Author: Outdoor Cooking King

  • Smoked Queso Dip: Hey Grill Hey’s Recipe, Step by Step

    Smoked Queso Dip: Hey Grill Hey’s Recipe, Step by Step

    This recipe is taken directly from Hey Grill Hey — the Smoked Queso recipe published by founder Susie Bulloch. It’s a hot-smoked, hot-held party dip, not a cold-smoked one: everything in the pan spends time at a 275°F chamber temperature, so this is a case where the smoker is doing the same job an oven would, just with wood smoke added along the way.

    Ingredients

    For the sausage and vegetables

    • 1 pound pork sausage
    • 3 Tablespoons Hey Grill Hey Fiesta Rub, divided
    • 1 red bell pepper, seeded and diced
    • 1 jalapeño, seeded and diced
    • ½ cup yellow onion, diced
    • 6 cloves garlic, diced

    For the pico de gallo

    • 3 medium tomatoes, diced
    • 1 jalapeño, seeded and diced
    • 4 cloves garlic, minced
    • ½ cup fresh cilantro leaves, chopped
    • ½ cup yellow onion, diced
    • Fresh lime juice, to taste

    For the queso

    • 1 can pinto beans, drained and rinsed
    • 2 cups shredded Mexican blend cheese
    • 8 ounces cream cheese, cubed
    • 16 ounces Velveeta

    Method

    1. Preheat your smoker to 275°F (135°C) with your favorite hardwood.
    2. Lay a large sheet of foil on a rimmed baking sheet. Add the diced peppers, onions, and garlic and mix to combine. Top the pan with a flat cooling rack. Break the sausage into 4-6 balls, set them on the rack above the vegetables, and season with 2 Tablespoons of the Fiesta Rub.
    3. Place the pan on the smoker, close the lid, and cook for 45 minutes.
    4. While that smokes, combine the tomatoes, jalapeño, onion, cilantro, lime juice, and the remaining 1 Tablespoon of Fiesta Rub in a bowl for the pico de gallo. Taste and adjust, then refrigerate until needed.
    5. Remove the sausage and peppers from the smoker. Crumble the sausage and mix it with the peppers, then transfer everything to a half-sized aluminum pan. Add the beans, shredded cheese, cream cheese, and Velveeta.
    6. Set the pan back on the smoker, close the lid, and smoke for 45 minutes, until the cheeses are fully melted.
    7. Remove from the smoker and stir in any remaining Fiesta Rub. If the queso is too thick, stir in a couple of tablespoons of milk to loosen it.
    8. Top with the fresh pico de gallo and serve with tortilla chips, vegetables, or crackers.

    Why the Sausage and Peppers Get Smoked Twice

    The recipe calls for two separate smoking stages rather than dumping everything into one pan from the start. Bulloch’s method smokes the raw sausage and vegetables uncovered for 45 minutes first, then folds the cooked, smoke-flavored meat into the cheese mixture for a second 45-minute smoke. That second pass is what actually melts and blends the cheeses; the first pass is purely about giving the sausage and vegetables their own direct exposure to smoke before they’re buried in Velveeta and cream cheese, where they’d otherwise pick up almost none. Hey Grill Hey’s own notes call this the “double smoke flavor” and say it’s optional — if time is short, the sausage and peppers can be browned in a skillet instead, though the finished dip won’t taste the same.

    Getting the Texture Right

    Velveeta and cream cheese are both processed to melt smoothly, which is why they anchor the recipe rather than a naturally-aged cheese that can break or turn grainy under sustained heat. Even so, 90 minutes of combined smoker time plus the pinto beans can leave the finished dip thicker than expected, and the recipe’s own fix is simple: stir in a couple of tablespoons of milk at a time until it loosens back to a dippable consistency. Bulloch also flags that this base recipe swaps easily — chorizo in place of the pork sausage for more heat, or a different melting cheese such as queso asadero in place of the Velveeta, are both changes she’s confirmed work in the comments on the original post.

    A Note on the Sausage

    The pork sausage goes onto the smoker raw, so it needs to reach a safe internal temperature rather than just look cooked. The USDA’s Safe Minimum Internal Temperature Chart lists ground meats, including sausage, at 160°F (71.1°C), with no rest time required. The recipe times the first smoking stage at 45 minutes rather than giving a target temperature, so it’s worth checking a sausage ball with an instant-read thermometer the first time you make this, especially since the balls are broken apart by hand afterward and any undercooked center would otherwise be mixed straight into the finished dip.

    Serving It

    The finished queso is topped with the fresh, unsmoked pico de gallo rather than having it stirred in and cooked down, which keeps the tomato and cilantro tasting bright against the smoky, rendered sausage and melted cheese underneath. Hey Grill Hey serves it straight from the aluminum pan with sturdy tortilla chips, though the recipe notes it works just as well with cut vegetables or crackers for anyone skipping the chips.

    Keep reading

    Sources

  • Cold-Smoking Cheese: What the Guidance Actually Says

    Cold-Smoking Cheese: What the Guidance Actually Says

    This guide leans on the cold-smoking notes that A-MAZE-N’s parent company, Pit Boss Grills, publishes for its A-MAZE-N smoke tubes, the temperature and timing guidance in ThermoWorks’ “Thermal Tips: How to Cold-Smoke Cheese”, the FDA’s own processing limits for cold-smoked fish, and BBQ writer Meathead Goldwyn’s safety piece “Cold Smoking Meats: Don’t Do It” on AmazingRibs.com. Cheese is the one cold-smoked food none of these sources treats as genuinely dangerous, but as laid out below, dedicated official guidance on cold-smoking cheese specifically is thinner than home cooks might expect.

    What a Smoke Tube Does That a Lit Burner Doesn’t

    A cold smoker doesn’t cook food with heat the way a grill or pellet smoker does. An A-MAZE-N tube or maze holds loose pellets or sawdust that smolders on its own once lit, producing smoke without any live fire or heating element under the food. Almost none of the tube’s own heat reaches the food, so cheese can sit nearby and pick up smoke without melting. A hot smoker, by contrast, is built to raise the surrounding air temperature on purpose. Pit Boss Grills’ own guidance on smoking salt with an A-MAZE-N tube shows the practical difference: for cold smoking, “be sure the temperature is below 80°F,” while their hot-smoking method for the same ingredient runs the grill at 250°F.

    Why Cheese Needs a Lower Ceiling Than Meat or Fish

    Every cold-smoked food shares one problem: the process happens too cool to cook anything, so heat can’t be relied on to control bacteria. Cheese also has a second, purely physical constraint meat and fish don’t: it melts. ThermoWorks’ cold-smoking guide states that “solid milk fat in cheese begins to liquefy at 90°F (32°C),” which is why it keeps the smoker “below 90°F (32°C)” — not as a food-safety line, but to stop the block sweating and losing shape before the smoke sets. That same 90°F figure shows up in the FDA’s guidance for commercial cold-smoked fish, which restricts smoker temperature to “no more than 32.2°C (90°F),” though for a different reason: keeping spoilage organisms alive long enough to spoil the fish visibly before Clostridium botulinum could produce toxin undetected. The number lines up, but that FDA document is about fish, not cheese, and no FDA or USDA document found for this article covers cold-smoked cheese in that kind of technical detail.

    The Ambient-Temperature Range People Actually Use

    The temperature guidance that does exist for cheese comes from equipment makers and practical smoking guides, not food-safety regulators. Pit Boss Grills caps ambient temperature at 80°F for cold smoking with an A-MAZE-N tube. ThermoWorks puts the ceiling slightly higher, at 90°F, tied to the point where cheese softens rather than to any stated pathogen target. Both sit under the low edge of what USDA and FDA describe as the “danger zone,” which both start at 40°F, though the upper bound differs by source — FSIS consumer guidance uses 140°F, while Meathead’s AmazingRibs piece cites 130°F. Either way, a cold smoker at 80-90°F is well inside that zone, which is why session length and post-smoke refrigeration matter as much as the ambient reading.

    Session Length and Handling While It Smokes

    ThermoWorks recommends smoking cheese “for 2 to 4 hours,” rotating it “every 30 minutes for even exposure.” Before it goes in, the guide says to “bring the cheese to room temperature before smoking” specifically to stop condensation forming on a cold block in the smoky, humid chamber — beaded moisture is what makes smoke adhere unevenly. A leave-in probe thermometer is what ThermoWorks recommends for watching ambient temperature throughout, since a tube or maze isn’t sealed as tightly as a purpose-built cold-smoker cabinet and its output can drift with outdoor conditions.

    Resting and Wrapping Afterward

    Once the session ends, ThermoWorks’ guidance is to “wrap well and refrigerate for at least 24 hours to let the smoky flavors settle and soften.” Fresh off the smoker, cold-smoked cheese tastes sharper and more acrid than it will a day or two later — the surface smoke compounds need time to diffuse in and mellow, a flavor step rather than a safety one, but one most recipes skip if rushed to the table too soon.

    What’s Genuinely Not Well Documented

    None of the four sources behind this article is a state extension service or USDA/FDA document written specifically about cold-smoking cheese at home — a search for that exact guidance came up empty. Meathead’s AmazingRibs piece, the most safety-focused source used here, is upfront that “cold smoking cheese, tofu, and nuts at home are relatively low risk,” a judgment call from an experienced food writer rather than a regulatory finding. His broader argument is that cold-smoked meat is the real risk, since “the air temp around the food is usually below 140°F according to the FDA” — too cool to cook, too warm to be reliably safe for hours, in a protein that can carry pathogens all the way through it. Cheese doesn’t share meat’s raw-protein risk profile, but no federal or extension-service document was found here that explains why in the technical detail FDA gives for fish. Readers wanting that level of assurance for cheese should treat the 80-90°F ceiling, short session length, and 24-hour refrigeration rest above as current best practice from equipment makers and experienced smokers, not a verified food-safety protocol.

    Keep reading

    Sources

  • The Aussie Sausage Sizzle: Method, Rules and History

    The Aussie Sausage Sizzle: Method, Rules and History

    This one is less a single chef’s recipe than an Australian institution, and the method here comes from food writer Richard Cornish‘s How to make your sausages sizzle, published on Good Food, the recipe site run by The Sydney Morning Herald and The Age, alongside the history of the tradition itself as recorded by the Australian Food Timeline and ABC News.

    What a Sausage Sizzle Is

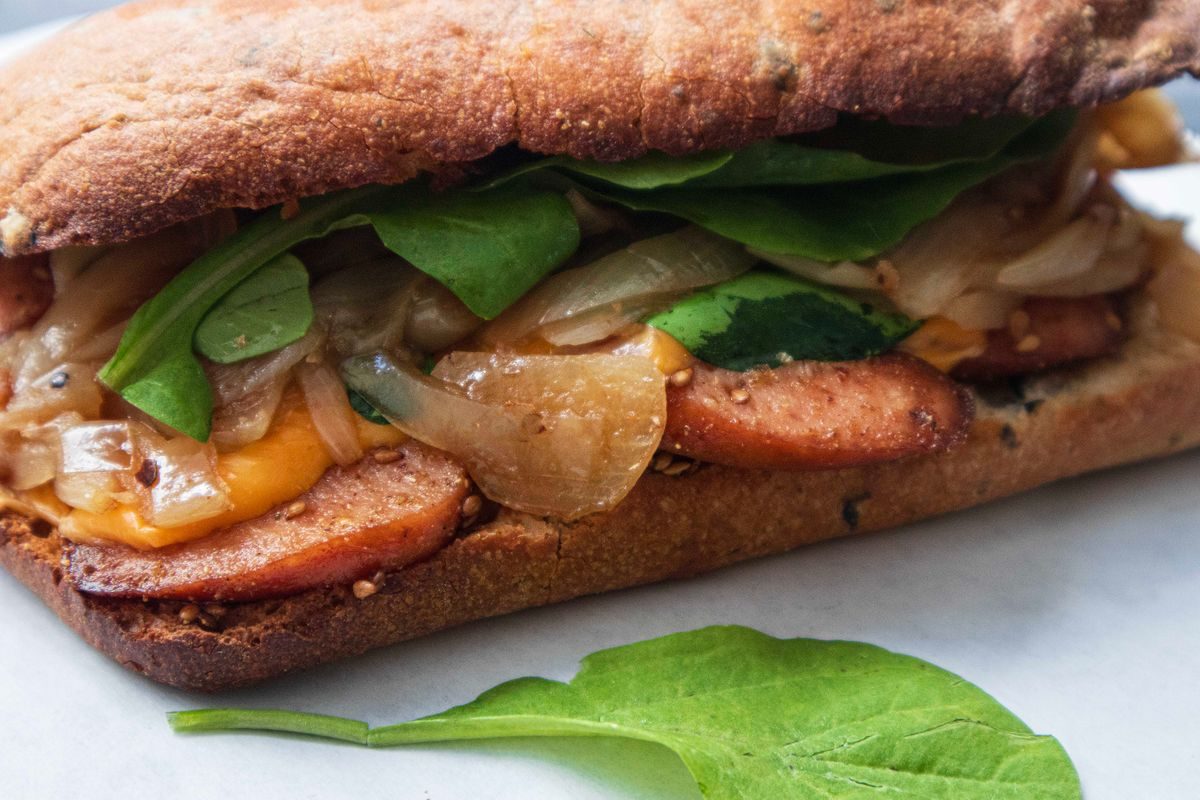
    A sausage sizzle, in its most familiar modern form, is what the Australian Food Timeline describes as a sausage and fried onions wrapped in a single slice of white bread, with tomato sauce optional. It’s typically run by volunteers from a local charity, school or sports club as a fundraiser rather than sold as a commercial product. The best-known version is the Bunnings Sausage Sizzle, held most weekends outside the hardware chain’s stores, but the format is older and wider than any one retailer.

    Cooking the Sausages and Onions

    Cornish’s advice, given in response to a reader whose onions burned at a school fundraiser, centers on heat control. Turn the barbecue down low. Slice the onions finely, season them with salt, and massage the salt through to soften them and draw out liquid. Place a big double handful of onions on the hotplate with as much of that liquid as you can manage, and resist stirring for about five minutes; then turn them and leave them piled up rather than spread out, so they stay soft and golden instead of drying out, with the sugar in the drawn-out juice caramelising at the edges.

    The sausages themselves should also be cooked low and slow, according to Cornish, with excess hot fat scraped away as it builds up, since it can exceed 200°C and cause the collagen casing to fail. He also advises against pricking sausages before cooking, since that releases the fat and moisture that keep them from drying out and can cause flare-ups on the grill.

    A Note on Safety

    Sausages are a ground and seasoned meat product, so they fall under the same food-safety category as burgers or meatballs rather than a whole cut like a steak. Cornish’s article cites Australia’s Food Safety Information Council, which advises that sausages and chicken cooked on a barbecue should reach an interior of 75°C, checked with a meat thermometer rather than guessed by eye. That’s higher than the equivalent U.S. figure: the USDA’s Safe Minimum Internal Temperature Chart sets ground meats at 160°F, which is 71.1°C. Either way, a thermometer beats guesswork, and Cornish also warns against cooking raw chicken and sausages side by side on the same barbecue surface to avoid cross-contamination.

    From Rationing to Ritual

    The sausage sizzle’s origins are humbler than its current status suggests. According to ABC News’ account of its history, sausages weren’t rationed like other cuts of meat during the Second World War, since they were largely made from trimmings, and Jacqui Newling, colonial gastronomer at Sydney Living Museums, told ABC that “people didn’t trust what went inside the sausage” during that period, which gave it a reputation as poverty food. One of the earliest recorded uses of the term “sausage sizzle” was the “Full Moon Sausage Sizzle” run by the Forbes Country Women’s Association in 1946, raising food parcels for England. By the 1960s, ABC reports, the sausage had gone from humble to something closer to a folk hero, tied to community fundraising rather than any particular brand.

    The Bunnings Version and #Oniongate

    The Bunnings Sausage Sizzle traces back to a charity cake stall outside the Sunshine, Melbourne store in 2004, run by the local Country Women’s Association, according to the Australian Food Timeline; it’s speculated that a local footy club helped turn the stall from cakes into sausages, since the aroma of frying sausages and onions was likely a bigger draw for hardware shoppers than cream sponges. A 2019 rule change requiring onions to sit under, not on top of, the sausage — introduced after a customer slipped on a dropped piece of onion at the Gympie store — became national and even international news, a controversy ABC News covered as evidence of how seriously Australians take the ritual.

    Keep reading

    Sources

  • Moroccan Kefta Kebabs: Taste of Maroc’s Recipe

    Moroccan Kefta Kebabs: Taste of Maroc’s Recipe

    This recipe is taken directly from Christine Benlafquih‘s Taste of Maroc — her Moroccan Kefta Kebab recipe published on tasteofmaroc.com. Benlafquih is a long-time resident of Morocco, founding editor of Taste of Maroc, and owner of a food-tour business in Casablanca; she was also the Moroccan food expert for The Spruce Eats from 2008 to 2016. Her base kefta recipe is the one she uses for kebabs, meatballs and patties alike.

    What Is Kefta?

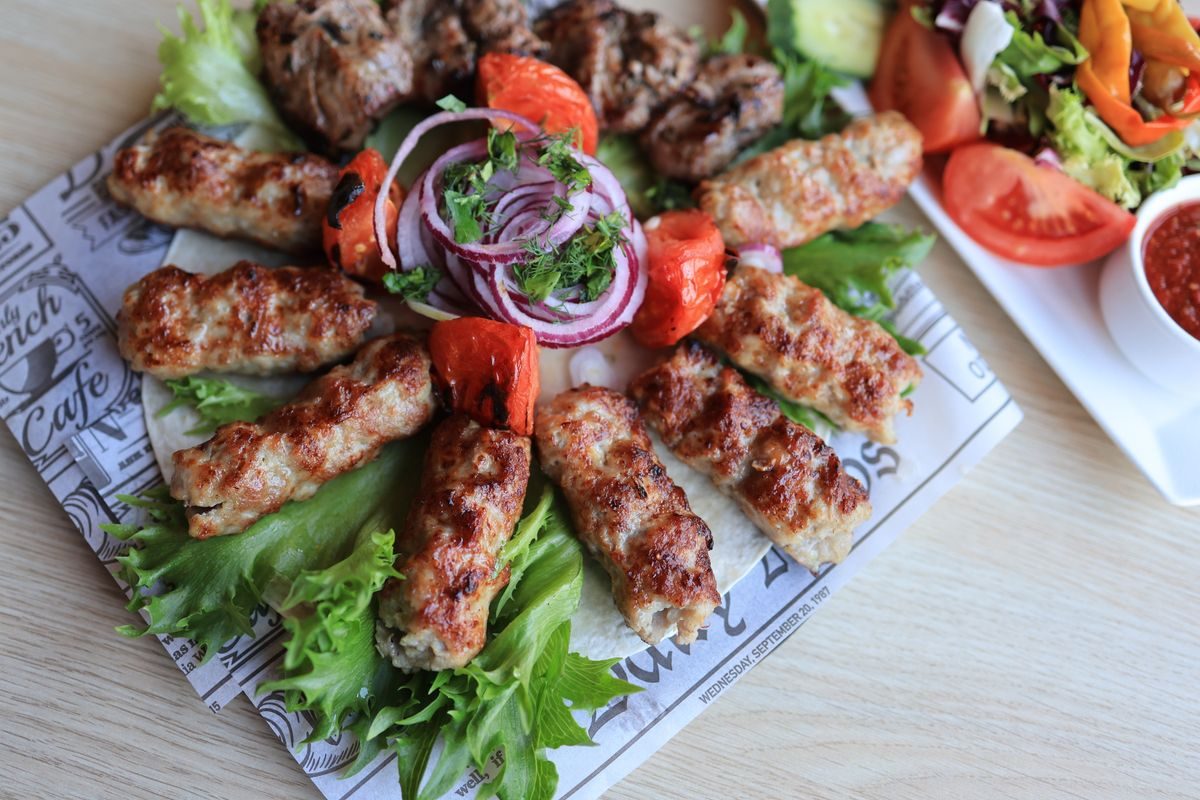
    Kefta is the Moroccan Arabic term for ground meat, seasoned or not, and at Moroccan butcher shops the meat is typically ground to order, with spices and herbs added directly to the mincer if it’s being sold seasoned, Benlafquih explains. Once ground and seasoned, it’s either wrapped to take home or carried to a nearby grill to be cooked and eaten on the spot as street food. Grilled kefta kebabs can be eaten straight off the skewer or stuffed into Moroccan bread with a tomato and onion salad, or with grilled onions and tomatoes as condiments.

    Benlafquih notes that ground beef, lamb, or a mix of the two are all traditional, and that a little added fat is important for the classic texture; she recommends asking your butcher to finely grind or double-grind the meat so it holds together on the skewer.

    Ingredients

    • 1 lb finely ground lamb (or beef, or a mix)
    • 4 to 5 oz lamb or beef suet, recommended for classic flavor and texture
    • 1 medium onion, finely chopped or grated
    • 1/4 cup chopped fresh parsley
    • 1/4 cup chopped fresh cilantro
    • 1 tablespoon chopped fresh mint leaves (optional; good with lamb)
    • 2 teaspoons sweet paprika
    • 1 teaspoon ground cumin
    • 1 teaspoon salt
    • 1/4 teaspoon black pepper
    • 1 teaspoon each ground cinnamon, ground ginger and ground turmeric (all optional)
    • 1/2 teaspoon ras el hanout (optional)
    • 1/4 teaspoon cayenne pepper (optional)

    Method

    1. In a large bowl, combine the meat with the herbs and spices. Knead by hand for a minute or two so the seasoning is evenly distributed.
    2. Shape the kefta into small sausage-like logs, either arranged in a grill basket or threaded and molded onto skewers.
    3. Grill over medium-hot coals several minutes per side, until evenly browned and cooked through but still juicy. Benlafquih notes that Moroccan preference is for little to no pink, so watch carefully to avoid drying the meat out.
    4. Alternatively, bake in a 350°F (180°C) oven on a rack set over a pan, about 15-20 minutes depending on thickness.
    5. Wrap the cooked kebabs in foil to keep them warm until serving.

    A Note on Safety

    Because kefta is ground meat rather than a whole cut, it needs a higher target temperature than a steak or chop. The USDA’s Safe Minimum Internal Temperature Chart puts ground meats at 160°F (71.1°C), with no rest time required. Benlafquih’s recipe describes doneness by color and juiciness rather than a thermometer reading, so on a home grill it’s worth checking a log or two with an instant-read thermometer until you’re confident in your grill’s timing, especially since Moroccan kefta is traditionally cooked with little to no pink showing, which lines up with the higher ground-meat threshold.

    Where the Spicing Comes From

    Benlafquih attributes kefta’s spice profile — paprika, cumin, and optionally cinnamon, ginger, turmeric and ras el hanout — to a mixture of classic Moroccan seasoning built up over generations of home and butcher-shop cooking. Ras el hanout, the optional blend she suggests for “a hint of exotic, aromatic flavor,” is itself a mix of numerous spices rather than a single ingredient, and recipes for it vary from family to family and shop to shop.

    Beyond the Skewer

    Benlafquih points out that threading kefta onto skewers and grilling it over coals isn’t the only way to cook this mixture. The same base can be shaped into patties for pan-frying, formed into logs for oven baking, or rolled into small meatballs for poaching in a sauce or in butter — useful to know if you don’t have a grill or coals on hand, since the seasoning and meat ratio stay the same across all three.

    Keep reading

    Sources

  • Moo Ping: Hot Thai Kitchen’s Grilled Pork Skewers

    Moo Ping: Hot Thai Kitchen’s Grilled Pork Skewers

    This recipe is taken directly from Pailin Chongchitnant‘s Hot Thai Kitchen — her BBQ Pork Skewers (moo ping) recipe published on hot-thai-kitchen.com. Chongchitnant is a Thai chef, cookbook author and YouTuber whose site aims to demystify Thai cuisine for home cooks, and her moo ping is written to replicate the version sold from street carts rather than the sweeter, mass-produced kind now common in Thailand.

    What Is Moo Ping?

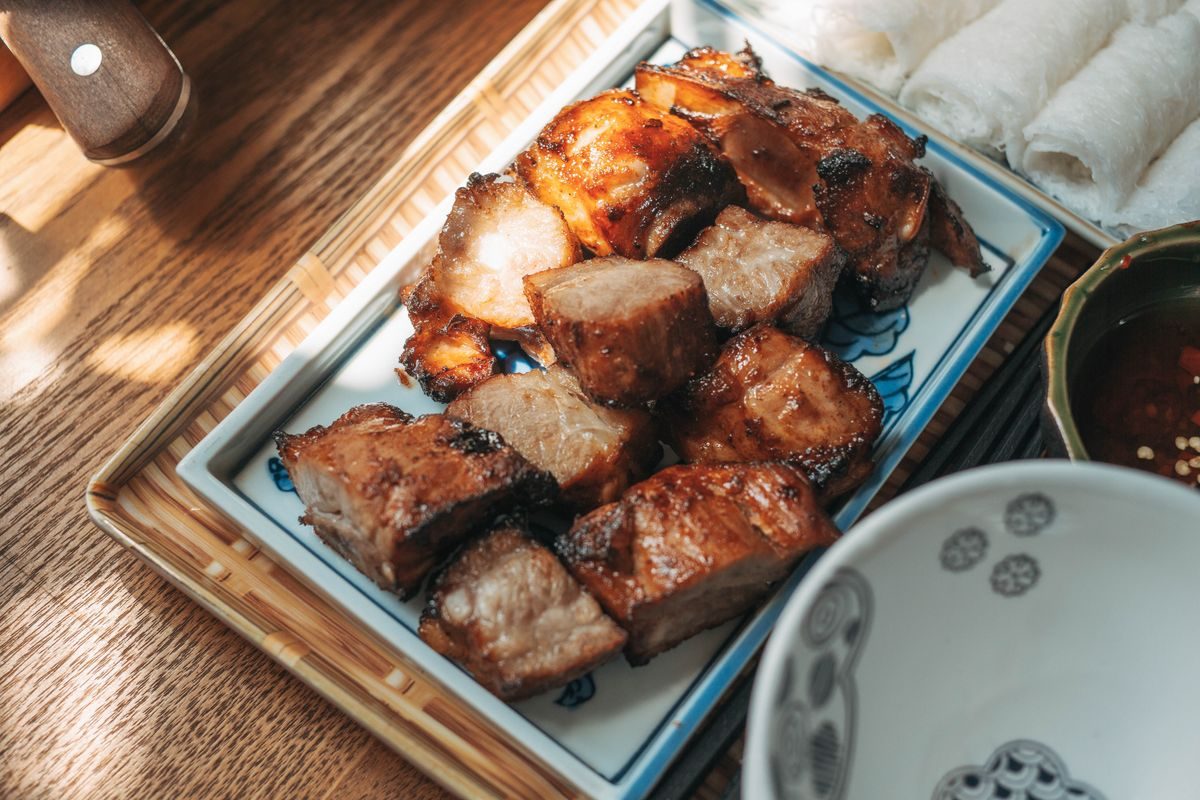
    Moo means pork and ping means to grill, so the name simply translates to grilled pork, though Chongchitnant calls it “the ultimate poster child of Thai street food.” The pork is marinated in a slightly sweet mixture of umami sauces, herbs and coconut milk, then skewered and grilled, and it’s always served with sticky rice. She notes that many street vendors today buy pre-made moo ping from large suppliers rather than marinating it themselves, using finely chopped pork and evaporated milk instead of coconut milk, which is part of why she prefers to make her own.

    Ingredients

    • About 24 bamboo skewers, soaked at least 1 hour
    • 1 1/2 lb pork collar butt roast (or pork shoulder)
    • 5 cloves garlic
    • 3 cilantro roots or 2 tablespoons chopped cilantro stems
    • 2 tablespoons oyster sauce
    • 2 tablespoons soy sauce
    • 2 tablespoons black soy sauce
    • 3 tablespoons (35 g) palm sugar
    • 1 tablespoon neutral oil
    • 1/4 cup coconut milk
    • 3 tablespoons water
    • 1/4 teaspoon each white and black peppercorns
    • 3 tablespoons cornstarch
    • Sticky rice, for serving

    Method

    1. Pound the garlic, cilantro roots and peppercorns in a mortar until fine, then add the palm sugar and pound until dissolved.
    2. Stir in the remaining marinade ingredients, except the cornstarch.
    3. Trim any silver skin from the pork, then slice it against the grain into thin, bite-sized pieces, about 5 mm (a little under 1/4 inch) thick; slicing thinly against the grain keeps the muscle fibers short and the meat tender.
    4. Pour the marinade over the pork and mix well. Marinate at least 3 hours, or overnight for the best flavor.
    5. Sprinkle cornstarch over the marinated pork and mix in.
    6. Thread 4-5 pieces per skewer, laying the pork flat and shingled so the pieces stay packed together; chilling the skewers for an hour helps them hold their shape on the grill.
    7. Grill over medium to medium-high heat, 1.5-2 minutes per side, resting exposed skewer ends on a strip of foil so they don’t scorch. Serve with sticky rice.

    A Note on Safety

    Pork collar butt sliced into cutlets is a whole-muscle cut, not ground meat, so it falls under a different safe-temperature rule than a burger or sausage. The USDA’s Safe Minimum Internal Temperature Chart puts pork steaks, chops and roasts at 145°F (62.8°C), followed by a 3-minute rest. Chongchitnant’s recipe grills by time and feel rather than temperature, and because these pieces are sliced so thin, a probe thermometer is fiddly to use; a good visual check is to cut into the thickest piece on a test skewer and confirm the center is opaque with no translucence before you plate the rest.

    An Everyday Street Food

    Chongchitnant places moo ping firmly within everyday Thai street food culture rather than any single restaurant tradition — it’s a dish sold from carts and stalls across the country at any time of day, found equally outdoors and inside shopping mall food courts. She’s candid that quality has slipped as more vendors buy pre-marinated pork from large suppliers instead of mixing their own, which is her reason for sharing a homemade version rather than trying to copy a specific stall.

    Getting the Texture Right

    Two details in Chongchitnant’s method matter more than they might seem. Slicing against the grain, rather than with it, shortens the muscle fibers so the pork stays tender despite the fast 1.5-2 minute cook. And dusting the marinated pork with cornstarch just before skewering gives the surface a light, slightly sticky coating that helps it caramelize on the grill without drying out the thin-sliced meat.

    Keep reading

    Sources

  • Bún Chả Hà Nội: Vicky Pham’s Grilled Pork Recipe

    Bún Chả Hà Nội: Vicky Pham’s Grilled Pork Recipe

    This recipe is taken directly from Vietnamese food writer Vicky Pham‘s own site — her Bún Chả Hà Nội recipe published on vickypham.com. Pham is a home cook who focuses on preserving and sharing authentic Vietnamese recipes, and her version of this Hanoi classic is a good baseline before you start adjusting the dipping sauce to your own taste.

    What Is Bún Chả?

    Bún chả is grilled pork (chả) served with rice noodles (bún), fresh herbs, and a fish-sauce dipping broth, according to The World from PRX. Pham, who specialises in Northern Vietnamese cooking, describes it as her favourite Vietnamese dish and a Northern Vietnamese specialty that originated in Hanoi. Chef Michael Chuong of Elements restaurant told The World that “bún chả is one of the oldest favorites of north Vietnam cuisine,” and that Hanoi cooks typically grill it two ways: fatty pork patties, and thin slices closer to barbecued pulled pork.

    Pham draws a clear line between this Northern dish and its Southern cousin, bún thịt nướng: bún chả is served deconstructed, with noodles and grilled pork patties kept separate from a sweeter, lighter dipping broth, while bún thịt nướng is tossed together in one bowl with thinly sliced grilled pork shoulder and a saltier nước chấm sauce.

    Ingredients

    For the pork patties

    • 1 1/2 lbs fatty ground pork (at least 20% fat)
    • 2 tablespoons fish sauce
    • 2 tablespoons oyster sauce
    • 3 tablespoons brown sugar
    • 1/2 teaspoon ground black pepper
    • 1 tablespoon roasted rice powder
    • 1/4 cup minced lemongrass
    • 4 fresh garlic cloves, finely minced
    • 1 small shallot, finely minced
    • 2 teaspoons vegetable oil, for coating hands

    For the rest of the dish

    • 14 oz dried round rice vermicelli noodles
    • Lettuce, cucumber and Vietnamese herbs
    • 2 cups thinly sliced unripe green papaya, 2 teaspoons salt, 1 tablespoon sugar, 2 tablespoons white vinegar (for quick pickled papaya)
    • 1 cup hot water, 3/4 cup sugar, 3/4 cup fish sauce, 3 tablespoons lime juice, 2 cups coconut soda, 6 garlic cloves, 2 Thai chilies (for the dipping sauce/broth)

    Method

    1. Combine the ground pork with fish sauce, oyster sauce, brown sugar, pepper, roasted rice powder, lemongrass, garlic and shallot.
    2. Oil your hands and roll the mixture into about 32 small patties. Grill over charcoal, roughly 8 minutes per side, until lightly charred, or pan-fry, or air-fry at 350°F for about 5 minutes per side.
    3. For the pickled papaya, salt the sliced papaya and let it sit 30 minutes, rinse, squeeze dry, then mix with sugar and vinegar.
    4. For the dipping broth, dissolve sugar in hot water, then stir in fish sauce, lime juice, coconut soda, garlic and chilies.
    5. Cook the noodles per package instructions.
    6. To serve, put pork patties and pickled papaya in a small bowl and cover with the dipping broth; serve alongside noodles, lettuce and herbs.

    A Note on Safety

    Because the pork here is ground rather than a whole cut, it needs to reach a higher internal temperature than a chop or roast. The USDA’s Safe Minimum Internal Temperature Chart lists ground meats at 160°F (71.1°C), with no rest time required, compared with 145°F (62.8°C) plus a 3-minute rest for whole muscle cuts. Pham’s recipe doesn’t specify a target temperature, going by char and time instead, so it’s worth checking a patty with a thermometer the first time you make this until you know what 160°F looks like on your grill.

    How to Eat It

    Pham’s instructions describe the traditional method: use the meat-and-broth bowl as your base, add noodles, tear in herbs and lettuce, swish everything in the sauce, then eat with a patty and a bit of pickled papaya, repeating for each bite. It’s a more hands-on, assemble-as-you-go meal than most Western noodle bowls, which is part of why it works so well as a shared table dish.

    The Dinner That Made It Famous

    Bún chả became internationally famous in May 2016, when President Barack Obama joined Anthony Bourdain for beer and a bowl at Bún Chả Hương Liên in Hanoi, on Bourdain’s CNN show Parts Unknown, as reported by The World from PRX. The restaurant had been serving the dish for decades before that meal turned it, briefly, into the most talked-about bowl of noodles in Vietnam.

    Keep reading

    Sources

  • Reverse-Seared Prime Rib: AmazingRibs’ Grill Method

    Reverse-Seared Prime Rib: AmazingRibs’ Grill Method

    This method follows “The Science Of Cooking Prime Rib, Tenderloin, And Other Beef Roasts,” by Meathead Goldwyn of Meathead’s AmazingRibs.com, a reverse-sear method built for a smoker or grill rather than an oven. The USDA’s own safe-temperature guidance is layered in separately, because — as covered below — the published recipe’s target doneness sits below USDA’s minimum safe temperature for a whole beef roast, and that gap is worth understanding before you commit an expensive roast to it.

    Trimming and Dry-Brining, a Day Ahead

    AmazingRibs’ method starts with a boneless roast: cut the rib bones off (saving them for gravy) and trim the fat cap down close to the meat, along with the tougher silverskin, then press the roast into as round a shape as possible — tying it with string every inch or two if it won’t hold that shape on its own. About six to twenty-four hours before cooking, salt it generously with kosher salt, roughly half a teaspoon per pound of trimmed meat, sprinkled from height for even coverage, then left uncovered or loosely wrapped in the fridge. That dry brine pulls moisture out, dissolves the salt, and draws it back into the meat over time — well before any spice rub goes on.

    The Rub and a Light Touch of Smoke

    About an hour before cooking, the recipe calls for a wet spice paste — a blend of herbs, spices, and water — worked over every visible surface of the roast, top, bottom, and sides. If cooking outdoors, the method adds a small amount of hardwood or fruitwood to the fire at the start of the cook, no more than two to four ounces. Meathead is specific that this cut doesn’t want a heavy smoke flavor: a little in the background is the goal, since too much can overpower the beef itself.

    The Reverse Sear: Low Heat First, High Heat Last

    The grill or smoker is set up for two-zone cooking, with the indirect side preheated to 225°F (107°C) — and the recipe is firm that it should not run hotter than about 250°F (121°C). Going in low and slow lets heat travel gradually from the surface toward the center, rather than building up a thick band of overcooked gray meat just under the crust the way starting with a hard sear would. A drip pan of stock and aromatics sits under the roast the whole time to catch drippings for gravy, kept topped up with hot water so it never scorches dry. The roast comes off the indirect heat once a probe thermometer in the thickest part reads 115°F (46°C); at that point the recipe calls for moving it directly over the hottest part of the fire, lid up, browning each of four sides for roughly five to ten minutes at a time until the surface is a deep, dark crust — the internal temperature will climb another 5 to 10°F during this stage. The roast comes off when it reaches 130°F (54°C) to 135°F (57°C) at the center, which the recipe describes as medium rare.

    Where This Recipe and USDA Guidance Genuinely Diverge

    This is the part worth reading closely before deciding how to cook your own roast. USDA’s food safety guidance sets 145°F as the safe minimum internal temperature for whole cuts of beef, adding a three-minute rest time as part of that recommendation: “for beef, veal, and lamb cuts, the safe temperature remains unchanged at 145°F, but the department has added a three-minute rest time.” That rest isn’t about texture — USDA describes it as an active safety step, since “during the three minutes after meat is removed the heat source, its temperature remains constant or continues to rise, which destroys harmful bacteria.”

    The AmazingRibs recipe above targets 130° to 135°F at the center — a medium-rare finish that sits 10 to 15 degrees below USDA’s 145°F minimum — and its author goes further, arguing rest periods don’t improve juiciness and recommending the roast be carved as soon as possible after searing rather than rested at all. That’s a common position among barbecue and steakhouse cooks chasing a specific texture, and it’s presented in the original as a quality judgment, not a food-safety one. It’s also a widely published approach: many chef-driven prime rib recipes target the same rare-to-medium-rare range. But it means following this recipe exactly, as written, does not meet USDA’s stated minimum for beef roasts. Cooking to USDA’s 145°F with the full three-minute rest is the higher food-safety margin of the two approaches, particularly for anyone serving guests who are pregnant, elderly, very young, or immunocompromised; cooking to 130–135°F without a rest is a doneness choice some cooks make deliberately, understanding it falls short of that federal minimum.

    Making the Gravy

    The same drip pan doubles as the base for a beef gravy: while the roast sears, strain its collected juices, taste, and reduce in a wide pan over high heat if the flavor needs concentrating. Season only after it’s reduced to the right consistency, since the drippings are already salted from the dry brine. Carve in slices about half an inch thick, pouring any juice that collects on the cutting board back over the meat before serving.

    Keep reading

    Sources

  • Weber’s Grilled Cornish Game Hens, Step by Step

    Weber’s Grilled Cornish Game Hens, Step by Step

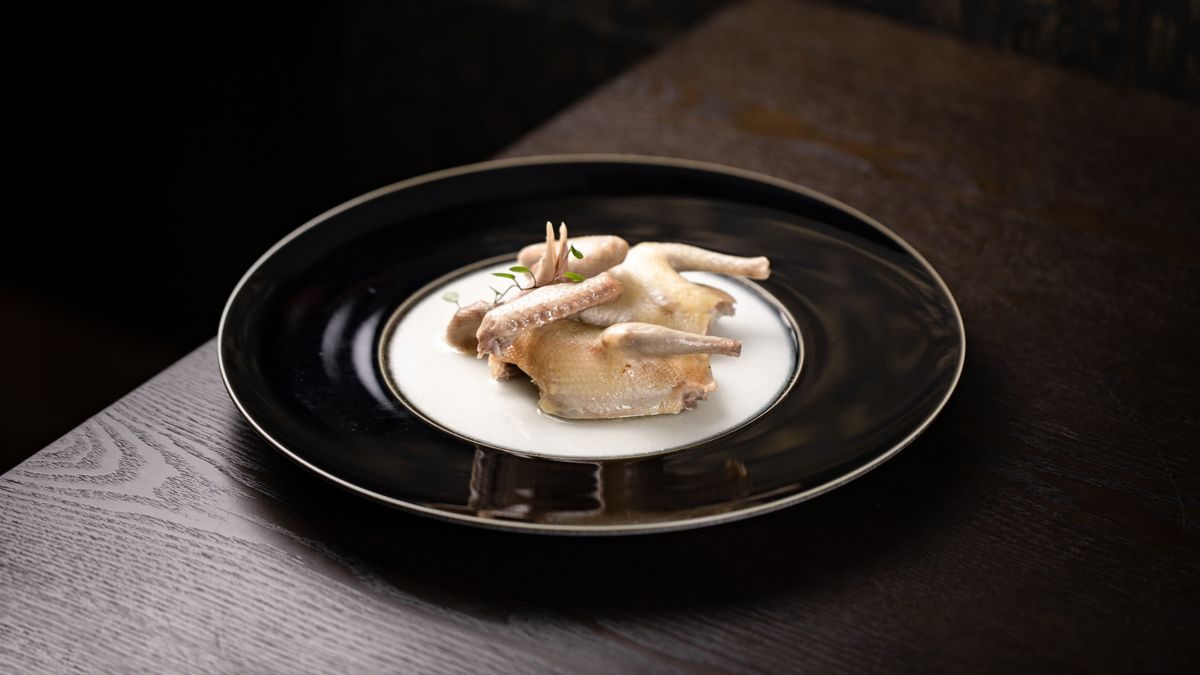
    This recipe comes from “Cornish Game Hens with Garlic-Mint Butter,” by Jamie Purviance, published in Weber’s Real Grilling™ recipe library, with the doneness and food-safety notes cross-checked against USDA guidance on cooking poultry safely. Cornish game hens are small enough — 1¼ to 1½ pounds each — that a whole one makes a single serving, and they cook fast enough for a weeknight even though they’re grilled whole and indirect, the same way a full-size chicken would be.

    The Garlic-Mint Butter

    The compound butter is built the same way a good chicken rub is: aromatics crushed into a paste, then worked into softened butter. Roughly chop three garlic cloves, sprinkle a teaspoon of kosher salt over them, and use the flat side of a knife blade to crush the two together into a paste. Mix that paste into a stick of softened butter along with a tablespoon of finely chopped fresh mint, half a teaspoon of grated lime zest, two teaspoons of fresh lime juice, half a teaspoon of chili powder, and a quarter teaspoon of black pepper. The mint and lime keep it lighter than a typical herb butter, which matters on a bird this small — there’s less meat to carry a heavy rub.

    Getting the Butter Under the Skin

    Working from the cavity end of each hen, run your fingers between the skin and the flesh of the breast and legs to loosen the skin without tearing it — the same technique used for a whole roasted or spatchcocked chicken. Divide the butter mixture across the four hens and push half of each portion under the loosened skin, massaging from the outside so it spreads evenly over the breast and legs rather than sitting in one clump. Spread what’s left of the butter over the outside of each hen, then truss each bird with butcher’s twine so the legs stay close to the body and cook evenly.

    Grill Setup and Cook Time

    Set the grill for indirect cooking over high heat, 450° to 550°F — noticeably hotter than the indirect medium heat used for a full-size turkey, which makes sense given how much less mass there is to cook through. With the cooking grates brushed clean, grill the hens over that indirect high heat with the lid closed until the juices run clear and the meat is no longer pink at the bone, which the recipe puts at 45 to 55 minutes. Pull them off, cover loosely with foil, and let them rest 3 to 5 minutes before serving warm.

    Where the Recipe’s Doneness Cue Falls Short

    Weber’s recipe describes doneness the traditional way — clear juices, no pink at the bone — without giving an internal-temperature number. That’s worth flagging, because USDA guidance doesn’t treat color or juice clarity as a reliable safety check for poultry. USDA’s food safety guidance is direct on the underlying rule for all poultry — whole birds, parts, and ground alike: “the safe cooking temperature for all poultry products… stays the same at 165°F,” checked with a food thermometer rather than judged by eye. Unlike a beef roast, there’s no lower “carryover” temperature that applies to poultry; 165°F is the floor no matter how small the bird. On something as compact as a Cornish game hen, it’s easy to hit the recipe’s time window without actually reaching a safe core temperature, especially if the grill runs cooler than intended. The safer approach is to treat 45 to 55 minutes as a general guide and confirm doneness with an instant-read thermometer in the thickest part of the thigh, not touching bone, before pulling the hens off the grill.

    Why Indirect Heat and Trussing Matter Here

    Both the trussing and the indirect setup exist to solve the same problem a full-size chicken has, just at a smaller scale: an untied bird’s legs splay outward and cook faster than the compact breast, and direct flame under a whole bird chars the skin before the interior catches up. Trussing keeps the legs tucked against the body so the whole hen presents a more even shape to the heat, and the indirect zone lets hot air circulate around that shape rather than searing one side of it. Because a game hen is so much smaller than a chicken, that even-cooking margin for error is thinner — there’s less time for a misjudged fire to correct itself before the bird is either underdone near the bone or dried out at the breast.

    Keep reading

    Sources

  • Weber’s Grilled Whole Turkey, Plus USDA Safe Steps

    Weber’s Grilled Whole Turkey, Plus USDA Safe Steps

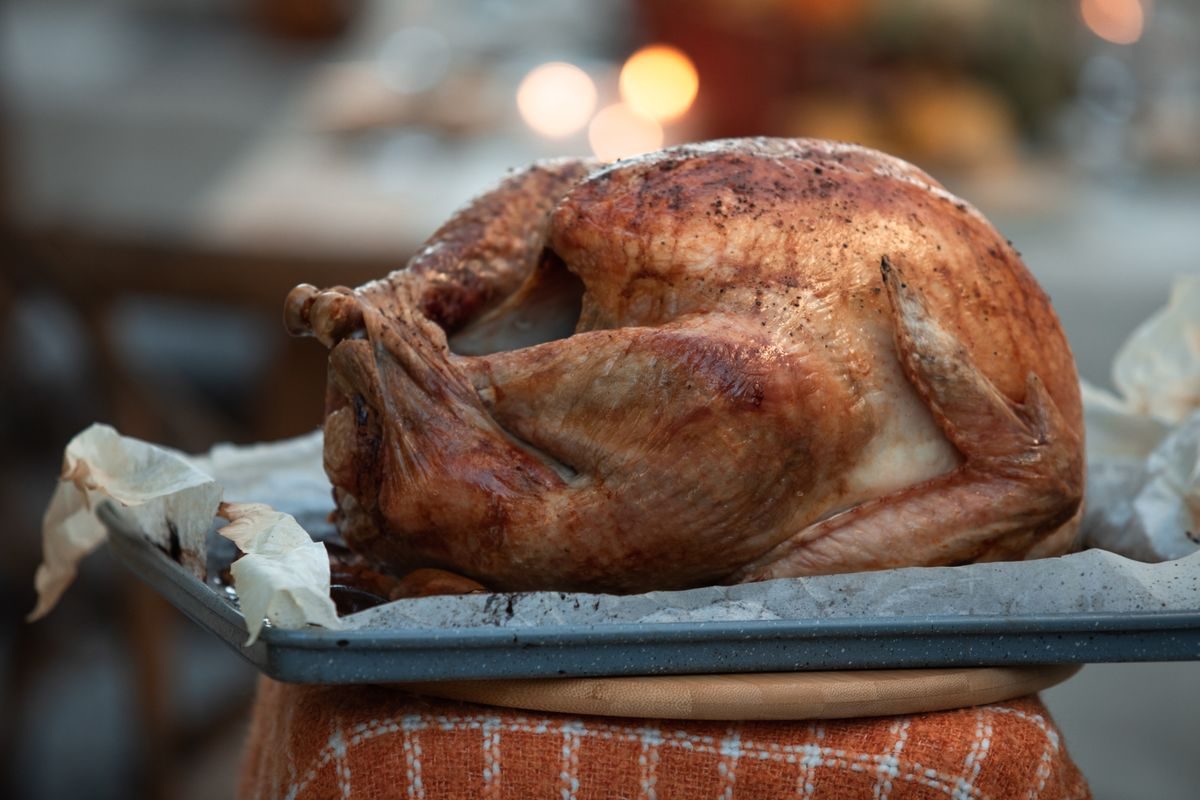
    This method is taken from “Barbecued Turkey with White Wine Gravy,” a recipe by Jamie Purviance published in Weber’s Real Grilling™ recipe library, with the thawing and doneness rules cross-checked against the USDA Food Safety and Inspection Service’s “Turkey from Farm to Table” guidance. This is a grill-roasted whole bird — no fryer, no oven — cooked over indirect heat with a water pan underneath to keep it moist through a two-and-a-half- to three-hour cook.

    Before the Bird Goes On: Thawing It Safely

    Skip this step at your own risk, since it’s the one most people get wrong. USDA lists three safe ways to thaw a whole turkey: in the refrigerator, in cold water, or in the microwave — and specifically warns “never defrost turkey on the counter.” Refrigerator thawing needs the most lead time: about one day for every four to five pounds of bird, so a 12-pounder needs roughly two and a half to three days in the fridge before it touches the grill. The cold-water method is faster but needs more attention — submerge the turkey in its original airtight wrapping or a leak-proof bag, and change the water every 30 minutes to keep it cold, cooking the bird immediately once it’s thawed. Microwave-thawed turkey also needs to go straight to the grill, since partially cooked spots from the microwave can’t safely sit and wait.

    The Butter Rub and the Cavity

    Weber’s recipe builds its flavor under the skin rather than on top of it. Combine finely chopped garlic, chopped Italian parsley, a tablespoon of chili powder, orange zest strips, and a stick of softened butter in a bowl with salt and pepper. Starting from the neck end, separate the skin from the breast meat with your fingers and push about half the butter mixture directly onto the breast meat, spreading it evenly under the skin. The remaining butter goes over the outside of the bird, followed by a generous seasoning of salt and pepper. The quartered, zested oranges go inside the turkey’s cavity rather than into the mixture itself.

    Setting Up the Grill

    This is a two-zone, water-pan cook. Set the grill for indirect cooking over medium heat, 350° to 450°F, and place a large foil pan on top of the Flavorizer bars (or the equivalent heat deflector on a charcoal or pellet grill), filled halfway with room-temperature water. Inside a heavy-duty roasting pan, combine 2 cups of low-sodium chicken stock with a roughly chopped onion and carrot, then set the turkey breast-side up on a roasting rack inside that pan. The pan of aromatics sits over the water pan, not directly over the fire.

    The Cook and the Target Temperature

    Grill with the lid closed, checking in after the first hour: if any part of the bird is browning too fast, tent it with foil. If the roasting pan looks dry, add the second 2 cups of stock so the drippings don’t scorch. Check again after another hour, tenting any dark spots. Total grilling time runs 2¼ to 3 hours. The recipe’s target is an internal temperature of 165°F in the thickest part of the thigh, not touching the bone — which matches USDA’s safe minimum for whole poultry exactly. USDA’s own guidance checks that same 165°F at three points: the innermost part of the thigh, the innermost part of the wing, and the thickest part of the breast, all measured with a food thermometer rather than gauged by the clock. Once the bird is out, let it rest 20 to 30 minutes before carving; both Weber and USDA note the internal temperature will keep climbing slightly during that rest.

    It’s worth flagging one place Weber’s own materials aren’t perfectly consistent: a separate Weber grill-skills page on roasting a whole turkey describes pulling the bird at 170° to 175°F rather than 165°F. That higher figure is a personal-preference doneness target, not a safety minimum — USDA is explicit that 165°F is where poultry becomes safe to eat, while noting separately that “for reasons of personal preference, consumers may choose to cook turkey to higher temperatures.” Either number is safe to serve at; the actual food-safety floor is 165°F throughout the bird, with no lower “carryover” exception the way there is for a beef roast.

    Finishing the Gravy

    While the turkey rests, strain the pan juices into a heatproof bowl, discarding the solids, and let the fat rise to the top for three to five minutes before skimming it off (topping up to 6 tablespoons with melted butter if the drippings came up short). Whisk the same amount of flour into the fat back in the roasting pan over medium heat until it darkens, 1 to 2 minutes, then whisk in stock and a half cup of dry white wine, scraping up the browned bits. Simmer about 5 minutes, adjusting thickness with more stock or more simmering time, season, strain, and stir in fresh chopped parsley before serving alongside the carved turkey.

    Keep reading

    Sources

  • How to Set Up a Grill Rotisserie: Weber’s Method

    How to Set Up a Grill Rotisserie: Weber’s Method

    Rotisserie grilling has its own setup checklist, and skipping a step usually shows up as a wobbling spit or a scorched drip pan. This piece follows Weber’s own three-part rotisserie guide — “How To Set Up Your Rotisserie”, “How to Truss And Spit A Roast For The Rotisserie”, and “How To Use A Rotisserie Counterweight” — alongside Char-Griller’s own kit instructions, “How to Set Up The Char-Griller Rotisserie.”

    Trussing and Mounting the Spit

    Both manufacturers start in the same place: nothing goes on the spit until it’s tied down. Weber’s guide is blunt about why — “the rotisserie turns gently, but as the meat cooks, that gentle turning will tear the roast loose if it is not securely tied down.” Its trussing post gets more specific: tie a roast every inch and a half to two inches along its length using heavy butcher’s twine, with a double loop to start each knot so it holds tension while the next tie goes on. Bone-in roasts need less — one tie between each bone, even across a two-to-three-inch gap — since the bones already hold the shape together. Boneless, rolled cuts need the tighter spacing to keep from falling apart mid-spin.

    Once trussed, run the spit through the center of the meat and lock a fork onto each end, pushing the tines in if the meat is thick enough or caging around it if not. Weber’s guide adds a step easy to skip: test the load spins freely before the grill is lit. Char-Griller’s kit instructions describe the same logic on a charcoal grill — forks go on the spit rod and lock down with a small screwdriver “to ensure the meat doesn’t move around on the spit rod when it’s cooking.”

    Balancing the Load with a Counterweight

    Not every rotisserie setup needs a counterweight, and Weber is explicit that its current motors are strong enough to turn a spit without one — which is why newer kits don’t include one. But for older motors, or food with an uneven shape, it still matters. Weber’s counterweight guide explains the physics: a roast is shaped fairly evenly, but “poultry can have a deep breast and a relatively flat back,” so the shaft speeds up as the breast swings down and slows as it swings back up. Left unbalanced, that puts extra strain on the motor and cooks the bird unevenly.

    To fit one, unscrew the small retaining loop from the wooden handle end of the spit, slide the counterweight hanger on between the handle and the loop, then screw the loop back down tight. The positioning rule: when the breast of the bird points up, the counterweight should point straight down, balancing heavy against light. A quick way to find true balance without the counterweight attached, described separately in Weber’s setup guide, is to remove the spit from the motor, let it rest in the support grooves, and let gravity settle the heaviest side downward on its own — that tells you where the counterweight needs to sit.

    Setting Up the Fire and the Drip Pan

    This is where the two sources diverge. Weber’s method is a two-zone setup: light the charcoal, then split it into two piles on opposite sides of the grill, with the drip pan centered on the charcoal grate between them and the meat rotating above it. On a gas grill, the equivalent is running the outer burners on medium while the burners under the food stay off, with the pan on the Flavorizer bars in that middle zone. Weber targets indirect medium-low heat, “right around 350°F,” for most rotisserie cooking.

    Char-Griller’s own instructions describe a different charcoal layout: coals go to the front or the back of the grill, not split into two side piles, with the drip pan or a sheet of foil underneath the food to catch grease and limit flare-ups. Either layout accomplishes the same goal — keeping direct flame away from the rotating food — so the choice comes down to what a given grill’s rotisserie ring or support brackets are built to accommodate. Char-Griller also flags something Weber’s guides don’t: its motor runs on either a power adapter or two D batteries, worth checking before the food goes on the spit.

    Running the Cook

    Once the spit is loaded and the fire is set, mount the motor onto its bracket, plug it in, and cycle it on and off once to confirm it’s turning before the hot spit goes near it. Neither source publishes a target rotation speed — the standard for both is that the motor turns continuously and the food spins freely without catching on the grate or the grease pan. Weber recommends cooking with the lid closed, checking in briefly around the half-hour mark, then closing it back up. Char-Griller’s guide echoes the same discipline: open the lid as little as possible so heat doesn’t escape.

    When the food is done, use heat-resistant gloves to lift the whole spit onto a cutting board — it comes off scorching hot. Pull the first fork, slide the meat off, and cut the trussing twine free immediately, since Weber notes the crust hardens as it cools and the string gets harder to remove the longer it’s left on. Weber’s guide then calls for a ten-to-fifteen-minute rest before carving; always confirm doneness with a food thermometer rather than the clock, using the internal temperature appropriate to whatever is on the spit.

    Keep reading

    Sources