Author: Outdoor Cooking King

  • Grilled Hot Dogs Done Right: Char, Splits and Buns

    Grilled Hot Dogs Done Right: Char, Splits and Buns

    The grilling numbers in this guide come from Weber’s official recipe library, starting with the Grilled Hot Dogs with Avocado Salsa and Sour Cream recipe published on weber.com by Jamie Purviance, plus a second Weber recipe for bun handling and a splitting-prevention breakdown from BBQ writer Joshua Bousel at Meatwave.com. USDA’s own guidance on already-cooked hot dogs rounds out the food-safety side.

    Hot dogs look foolproof – they come precooked, so in theory you just need to warm them through. In practice, the gap between a hot dog that blows out its skin and one with a clean, even char comes down to a few specific choices: how you score it, how hot the grate is, and whether you’re working with a skinless frank or one in a natural casing.

    Skinless or Natural Casing Changes the Plan

    Bousel’s guide at Meatwave splits hot dogs into two categories that need different handling. Skinless franks are cooked in a synthetic casing that’s stripped off before packaging, and they’re what you’ll find in most supermarket packs. Natural-casing dogs are stuffed into a real casing (often sheep’s casing) that stays on, giving them a distinct “snap” when you bite in. According to Bousel, skinless dogs grilled whole over direct heat “deflated and shriveled up” once pulled off the fire, while cased dogs held their shape better but were more prone to bursting.

    Getting the Char Without the Split

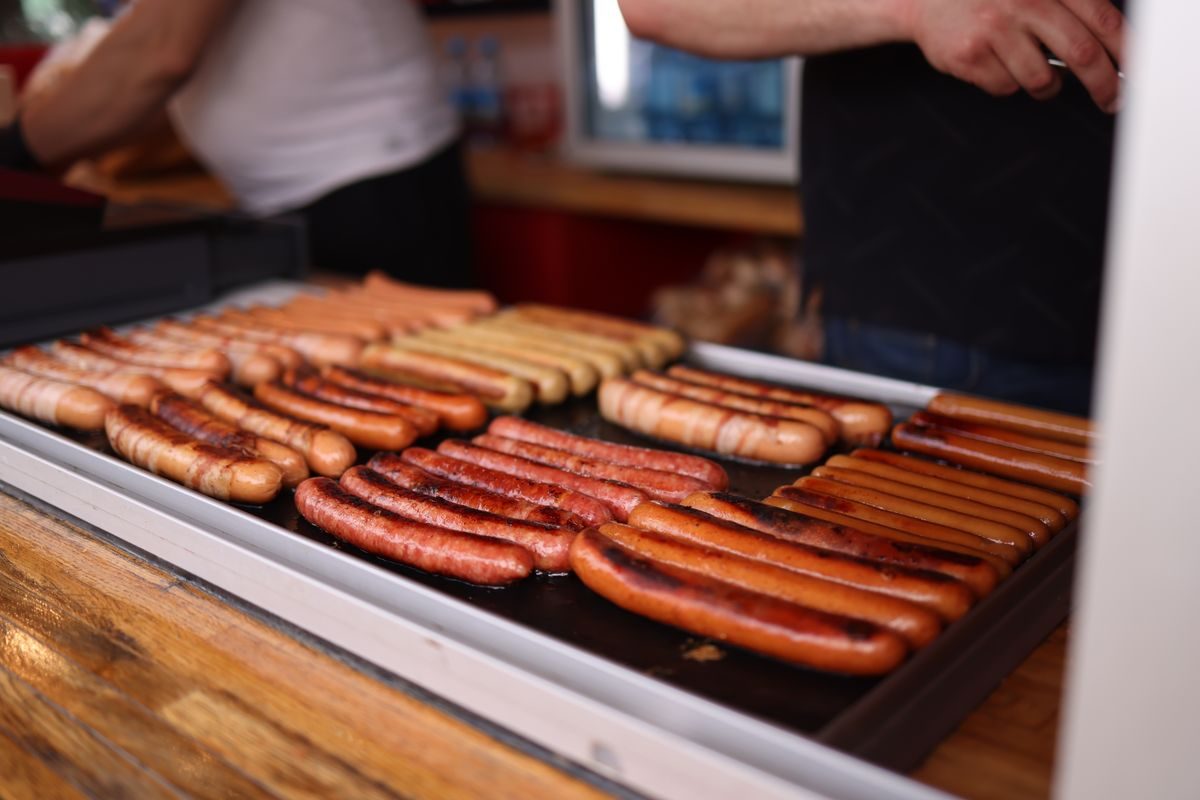
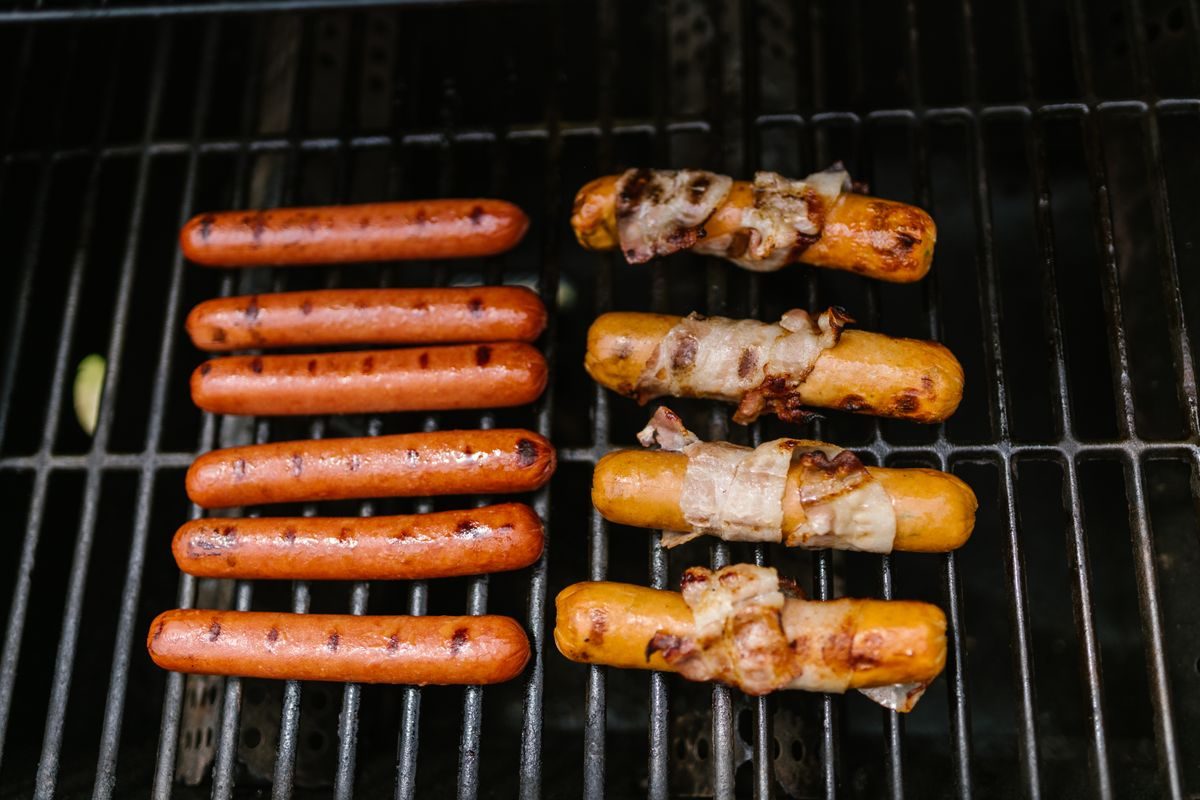
    For skinless hot dogs, both Weber and Meatwave point to the same fix: cut a few shallow slashes before they hit the grate. Weber’s avocado-salsa recipe calls for cutting “a few shallow slashes in each hot dog,” then grilling over direct heat with the lid closed until they’re lightly marked and hot all the way through, which the recipe lists at 5 to 7 minutes with occasional turning, over a grill prepped for medium heat (350°F to 450°F, roughly 175°C to 230°C by our conversion). Weber’s Chicago-Style Hot Dogs recipe uses a slightly different cut – diagonal slashes along one side – and a tighter window of 4 to 5 minutes at medium heat. Either way, the slashes let steam escape as the dog heats, so it cooks through faster and doesn’t build up the internal pressure that splits the skin.

    Natural-casing dogs are a different story. Bousel found that slashing cased dogs backfires, since “those slits can further expand and tear during cooking.” His workaround, adapted from a sausage-grilling method he credits to Serious Eats’ J. Kenji López-Alt, is to simmer the dogs first in a pan of liquid over indirect heat until warmed through, then move them to direct heat just long enough to char the outside. In his own test, this produced dogs that charred fast “without a single casing splitting.”

    Toasting the Buns Without Losing Them

    Bun toasting is easy to get wrong if you rest the buns directly over the hottest part of the fire, where they can scorch before the inside even warms. Weber’s recipe for feeding a crowd handles this by keeping the buns off the hot zone entirely: once the hot dogs are on the hot side of the grate, the buns go cut-side down on the cooler side, and the whole thing closes under the lid for about a minute before the dogs get flipped for a final minute. That’s enough time for light grill marks and a warm, slightly crisp interior without drying the bread out.

    Already Cooked Doesn’t Mean Skip the Thermometer Entirely

    USDA’s food-safety guidance is clear that hot dogs are sold fully cooked, so grilling them is about flavor and texture, not raw-meat safety. Still, USDA flags one real risk: Listeria monocytogenes can survive refrigeration and turn up in ready-to-eat products like hot dogs, and while it’s rare, it can cause serious illness in pregnant women, older adults, and people with weakened immune systems. USDA’s guidance is that “those at increased risk of foodborne illness should reheat hot dogs and luncheon meat until steaming hot before eating.” If you want a number rather than a description, USDA’s own reheating standard for cooked, ready-to-eat foods is 165°F (about 74°C), which lines up with “steaming hot” in practice. For everyone else, grilling until the dog is hot all the way through and visibly charred, as the Weber recipes describe, comfortably clears that bar.

    Put together, that’s the whole method: slash skinless dogs or simmer-then-sear cased ones, grill over a real medium heat rather than the hottest part of the fire, keep the buns on the cool side until the last minute, and don’t worry about undercooking – just reheat to steaming if you’re serving anyone in a higher-risk group.

    Keep reading

    Sources

  • Alton Brown’s Grilled Brussels Sprouts, Skewered

    Alton Brown’s Grilled Brussels Sprouts, Skewered

    This method comes from Alton Brown’s Good Eats episode “A Cabbage Sprouts in Brussels,” published on Food Network — see the Grilled Brussels Sprouts recipe on foodnetwork.com. Instead of a grill basket, it skewers the sprouts directly, which keeps them from rolling around and makes flipping the whole batch a one-motion job.

    Ingredients

    • 1 pound Brussels sprouts, as uniform in size as possible
    • 2 tablespoons olive oil
    • 1 tablespoon minced garlic
    • 1 teaspoon dry mustard
    • 1 teaspoon smoked paprika
    • 1 teaspoon kosher salt
    • 1/4 teaspoon freshly ground black pepper

    The recipe is rated easy, with a total time of 23 minutes — 10 minutes prep and 13 minutes on the grill — and yields 4 servings. Every ingredient here is plant-based, so there’s no hidden-animal-product label check needed on this one the way there is with a bottled sauce or a rub.

    Skewering and Grilling, Step by Step

    1. Heat a grill to medium.
    2. Cut off the stem end of each Brussels sprout and pull off any yellowing outer leaves.
    3. Put the sprouts in a large microwave-safe bowl and microwave on high for 3 minutes to par-cook them.
    4. Add the olive oil, garlic, mustard, paprika and salt, and toss to coat. Let the sprouts cool until you can handle them comfortably.
    5. Skewer 4 to 5 sprouts onto each metal skewer, with all the stem ends facing the same direction and at least 1/2 inch of space between sprouts.
    6. Lay the skewers on the grill with the stem ends closest to the flame. Cover and cook for 5 minutes, then turn the skewers over and cook for another 5 minutes.
    7. Serve as is, or slide the sprouts off the skewers back into the original bowl and toss them with whatever oil-and-garlic mixture is left before plating.

    Brown’s own cook’s note flags the one variable that actually matters here: uniform sprout size. Since they’re grilled as a batch on shared skewers rather than individually monitored, sprouts that are noticeably bigger or smaller than their neighbors will finish at different rates.

    Why the Microwave Step Is There

    Three minutes in the microwave before they ever touch the grate is doing real work, not just saving time. Raw Brussels sprouts are dense enough that 10 minutes of direct grilling alone would likely char the outer leaves before the center cooked through. Par-cooking them first means the grill only needs to add char, color and smoke flavor to sprouts that are already most of the way to tender — which is also why the total grill time here is just 10 minutes split across two sides.

    Nutrition, as Published

    Food Network’s nutritional analysis for this recipe puts a single serving at 126 calories, 8 grams of total fat, 11 grams of carbohydrates, 5 grams of dietary fiber, 4 grams of protein and 509 milligrams of sodium — most of that sodium coming from the kosher salt and any extra added at the table, since none of the other ingredients are salty on their own.

    How Food Network Files This Recipe

    On the recipe page itself, Food Network tags this dish under Gluten Free and Diabetes-Friendly, alongside Healthy Dinner, Healthy Lunch and Side Dish categories. That’s consistent with the ingredient list: there’s no wheat-based thickener or added sugar anywhere in it, and the seasoning leans on spice rather than a sauce that might otherwise sneak in sodium or carbohydrate beyond what’s already counted in the nutrition figures above. It’s worth remembering that those labels describe the dish as written — if you’re serving it alongside something else at a cookout, the plate as a whole may not carry the same tags even if the sprouts themselves do.

    A Word on the Vegetable Itself

    Brussels sprouts (Brassica oleracea, variety gemmifera) take their name from the city they’re associated with: according to Encyclopaedia Britannica, they may have been grown in Belgium as early as 1200, though the first recorded description of the vegetable dates to 1587. Britannica also notes each stem produces small axillary buds that look like miniature cabbage heads, which is exactly the shape that makes them easy to thread onto a skewer in the first place.

    Keep reading

    Sources

  • Cottage Life’s Whole Grilled Buffalo Cauliflower

    Cottage Life’s Whole Grilled Buffalo Cauliflower

    This recipe comes from David Grenier, published in Cottage Life magazine’s June/July 2020 issue — see the Buffalo cauliflower recipe on cottagelife.com. Rather than cutting the head into florets or steaks first, it grills the cauliflower whole, wrapped in foil on the grate, then finishes it with a buffalo baste.

    Ingredients

    Cauliflower and spice mix

    • 1 head cauliflower, about 500 g, leaves removed and core trimmed
    • 1/3 cup vegetable oil
    • 2 tablespoons packed brown sugar
    • 1 teaspoon each: ground cumin, cayenne pepper, dry mustard, smoked paprika, salt

    Buffalo sauce

    • 1/3 cup vegan butter, melted
    • 1/3 cup hot sauce (the recipe suggests Frank’s)
    • 2 teaspoons soy sauce
    • 1 teaspoon garlic powder

    For serving

    • 1 cup vegan ranch dressing, optional, for dipping

    Grenier notes plain butter and regular ranch work fine as swaps if you don’t have the vegan versions on hand — but as written, with vegan butter and vegan ranch, the recipe is dairy-free throughout.

    Grilling the Whole Head

    1. Preheat the grill to medium-high, about 400°F (204°C).
    2. Whisk together the spice mix ingredients — it will be slightly granular rather than smooth. Set the cauliflower head on a sheet of heavy-duty foil and brush it all over with the spice mix, working it into the nooks between the florets.
    3. Set the cauliflower and its foil sheet on the grill (the foil catches drippings and helps prevent flare-ups). Close the lid and grill for 30 minutes. Check on it, and rotate the foil if it’s cooking unevenly, then grill for another 25 minutes.
    4. Melt the vegan butter in a small saucepan on the barbecue’s side burner or on the stovetop, then whisk in the hot sauce, soy sauce and garlic powder until smooth. Baste the cauliflower head with the warm sauce and grill for a further 5 minutes. It’s done when a knife slides through it easily.
    5. Lift the cauliflower onto a cutting board with a sturdy metal spatula, then cut it into wedges or break it into florets. Serve with the reserved sauce on the side and the vegan ranch for dipping.

    Total cook time runs about an hour, and it serves 4 as a main course or 6 as a side.

    Getting Ahead of the Grill Time

    An hour of grill time for one vegetable is a lot to ask on a busy night, so Grenier builds in a shortcut: par-cook the whole head first, either in a steamer basket over an inch of simmering water for 5 minutes, covered, or in the microwave in a covered glass bowl with a few vent holes pierced in the plastic wrap, for 4-5 minutes on high. Either method cuts the grill time down to 25-30 minutes total. The spice mix can also be made and brushed onto the cauliflower the day before and left covered in the fridge, so the only thing left to do once the grill is hot is cook it.

    Why Grill It Whole Instead of in Florets

    Keeping the head intact rather than breaking it into florets first means less surface area is exposed directly to the grate, so there’s less risk of losing pieces through the bars and less turning required overall — you’re mostly just rotating one large piece instead of managing a basket of small ones. The foil sheet underneath does double duty, both catching the buffalo baste as it drips and keeping flare-ups from the sugar and oil in the spice mix under control.

    Checking the Sauce for Hidden Animal Ingredients

    Because the recipe specifies plain “hot sauce (e.g., Frank’s)” rather than a pre-mixed buffalo wing sauce, it’s worth being precise about which bottle that means. McCormick, which owns the brand, lists the ingredients on its Frank’s RedHot Original Cayenne Pepper Sauce product page as: “Aged Cayenne Red Peppers, Distilled Vinegar, Water, Salt and Garlic Powder” — no dairy, honey or other animal-derived ingredients, so this base sauce is vegan on its own. That’s a different product from Frank’s premixed “Buffalo Wings Sauce,” which already has butter blended in and would work against the vegan butter this recipe calls for separately. If you’re shopping for the dish, look for the plain cayenne pepper sauce rather than a version marketed specifically as a “buffalo” or “wing” sauce, since those blended versions are the ones most likely to already contain dairy.

    Keep reading

    Sources

  • Nick Nairn’s Griddled Halloumi, BBC Food’s Method

    Nick Nairn’s Griddled Halloumi, BBC Food’s Method

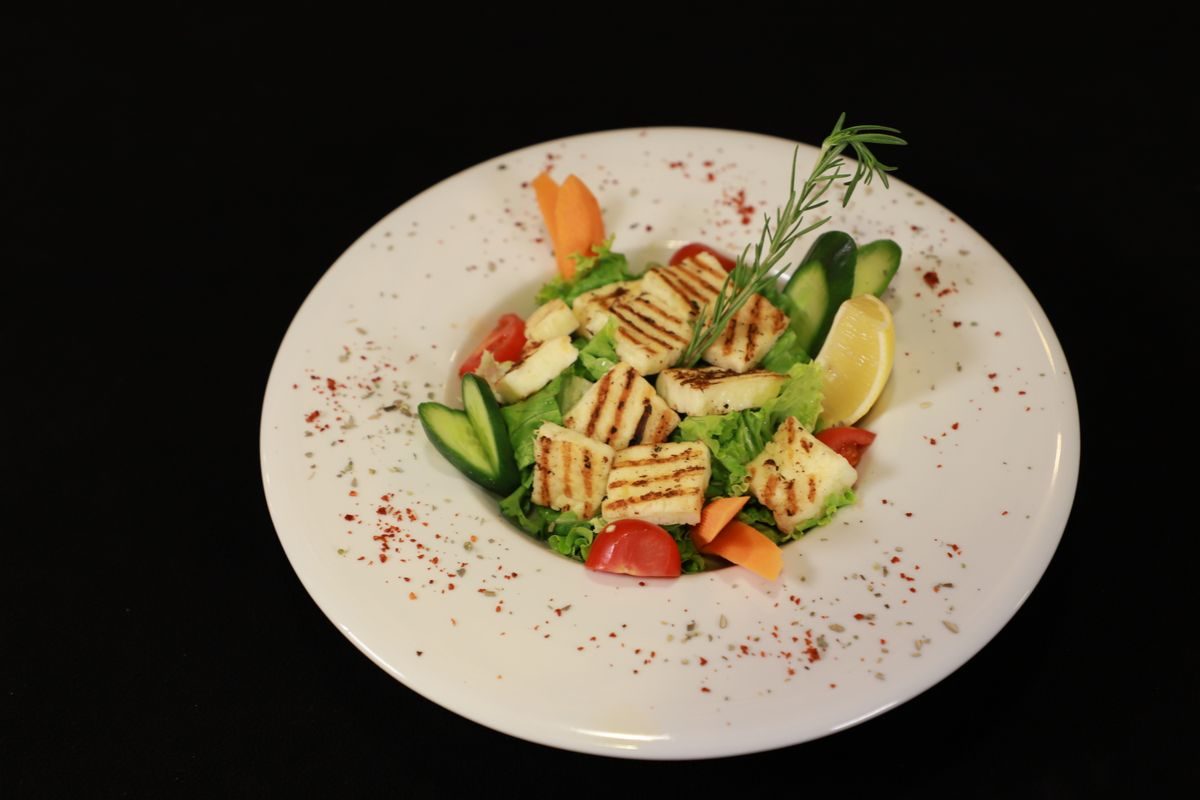
    This recipe is taken from Nick Nairn’s “Griddled halloumi,” published on BBC Food from his appearance on Ready Steady Cook — see the Griddled halloumi recipe on bbc.co.uk/food. It’s a simple open sandwich built around one central idea: griddle marks on halloumi and a plate of marinated courgette ribbons, stacked on toasted ciabatta.

    Ingredients

    • 1 courgette, cut into strips
    • 1/2 teaspoon fresh thyme leaves
    • 2 tablespoons olive oil
    • salt and freshly ground black pepper
    • 4 slices halloumi
    • 2 slices ciabatta, toasted

    Serves 1, though the quantities scale up easily for a group cooking outdoors.

    Method

    1. Mix the courgette strips, thyme leaves, olive oil and seasoning together in a bowl.
    2. Heat a griddle pan (or the direct-heat side of your grill) until hot. Place the courgette mixture on it and cook for 1-2 minutes.
    3. Add the halloumi slices and continue griddling for 3-4 minutes, until golden-brown stripes appear on the cheese.
    4. Arrange the toasted ciabatta on a plate and pile the griddled halloumi and courgette on top to serve.

    The original recipe doesn’t specify a target temperature — just “hot” — since halloumi’s whole trick on a grill is that it holds its shape rather than melting, so there’s some forgiveness in how hard you run the heat.

    Why Halloumi Doesn’t Melt

    According to Cyprus’s official Halloumi.cy Trade Service (Ministry of Energy, Commerce and Industry), the raw materials for halloumi are fresh sheep or goat’s milk, or a mixture of the two, with or without cow’s milk added — and when cow’s milk is used, the sheep or goat’s milk must always outweigh it. Rennet, mint leaves and salt round out the traditional recipe. The high-heat treatment during production is what gives halloumi its “special characteristic,” as the Trade Service describes it: an ability to be fried or grilled without melting or spreading, which is exactly what lets it develop the griddle marks in Nairn’s recipe instead of turning into a puddle.

    Cyprus, Not Greece

    Halloumi is frequently sold alongside Greek ingredients, but it’s specifically Cypriot. On 12 April 2021 the European Commission registered “Χαλλούμι (Halloumi) / Hellim” as a Protected Designation of Origin, according to the Cyprus Trade Service’s PDO page, meaning that as of 1 October 2021, only cheese made on the island under the traditional recipe can be sold in the EU under that name. The Cyprus Cheesemakers Association traces written references to halloumi back to the 16th century, including a 1556 document by the Venetian Doge Leonardo Donà, and notes that by 1928 it was already being exported to destinations including Egypt, Greece, France, the UK and the United States.

    Other Ways to Serve Grilled Halloumi

    Nairn’s courgette-and-ciabatta build is one option among several the Cyprus Trade Service lists as traditional pairings. Its food pairing guidance suggests serving grilled halloumi hot, simply drizzled with olive oil, or cubed and threaded onto a kebab skewer with thick chunks of tomato and onion. It also notes that halloumi in burgers has become a popular summer barbecue idea in its own right, served either as a standalone vegetarian patty or alongside meat. If you want to skip the courgette ribbons entirely, any of those are a legitimate substitute for Nairn’s version — the halloumi itself, and the griddle marks it takes on, is doing the real work in this recipe.

    A Word on the Diet Label

    Because halloumi is a dairy cheese made with rennet, it’s neither vegan nor automatically vegetarian — rennet can be sourced from an animal’s stomach or from a microbial/vegetarian alternative, and Cyprus’s own specification doesn’t say which one is compulsory. If you’re cooking for a strict vegetarian, check the packet for a “vegetarian” or “microbial rennet” label rather than assuming, since that varies by producer. The courgette, thyme, olive oil and ciabatta in the rest of the dish are plant-based, but ciabatta dough can occasionally include dairy or, less commonly, egg wash, so it’s worth a quick label check there too if you’re catering to anyone with a dairy allergy on top of the cheese itself.

    Keep reading

    Sources

  • Smoked BBQ Pulled Jackfruit: Girls Can Grill’s Method

    Smoked BBQ Pulled Jackfruit: Girls Can Grill’s Method

    This method comes from Christie Vanover, competitive pitmaster and founder of Girls Can Grill — see her Smoked BBQ Jackfruit recipe on girlscangrill.com. Unlike the skillet and oven versions that circulate online, this one actually goes into the smoker, so the fruit picks up real wood smoke rather than relying on liquid smoke or paprika to fake it.

    Why Canned Jackfruit Shreds Like Pulled Pork

    The trick is buying young jackfruit canned in water or brine, not the ripe fruit canned in syrup used for desserts. Young jackfruit is picked before it sweetens up, so the flesh stays firm and mild rather than fruity. Vanover describes it as having “a completely neutral flavor,” which is exactly why it takes on a BBQ rub and sauce so readily — there’s no competing taste to work around, just a fibrous texture that pulls apart in strands the way cooked pork shoulder does.

    Ingredients

    • 4 cans (14 oz each) young jackfruit in brine
    • 2 tablespoons BBQ pork rub
    • 1 1/2 cups barbecue sauce, divided

    Vanover is upfront that her own rub blend contains honey granules, and that many bottled barbecue sauces contain honey too — so if you want this dish to actually be vegan rather than just meat-free, check the label on whatever rub and sauce you use, or build your own from salt, pepper, granulated garlic, chili powder and brown sugar instead.

    Smoking the Jackfruit, Step by Step

    1. Drain the jackfruit and discard the canning liquid. Pull the chunks apart into strips by hand while they’re still cool — this is easier now than after cooking, and it means every strand gets seasoned and smoked rather than just the outside of a chunk.
    2. Spread the pulled fruit in a 13-by-9-inch pan and toss it with the BBQ rub.
    3. Heat a smoker or pellet grill to 250°F (121°C) using apple wood, and set up an indirect heat zone.
    4. Place the pan on the smoker and cook for 30 minutes. Toss the fruit so the smoke reaches every piece, then smoke for another 30 minutes.
    5. Remove the pan, stir in 1 cup of the barbecue sauce, and return it to the smoker for a final 15-20 minutes to let the sauce set.

    Total time runs about 1 hour 35 minutes, and the recipe makes roughly 10 servings — plenty for a crowd, with the leftover 1/2 cup of sauce held back for serving on the side.

    Serving It as Tacos or Sandwiches

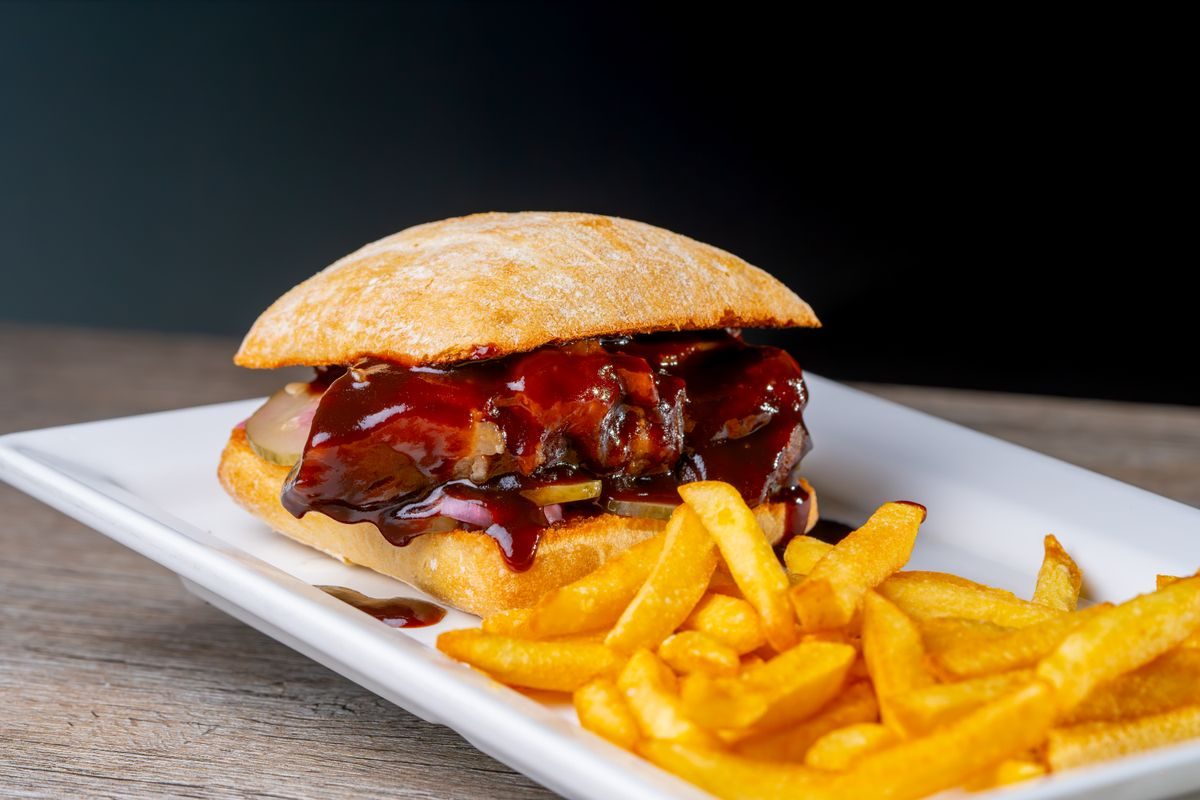
    Once it’s smoked and sauced, the jackfruit behaves like any other pulled barbecue filling. Pile it onto a bun with pickles for a sandwich, or wrap it in warm tortillas for soft tacos — the same batch also works as a pizza topping or over nachos if you’d rather skip the bread altogether. If you’re serving vegan guests, double-check the buns too, since some enriched doughs use dairy or egg.

    Where to Find It and What It Actually Tastes Like

    Vanover notes that canned jackfruit shows up in most Asian grocery stores, since it’s a common ingredient there beyond its newer role as a meat substitute, and it’s also increasingly stocked at natural grocers and larger supermarkets. As for texture once it’s cooked and shredded, she compares it to pulled chicken or pork, but firmer, with an underlying quality closer to mushroom than to fruit. She also flags that the canning brine leaves the dish a little higher in sodium than a from-scratch version would be, so rinsing the fruit before cooking is worth doing if that matters to you — though she personally skips the rinse because she likes what the brine adds to the flavor.

    A Note on the Fruit Itself

    Jackfruit (Artocarpus heterophyllus) is an evergreen tree native to tropical Asia, according to Encyclopaedia Britannica, which also notes it’s considered a staple food crop in Bangladesh and other parts of South and Southeast Asia. Britannica records it as the largest tree-borne fruit in the world, reaching up to about 2 feet long and 40 pounds on the tree — though the canned young fruit used in this recipe is a much more manageable size to work with than a whole one from the market.

    Keep reading

    Sources

  • Griddle Breakfast Potatoes: Two Published Methods

    Griddle Breakfast Potatoes: Two Published Methods

    This recipe is built from Meaningful Eats’ Blackstone Fried Potatoes recipe, which microwaves the potatoes before griddling them, compared against Ambitious Foodie’s Easy Blackstone Potatoes recipe, which cooks the potatoes raw straight on the griddle. The two disagree on whether the microwave step is optional, which turns out to be the main decision to make before starting.

    Ingredients (Meaningful Eats’ Version, With Onions)

    • 4 pounds Yukon gold or red potatoes, peeled if using Yukon gold, cut into 1-inch pieces
    • 2 tablespoons oil, plus more for the griddle
    • 1 teaspoon kosher salt (for the microwave step)
    • Sliced onions
    • Seasoned salt, paprika, garlic powder, onion powder, black pepper, to taste

    Method: Microwave First, Then Griddle

    Meaningful Eats treats the microwave step as essential, not optional: “My #1 tip is to microwave the potatoes first so they’re soft in the center and crisp on the outside,” and the recipe’s own top tip repeats it as something not to skip. In practice, that means tossing the cut potatoes with oil and the teaspoon of salt in a microwave-safe bowl, covering tightly, and microwaving “for 15 minutes, stirring every 5 minutes, until the potatoes are soft and can be easily pierced with a fork,” then draining off any excess liquid before they go anywhere near the griddle.

    Once the potatoes are pre-cooked, the griddle work is mostly about building color. Preheat the Blackstone to medium-high and oil it, then cook the sliced onions on one side “for 8-10 minutes, stirring frequently, until the onions are soft and golden brown,” and scoop them off into a bowl so they don’t overcook while the potatoes go on. Add the pre-cooked potatoes in a single layer — cut-side down if using red potatoes with the skin left on — and “let them cook without stirring for 5-6 minutes until golden and crisp on the first side” before seasoning, flipping, and cooking “another 5-6 minutes until browned and crispy all over.” The onions go back in at the end, tossed through to finish. Meaningful Eats lists prep at 10 minutes, a 15-minute microwave step, and 20 minutes on the griddle, for 45 minutes total.

    Method: Straight to the Griddle, No Pre-Cook

    Ambitious Foodie’s version skips the microwave in the main method entirely. Its FAQ section states plainly: “Potatoes can be cooked on the griddle without first being boiled!” The core steps are to wash, peel, and “chop them into consistent-sized cubes so they cook evenly,” then pat the pieces dry, since leftover surface moisture is what stops them from crisping properly. From there, it’s a direct griddle cook: heat to medium-high, drizzle oil, add the potato cubes in a single layer, season with salt, black pepper, garlic powder, and onion powder, and “let them sit undisturbed for a few minutes to form a golden crust, then toss from time to time until golden brown throughout.” Butter goes in during the last moments of cooking, melted through for richness. This version lists 10 minutes prep and 10 minutes cook time, for 20 minutes total — well under half of the microwave-first version, mostly because there’s no pre-cook step to account for.

    Optional Add-Ons in the No-Pre-Cook Version

    Even without requiring a pre-cook, Ambitious Foodie offers the microwave as one option among several for cooks who want a guaranteed soft center, alongside parboiling (“Parboiling the potato cubes for several minutes before griddling them speeds cooking time and creates an extra crispy exterior”) and covering the potatoes with a dome partway through cooking “to help them cook through evenly before crisping up.” In this version, none of those steps are treated as mandatory the way Meaningful Eats treats its microwave step — they’re framed as ways to get closer to a specific texture, not as a requirement for the potatoes to cook through at all.

    Choosing a Potato

    The two recipes make slightly different calls here too. Meaningful Eats specifically prefers “peel[ing] the Yukon golds for that perfectly crisp outside and soft center,” while noting red potato skins “don’t affect the texture as much, so there’s no need to peel them.” Ambitious Foodie is less specific about variety in its main ingredient list, but its FAQ recommends Yukon Gold “for fried potatoes or smashed potatoes and russet potatoes for crispy fries or hash browns” — suggesting russets as a firmer, starchier option if a crisper result is the goal.

    Getting a Crisp Result Either Way

    Both recipes agree on the same two griddle fundamentals regardless of which pre-cook route is used: a single layer of potatoes rather than a crowded pile, and leaving the pieces undisturbed for several minutes at a time rather than stirring constantly, so a real crust has time to form before the potatoes get moved around.

    Keep reading

    Sources

  • Detroit-Style Pan Pizza in an Outdoor Pizza Oven

    Detroit-Style Pan Pizza in an Outdoor Pizza Oven

    This recipe follows Ooni’s own Detroit-style Pizza recipe, baked in an outdoor pizza oven rather than a home oven, with the style’s origin story cross-checked against the Institute of Culinary Education’s history of Detroit-style pizza, which interviews Buddy’s Rendezvous COO Wesley Pikula directly.

    Where the Style Actually Comes From

    Both sources place the style’s birth at Buddy’s Rendezvous on Detroit’s east side in 1946. Ooni’s version credits bar owner Gus Guerra, who was looking to add menu items and “just happened to have a few unused blue steel industrial utility trays,” which he thought could work for a Sicilian-style pizza. ICE’s account, sourced from Pikula, describes the same origin slightly differently: “The pans themselves were scrap metal pans… they could be used as drip trays. I’m sure one of the regulars brought one of those in.” The two descriptions agree on the essential fact — an automotive-city scrap or utility pan, repurposed as a pizza pan — even though they don’t describe the pan in identical terms, which is a reminder that some of this history was passed down rather than documented at the time. Ooni goes further and notes that even the dough recipe’s true author is disputed, crediting “maybe Guerra’s wife, Anna, or an ‘old Sicilian dude named Dominic,’” while agreeing the dough’s technique is Sicilian in origin.

    The Caramelized Edge and the Pan That Followed

    ICE’s history adds a detail Ooni’s recipe page doesn’t cover: the now-famous caramelized cheese edge wasn’t fully established until 1978, when “Jet’s Pizza was the second Detroit pizzeria to adopt the square, scrap metal pan approach,” and it’s specifically credited with originating “the iconic, caramelized corners.” As Pikula put it, “It might look basic to the eye, but its nature is anything but.” Wisconsin brick cheese, spread to the edges of the pan, is the ingredient both sources point to as central to that effect — Ooni’s recipe instructs cooks to pay “particular attention to the edges” when adding cheese, for exactly this reason, though its own topping list substitutes mozzarella and cheddar for the original brick cheese.

    Dough

    Ooni’s dough is a lean, yeasted dough built for a 9 by 13-inch pan (the equipment list actually specifies a 10 by 13-inch Detroit-style pizza pan, so check your own pan’s dimensions against the dough quantity below):

    • ½ teaspoon (3 g) instant dried yeast, or 4½ g active dried yeast, or 9 g fresh yeast
    • 1½ tablespoons (20 g) extra-virgin olive oil, plus extra for coating the pan
    • ½ tablespoon (10 g) fine sea salt
    • 1 cup + 2 tablespoons (260 g) water
    • 3 cups (350 g) strong bread flour

    Toppings

    • ¾ cup (80 g) cheddar, shredded
    • 1 cup (100 g) mozzarella, shredded
    • 1 cup (100 g) pepperoni slices
    • ½ cup (120 g) pizza sauce

    Method

    1. Combine the water, yeast, and olive oil in a stand mixer bowl. Add the flour and salt, then mix on low-to-medium speed for 5 minutes until smooth and elastic. Without a mixer, combine by hand and knead about 15 minutes.
    2. Cover and proof at room temperature for 3 to 4 hours, until doubled in size. (For a cold proof instead, refrigerate for 72 hours, then bring out 2 to 3 hours before cooking.)
    3. Drizzle the bottom and sides of the pan generously with olive oil.
    4. Transfer the dough to the pan and “dimple” it with your fingertips, pressing and pushing it into the corners. Cover and rest 30 minutes.
    5. Dimple the dough again, once more working it toward the corners of the pan.
    6. Preheat the oven for 15 to 20 minutes, aiming for 650°F (343°C) on the baking stone, checked with an infrared thermometer.
    7. Add the cheese first, paying particular attention to the edges to build the frico crust, then the pepperoni, then two stripes of pizza sauce over the top.
    8. Confirm the stone is still at 650°F (343°C), then turn the flame to its lowest setting. Place the pan at the front of the oven, away from direct flame, and rotate it every 2 minutes so the base cooks evenly. Bake 10 to 15 minutes depending on the pan and crust thickness; if it’s browning too fast, turn the flame off for 3 to 5 minutes.
    9. Remove the pizza from the pan with a spatula and let it rest on a rack for 2 minutes before slicing into 4 pieces.

    Ooni’s own equipment note is specific to its accessory: “If using Ooni’s Detroit-style Pizza Pan, do not exceed 700°F (371°C),” since higher stone temperatures can push a metal pan past what it’s rated for even though the same dough would tolerate a hotter Neapolitan-style bake.

    Keep reading

    Sources

  • Seasoning a Flat-Top Griddle: Blackstone’s Steps

    Seasoning a Flat-Top Griddle: Blackstone’s Steps

    This guide follows Blackstone’s own “How do I Season my New Griddle?” help-center article and Camp Chef’s “6 Ways to Maintain Your Flat Top Grill” for the actual steps, with Made In Cookware’s carbon-steel-versus-cast-iron comparison covering why a steel griddle isn’t seasoned quite like a cast-iron pan. For the cast-iron side of that comparison in more depth, see this site’s own cast-iron seasoning and cleaning guide rather than repeating it here.

    Cleaning a New Griddle Before the First Seasoning

    Blackstone’s instructions start with a plain wash, not oil: “Gently clean the griddle plate with soap and water to remove dust or debris. Rinse the griddle plate and dry it fully.” Only after the plate is clean and completely dry does the actual seasoning process begin.

    Blackstone’s Seasoning Steps

    With the griddle clean and the propane reconnected, Blackstone’s method is to “heat your griddle on high until the griddle plate starts to discolor” before any oil goes on. Once it has discolored, the instructions call for spreading “a thin layer of oil across the griddle surface (2-3 tablespoons for a 36″ griddle)” using tongs and a paper towel or cotton cloth, covering the walls of the griddle as well as the flat cooking surface. That layer is left to heat until it smokes, which Blackstone says takes “about 15 minutes,” and the layer is done bonding once the smoking stops. Blackstone is specific about what happens if a layer is undercooked or overcooked: stopping too early can leave “rancid oil on the cooktop,” while a layer that “started to turn chalky” has gone past bonding into carbonizing, and needs another coat over it. The full process — oiling, smoking off, repeating — is meant to run three to five times for a new griddle, and Blackstone notes that the edges and corners “do not get as hot” as the middle and may need extra passes before they darken to match the rest of the surface.

    Camp Chef’s Cleaning and Seasoning Routine

    Camp Chef’s flat-top maintenance guide splits the job into daily cleaning and periodic reseasoning, and treats them as two different tasks rather than one combined step. For cleaning after a cook, the instructions are to scrape off food “while the griddle is still warm” using a metal spatula or chain-mail scrubber, then “wash with hot water, mild dish soap… rinse and dry thoroughly,” with an explicit warning: “Never scour or use a dishwasher, as this could chip the nice, seasoned finish you’re going for.” Seasoning, in Camp Chef’s version, is a short top-up rather than Blackstone’s multi-pass process: apply “a thin coat of Cast Iron Conditioner or cooking oil,” spread it with a paper towel, heat the griddle “until the oil starts to smoke,” then turn off the heat and wipe away anything left over.

    Where the Two Manufacturers Line Up

    Blackstone and Camp Chef agree on the core mechanism — a thin oil layer, heated to smoking, repeated as needed — and both warn against harsh detergent or scouring pads that can strip a built-up layer. The difference is mostly in scale: Blackstone’s guidance is written for a brand-new griddle plate that needs several full passes before it’s properly seasoned, while Camp Chef’s version reads more like routine upkeep for a griddle that’s already broken in, where one light coat after cleaning is enough to keep the surface protected.

    Why a Steel Griddle Isn’t Cast Iron

    Made In’s comparison explains the material difference behind these instructions. Cast iron is “made by pouring molten hot iron alloy into a mold and leaving it to cool,” which produces a thick, heavy, heat-retentive slab, while a steel griddle plate — in the same family Made In describes as carbon steel — is “made of a single sheet of metal alloy that’s annealed… to make it both stronger and easier to shape,” resulting in something “about half the weight of cast iron counterparts.” That thinner, lighter construction is also why a flat-top griddle responds to heat changes faster than a cast-iron pan or skillet: Made In notes carbon steel is “prized for its responsiveness to temperature change,” letting a cook turn the heat down the moment something is browning the way it should, where a thick cast-iron surface stays hot and keeps cooking for longer after the burner is adjusted. Made In also points out that cast iron “tends to be a bit more brittle… than carbon steel,” meaning a dropped or thermal-shocked cast-iron piece is more likely to crack.

    What Stays the Same Either Way

    Despite the different weight and heat behavior, Made In is clear that the seasoning logic itself doesn’t change much: “Both cast iron and carbon steel griddles need to be seasoned before use, and must be hand washed and dried thoroughly before putting away,” and neither surface should be used to cook strongly acidic ingredients, which can strip a built-up seasoning layer on either material. In other words, a flat-top griddle needs its own seasoning routine mainly because of its thinner build and faster heat response, not because the underlying idea of bonding oil to the metal is fundamentally different from cast iron.

    Keep reading

    Sources

  • How to Preheat an Outdoor Pizza Oven: Ooni’s Method

    How to Preheat an Outdoor Pizza Oven: Ooni’s Method

    This method draws on Ooni’s own step-by-step pizza guide and Ooni’s Koda getting-started page, plus Meathead’s “The Science of Pizza on the Grill” from AmazingRibs.com, which covers the older, grill-plus-stone route to the same result. The two sources are aimed at different equipment, and comparing them shows just how much a dedicated outdoor pizza oven changes the numbers.

    Preheating a Dedicated Pizza Oven

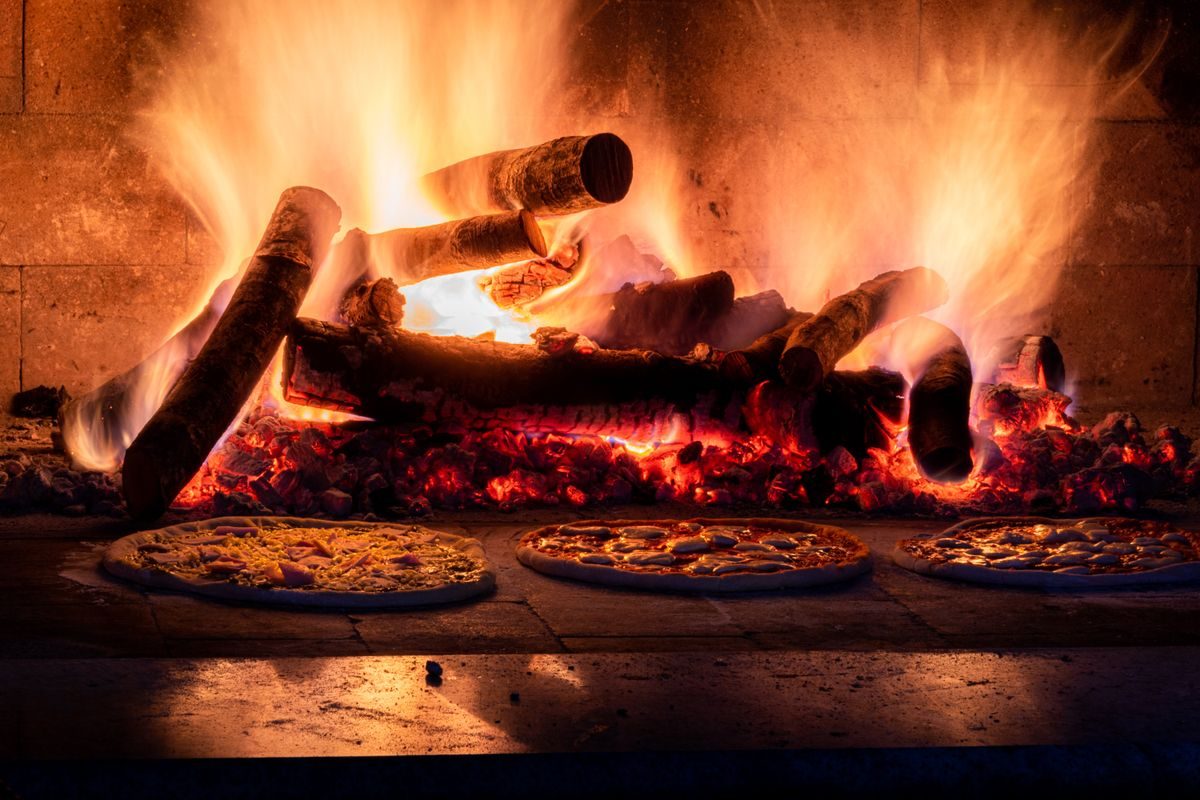
    Ooni’s guide puts preheating “up to 20 minutes (depending on the oven you’re using),” checked with an infrared thermometer aimed at the baking stone rather than by trusting a dial or a timer. The target is specific: once the stone reaches 750°F (399°C), the oven is ready to cook. For classic Neapolitan-style pizza, Ooni recommends staying in a 750-850°F (400-450°C) stone-temperature band, which it says will cook a pizza in 60 to 90 seconds. Between pies, the stone needs to climb back to 715-850°F (380-450°C) before the next one goes in — a reminder that a hot oven can still cool down faster than home cooks expect if the door or hatch is left open too long.

    Why the Stone, Not the Air, Is the Number That Matters

    Both the Koda getting-started page and the general how-to guide measure the stone surface rather than the air inside the oven, because it’s the stone that transfers heat into the base of the dough. Ooni sells its own infrared thermometer for this exact reason, and both pages assume the cook is checking the floor, not glancing at an ambient gauge.

    How a Grill-and-Stone Setup Compares

    AmazingRibs’ Meathead Goldwyn approaches the same problem from a converted grill rather than a purpose-built oven, and the numbers land in a noticeably different place. He advises “a good 30 minutes for the pizza stone as well as the oven/grill sides and dome to soak up energy” — roughly half again as long as Ooni’s window — because a grill’s mass and its imperfect seal make heat harder to hold onto. On a gas grill, his method is to preheat with direct heat on all burners “and let it heat up to about 600°F (316°C, converted here) on the top surface,” then shut off the burners directly under the stone once it’s there, using the side burners only to keep air moving. A ceramic kamado grill can do noticeably better on heat retention: Meathead reports getting the stone to “650°F (343°C) or so” before launching, and notes that a well-vented kamado can even approach 750-800°F (399-427°C, converted here), in the same range as a dedicated pizza oven.

    Where the Two Sources Genuinely Disagree

    The gap isn’t just about equipment quality — it’s about what each source treats as normal. Ooni’s own oven line is built to reach and hold 750°F+ on the stone within 15 to 20 minutes because the chamber is small, insulated, and shaped to reflect heat back down onto the dough. AmazingRibs’ baseline gas-grill number, 600°F, is a genuinely lower target that Meathead treats as perfectly adequate for a good crust — he isn’t describing a compromise, he’s describing what a standard grill setup reliably achieves. Cook times follow the same split: Ooni’s 60-90 seconds at 750-850°F versus a slower, more hands-on grill cook that depends heavily on the specific setup.

    Getting the Dough Ready to Launch

    Ooni’s guide is specific about avoiding a stuck pizza on the peel: “A generous sprinkling of semolina flour on your peel should keep your dough from sticking,” and toppings should stay light, since “overloading the dough makes it much harder to launch and retrieve your pizza.” A few drops of sauce or other liquid on the peel itself can also cause sticking, so the advice is to build the pizza quickly once it’s on the peel rather than letting it sit.

    Launching the Pizza

    For the actual launch, Ooni’s guide describes what it calls the “hovercraft technique”: creating a pocket of air between the dough and the peel, angling the peel toward the back of the oven, then “quickly and confidently start shimmying the peel away from the pizza.” The Koda page adds that the aim is to land the pizza “into the middle of the baking stone.” If the dough does stick partway through, Ooni’s advice is to lift the edge and blow gently underneath to work air back in rather than trying to yank the peel free.

    Turning and Finishing the Bake

    Once the pizza is in, both Ooni pages describe an active cook rather than a set-and-forget one: use the peel to turn the pizza roughly every 20 to 30 seconds so it bakes evenly, since the heat is coming almost entirely from one direction (the stone and, in wood or gas ovens, a side flame) rather than surrounding the pizza evenly the way a home oven does. Ooni notes a Neapolitan-style pizza at 750-850°F should be fully cooked in under two minutes if the stone temperature has actually been reached and held — which is the reason both sources put so much weight on measuring the stone rather than guessing from preheat time alone.

    Keep reading

    Sources

  • Emeril Lagasse’s Essence: A Cajun-Creole Dry Rub

    Emeril Lagasse’s Essence: A Cajun-Creole Dry Rub

    This is Emeril Lagasse’s own recipe, published on his official site as “Emeril’s Essence Creole Seasoning”. Lagasse built his cooking career in New Orleans, and this dry rub is the all-purpose blend he’s used since 1990, appearing in most of the cookbooks he’s written.

    Lagasse has described the seasoning in his own words as “my version of a Cajun seasoning blend,” even though it’s also commonly sold and referred to as Creole seasoning — a naming overlap that reflects how closely the two Louisiana culinary traditions are tangled together in his cooking, rather than a mistake on anyone’s part.

    Ingredients

    • 2 1/2 tablespoons paprika
    • 2 tablespoons salt
    • 2 tablespoons garlic powder
    • 1 tablespoon black pepper
    • 1 tablespoon onion powder
    • 1 tablespoon cayenne pepper
    • 1 tablespoon dried leaf oregano
    • 1 tablespoon dried thyme

    Method

    1. Combine all the ingredients thoroughly.
    2. Store in an airtight jar or container.

    That’s the entire method — there’s no cooking step, and the recipe as published yields about 2/3 cup of seasoning. Emeril’s own site lists the dish type simply as “Misc” and the cuisine as “Cajun/Creole,” with the recipe’s origin credited to an episode of his television show, Emeril Live.

    What Makes It Cajun, What Makes It Creole

    Cajun and Creole seasoning aren’t interchangeable terms, even though people often use them that way. Cajun seasoning tends to lean on a variety of ground peppers for a rustic, high-heat kick, while Creole seasoning is typically heavier on dried herbs and has roots in New Orleans’ more cosmopolitan, French- and Spanish-influenced cooking. Lagasse’s Essence sits deliberately in between: it has a paprika base and a real dose of cayenne pepper, which pulls from the Cajun side, alongside dried oregano and dried thyme, which are more characteristic of Creole blends. That dual identity is exactly why the same jar gets called both a Cajun spice blend and a Creole seasoning depending on who’s talking about it.

    According to reporting on Lagasse’s own comments, home cooks who’ve adopted the blend use it across burgers, pork chops, chicken, steak, grilled vegetables, and seafood — which tracks with a rub built from pantry staples rather than anything overly specialized. Reporting on Lagasse’s own account also notes he’s relied on this exact formula for more than three decades, calling it the one piece of his advice worth following if you only take one.

    Lagasse has also encouraged first-timers to experiment rather than treat his formula as the only correct version: he’s suggested trying a range of different Cajun seasonings to find a personal favorite, or building your own blend and adjusting it to taste. His one piece of advice for anyone doing that is not to skip the cayenne pepper, which is what gives the blend its characteristic back-of-the-throat heat.

    Using It on the Grill

    Because Essence is a dry blend with no sugar or wet ingredients, it behaves like a classic barbecue rub: pat it onto the surface of meat, poultry, or shrimp before it goes on the grill, and let the salt and spices do their work as the surface sears. It’s not a marinade and doesn’t need time to tenderize anything — a light, even coating just before cooking is enough. Because it’s mostly salt and ground spices with no fillers, it also mixes cleanly into batters or dredges if you want that same flavor profile on something breaded.

    Because it’s a dry mix with no fresh ingredients, it doesn’t carry the short shelf life of a fresh marinade or salsa-style sauce — kept sealed and away from moisture in an airtight container, as the recipe instructs, it behaves like any other dried spice blend in the pantry and is good for repeated use across several cookouts.

    Every ingredient in this rub is plant-derived or a mineral salt, with nothing that raises common allergy or dietary concerns — no dairy, egg, gluten-containing grain, fish, or shellfish products are used, so it works as a vegan, vegetarian, and gluten-free seasoning as published.

    Keep reading

    Sources