Vegetarian & Vegan

Substantial vegetarian and vegan outdoor recipes, menus and cooking guidance.

  • Weber’s Curried Red Lentil Burgers

    Weber’s Curried Red Lentil Burgers

    This recipe comes straight from Weber: the Curried Red Lentil Burgers with Mango Chutney on weber.com’s UK site, created by the Weber Grill Academy chefs. It is a useful alternative to a black bean burger: the patties are built from red lentils, chickpeas and peanuts, with curry powder and cumin for flavor, and served in pitta bread. The recipe serves 4, with 25 minutes of prep and 5 to 7 minutes of cooking, plus 2 to 4 hours of chilling.

    Weber files this under vegetarian recipes. It contains eggs and yogurt, so it is not vegan, and it includes peanuts and pitta bread, so check labels if anyone at the table has allergies. The recipe was published for UK readers, so quantities are metric with US equivalents.

    Ingredients

    • 100 g (3½ oz) red lentils, picked over, rinsed in a fine-mesh sieve and drained
    • 480 ml (16 fl oz) water
    • 1 can (400 g/13 oz) chickpeas, rinsed and drained
    • 175 g (6 oz) roasted, salted peanuts
    • 2 teaspoons curry powder
    • 2 teaspoons ground cumin
    • ½ teaspoon sea salt
    • ¼ teaspoon freshly ground black pepper
    • 8 tablespoons panko breadcrumbs
    • 8 tablespoons natural Greek yogurt
    • 2 large eggs, beaten
    • 2 tablespoons chopped fresh coriander (cilantro)
    • 1 tablespoon vegetable oil
    • 4 large pitta breads
    • 1 baby lettuce, shredded
    • ½ cucumber, thinly sliced
    • 8 tablespoons mango chutney

    Equipment listed: a grill-proof griddle, a burger press and a griddle spatula.

    Method

    In the kitchen

    1. Combine the lentils and water in a saucepan and bring to the boil. Skim off any foam that rises. Reduce the heat to medium-low and simmer for 10 to 20 minutes until tender. Drain well, rinse briefly and let cool.
    2. In a food processor with a metal blade, pulse the lentils, chickpeas, peanuts, curry powder, cumin, salt and pepper into a thick, slightly chunky paste. Move to a bowl and fold in the panko, yogurt, eggs and coriander.
    3. Using the burger press, form four gently packed patties, each about 1.5 cm (¾ inch) thick. The recipe notes that the patties will be quite wet. Cover and refrigerate for 2 to 4 hours.

    At the barbecue

    1. Prepare the grill for direct cooking over medium-high heat, 200–260°C (400–500°F), and preheat the grill-proof griddle.
    2. Coat the griddle lightly with the oil. Place the patties on the griddle and cook over direct medium-high heat for 5 to 7 minutes with the lid closed, until firm and nicely marked, turning once carefully. In the last minute, warm the pittas on the cooking grates over direct heat, turning once.
    3. Cut the pittas and patties in half and put a patty half inside each pitta half. Divide the lettuce, cucumber and mango chutney among the pittas and serve immediately.

    Notes on the Method

    Two details in the recipe are easy to skip and worth following. First, the long chill: the recipe calls for 2 to 4 hours in the refrigerator, and it describes the mixture as quite wet. Second, the cooking surface: the patties go on a preheated, lightly oiled griddle set on the grill, not straight onto the grates, and are turned only once, carefully. Weber does not spell out its reasons, but both steps suit a soft, wet patty.

    Serving

    Weber’s version is a pitta sandwich rather than a bun burger: the lettuce, cucumber and mango chutney are divided among the four pittas, and the pittas are warmed on the grates during the last minute of cooking.

    Where It Fits

    Weber’s UK roundup of meat-free burgers describes red lentils as budget friendly and easy to blend into a patty shape. The same page suggests a simpler route for anyone short on time: a portobello mushroom cap grilled with a little olive oil and herbs as a stand-in for the patty. This lentil recipe is the more involved option, since it needs simmering, blending and a chill before it reaches the grill, so plan the prep the day before or the morning of the cookout.

    Keep reading

    Sources

  • Alton Brown’s Grilled Brussels Sprouts, Skewered

    Alton Brown’s Grilled Brussels Sprouts, Skewered

    This method comes from Alton Brown’s Good Eats episode “A Cabbage Sprouts in Brussels,” published on Food Network — see the Grilled Brussels Sprouts recipe on foodnetwork.com. Instead of a grill basket, it skewers the sprouts directly, which keeps them from rolling around and makes flipping the whole batch a one-motion job.

    Ingredients

    • 1 pound Brussels sprouts, as uniform in size as possible
    • 2 tablespoons olive oil
    • 1 tablespoon minced garlic
    • 1 teaspoon dry mustard
    • 1 teaspoon smoked paprika
    • 1 teaspoon kosher salt
    • 1/4 teaspoon freshly ground black pepper

    The recipe is rated easy, with a total time of 23 minutes — 10 minutes prep and 13 minutes on the grill — and yields 4 servings. Every ingredient here is plant-based, so there’s no hidden-animal-product label check needed on this one the way there is with a bottled sauce or a rub.

    Skewering and Grilling, Step by Step

    1. Heat a grill to medium.
    2. Cut off the stem end of each Brussels sprout and pull off any yellowing outer leaves.
    3. Put the sprouts in a large microwave-safe bowl and microwave on high for 3 minutes to par-cook them.
    4. Add the olive oil, garlic, mustard, paprika and salt, and toss to coat. Let the sprouts cool until you can handle them comfortably.
    5. Skewer 4 to 5 sprouts onto each metal skewer, with all the stem ends facing the same direction and at least 1/2 inch of space between sprouts.
    6. Lay the skewers on the grill with the stem ends closest to the flame. Cover and cook for 5 minutes, then turn the skewers over and cook for another 5 minutes.
    7. Serve as is, or slide the sprouts off the skewers back into the original bowl and toss them with whatever oil-and-garlic mixture is left before plating.

    Brown’s own cook’s note flags the one variable that actually matters here: uniform sprout size. Since they’re grilled as a batch on shared skewers rather than individually monitored, sprouts that are noticeably bigger or smaller than their neighbors will finish at different rates.

    Why the Microwave Step Is There

    Three minutes in the microwave before they ever touch the grate is doing real work, not just saving time. Raw Brussels sprouts are dense enough that 10 minutes of direct grilling alone would likely char the outer leaves before the center cooked through. Par-cooking them first means the grill only needs to add char, color and smoke flavor to sprouts that are already most of the way to tender — which is also why the total grill time here is just 10 minutes split across two sides.

    Nutrition, as Published

    Food Network’s nutritional analysis for this recipe puts a single serving at 126 calories, 8 grams of total fat, 11 grams of carbohydrates, 5 grams of dietary fiber, 4 grams of protein and 509 milligrams of sodium — most of that sodium coming from the kosher salt and any extra added at the table, since none of the other ingredients are salty on their own.

    How Food Network Files This Recipe

    On the recipe page itself, Food Network tags this dish under Gluten Free and Diabetes-Friendly, alongside Healthy Dinner, Healthy Lunch and Side Dish categories. That’s consistent with the ingredient list: there’s no wheat-based thickener or added sugar anywhere in it, and the seasoning leans on spice rather than a sauce that might otherwise sneak in sodium or carbohydrate beyond what’s already counted in the nutrition figures above. It’s worth remembering that those labels describe the dish as written — if you’re serving it alongside something else at a cookout, the plate as a whole may not carry the same tags even if the sprouts themselves do.

    A Word on the Vegetable Itself

    Brussels sprouts (Brassica oleracea, variety gemmifera) take their name from the city they’re associated with: according to Encyclopaedia Britannica, they may have been grown in Belgium as early as 1200, though the first recorded description of the vegetable dates to 1587. Britannica also notes each stem produces small axillary buds that look like miniature cabbage heads, which is exactly the shape that makes them easy to thread onto a skewer in the first place.

    Keep reading

    Sources

  • Cottage Life’s Whole Grilled Buffalo Cauliflower

    Cottage Life’s Whole Grilled Buffalo Cauliflower

    This recipe comes from David Grenier, published in Cottage Life magazine’s June/July 2020 issue — see the Buffalo cauliflower recipe on cottagelife.com. Rather than cutting the head into florets or steaks first, it grills the cauliflower whole, wrapped in foil on the grate, then finishes it with a buffalo baste.

    Ingredients

    Cauliflower and spice mix

    • 1 head cauliflower, about 500 g, leaves removed and core trimmed
    • 1/3 cup vegetable oil
    • 2 tablespoons packed brown sugar
    • 1 teaspoon each: ground cumin, cayenne pepper, dry mustard, smoked paprika, salt

    Buffalo sauce

    • 1/3 cup vegan butter, melted
    • 1/3 cup hot sauce (the recipe suggests Frank’s)
    • 2 teaspoons soy sauce
    • 1 teaspoon garlic powder

    For serving

    • 1 cup vegan ranch dressing, optional, for dipping

    Grenier notes plain butter and regular ranch work fine as swaps if you don’t have the vegan versions on hand — but as written, with vegan butter and vegan ranch, the recipe is dairy-free throughout.

    Grilling the Whole Head

    1. Preheat the grill to medium-high, about 400°F (204°C).
    2. Whisk together the spice mix ingredients — it will be slightly granular rather than smooth. Set the cauliflower head on a sheet of heavy-duty foil and brush it all over with the spice mix, working it into the nooks between the florets.
    3. Set the cauliflower and its foil sheet on the grill (the foil catches drippings and helps prevent flare-ups). Close the lid and grill for 30 minutes. Check on it, and rotate the foil if it’s cooking unevenly, then grill for another 25 minutes.
    4. Melt the vegan butter in a small saucepan on the barbecue’s side burner or on the stovetop, then whisk in the hot sauce, soy sauce and garlic powder until smooth. Baste the cauliflower head with the warm sauce and grill for a further 5 minutes. It’s done when a knife slides through it easily.
    5. Lift the cauliflower onto a cutting board with a sturdy metal spatula, then cut it into wedges or break it into florets. Serve with the reserved sauce on the side and the vegan ranch for dipping.

    Total cook time runs about an hour, and it serves 4 as a main course or 6 as a side.

    Getting Ahead of the Grill Time

    An hour of grill time for one vegetable is a lot to ask on a busy night, so Grenier builds in a shortcut: par-cook the whole head first, either in a steamer basket over an inch of simmering water for 5 minutes, covered, or in the microwave in a covered glass bowl with a few vent holes pierced in the plastic wrap, for 4-5 minutes on high. Either method cuts the grill time down to 25-30 minutes total. The spice mix can also be made and brushed onto the cauliflower the day before and left covered in the fridge, so the only thing left to do once the grill is hot is cook it.

    Why Grill It Whole Instead of in Florets

    Keeping the head intact rather than breaking it into florets first means less surface area is exposed directly to the grate, so there’s less risk of losing pieces through the bars and less turning required overall — you’re mostly just rotating one large piece instead of managing a basket of small ones. The foil sheet underneath does double duty, both catching the buffalo baste as it drips and keeping flare-ups from the sugar and oil in the spice mix under control.

    Checking the Sauce for Hidden Animal Ingredients

    Because the recipe specifies plain “hot sauce (e.g., Frank’s)” rather than a pre-mixed buffalo wing sauce, it’s worth being precise about which bottle that means. McCormick, which owns the brand, lists the ingredients on its Frank’s RedHot Original Cayenne Pepper Sauce product page as: “Aged Cayenne Red Peppers, Distilled Vinegar, Water, Salt and Garlic Powder” — no dairy, honey or other animal-derived ingredients, so this base sauce is vegan on its own. That’s a different product from Frank’s premixed “Buffalo Wings Sauce,” which already has butter blended in and would work against the vegan butter this recipe calls for separately. If you’re shopping for the dish, look for the plain cayenne pepper sauce rather than a version marketed specifically as a “buffalo” or “wing” sauce, since those blended versions are the ones most likely to already contain dairy.

    Keep reading

    Sources

  • Nick Nairn’s Griddled Halloumi, BBC Food’s Method

    Nick Nairn’s Griddled Halloumi, BBC Food’s Method

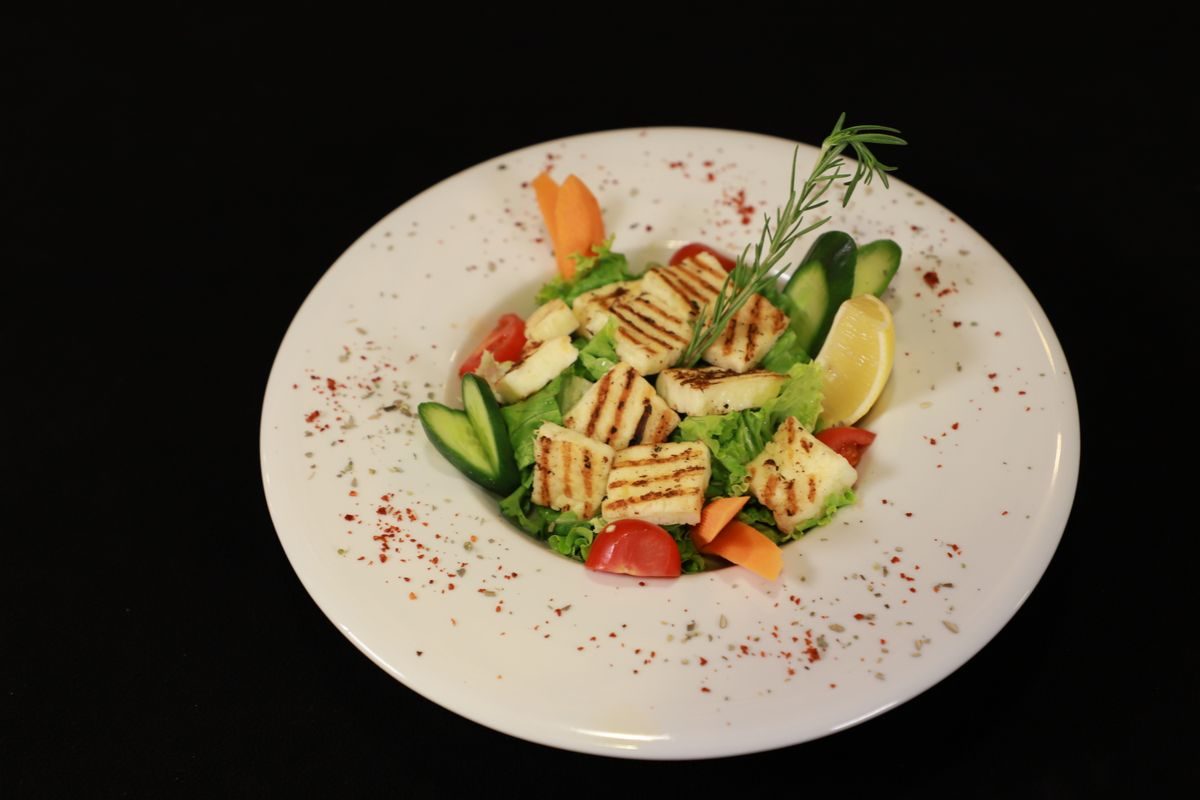
    This recipe is taken from Nick Nairn’s “Griddled halloumi,” published on BBC Food from his appearance on Ready Steady Cook — see the Griddled halloumi recipe on bbc.co.uk/food. It’s a simple open sandwich built around one central idea: griddle marks on halloumi and a plate of marinated courgette ribbons, stacked on toasted ciabatta.

    Ingredients

    • 1 courgette, cut into strips
    • 1/2 teaspoon fresh thyme leaves
    • 2 tablespoons olive oil
    • salt and freshly ground black pepper
    • 4 slices halloumi
    • 2 slices ciabatta, toasted

    Serves 1, though the quantities scale up easily for a group cooking outdoors.

    Method

    1. Mix the courgette strips, thyme leaves, olive oil and seasoning together in a bowl.
    2. Heat a griddle pan (or the direct-heat side of your grill) until hot. Place the courgette mixture on it and cook for 1-2 minutes.
    3. Add the halloumi slices and continue griddling for 3-4 minutes, until golden-brown stripes appear on the cheese.
    4. Arrange the toasted ciabatta on a plate and pile the griddled halloumi and courgette on top to serve.

    The original recipe doesn’t specify a target temperature — just “hot” — since halloumi’s whole trick on a grill is that it holds its shape rather than melting, so there’s some forgiveness in how hard you run the heat.

    Why Halloumi Doesn’t Melt

    According to Cyprus’s official Halloumi.cy Trade Service (Ministry of Energy, Commerce and Industry), the raw materials for halloumi are fresh sheep or goat’s milk, or a mixture of the two, with or without cow’s milk added — and when cow’s milk is used, the sheep or goat’s milk must always outweigh it. Rennet, mint leaves and salt round out the traditional recipe. The high-heat treatment during production is what gives halloumi its “special characteristic,” as the Trade Service describes it: an ability to be fried or grilled without melting or spreading, which is exactly what lets it develop the griddle marks in Nairn’s recipe instead of turning into a puddle.

    Cyprus, Not Greece

    Halloumi is frequently sold alongside Greek ingredients, but it’s specifically Cypriot. On 12 April 2021 the European Commission registered “Χαλλούμι (Halloumi) / Hellim” as a Protected Designation of Origin, according to the Cyprus Trade Service’s PDO page, meaning that as of 1 October 2021, only cheese made on the island under the traditional recipe can be sold in the EU under that name. The Cyprus Cheesemakers Association traces written references to halloumi back to the 16th century, including a 1556 document by the Venetian Doge Leonardo Donà, and notes that by 1928 it was already being exported to destinations including Egypt, Greece, France, the UK and the United States.

    Other Ways to Serve Grilled Halloumi

    Nairn’s courgette-and-ciabatta build is one option among several the Cyprus Trade Service lists as traditional pairings. Its food pairing guidance suggests serving grilled halloumi hot, simply drizzled with olive oil, or cubed and threaded onto a kebab skewer with thick chunks of tomato and onion. It also notes that halloumi in burgers has become a popular summer barbecue idea in its own right, served either as a standalone vegetarian patty or alongside meat. If you want to skip the courgette ribbons entirely, any of those are a legitimate substitute for Nairn’s version — the halloumi itself, and the griddle marks it takes on, is doing the real work in this recipe.

    A Word on the Diet Label

    Because halloumi is a dairy cheese made with rennet, it’s neither vegan nor automatically vegetarian — rennet can be sourced from an animal’s stomach or from a microbial/vegetarian alternative, and Cyprus’s own specification doesn’t say which one is compulsory. If you’re cooking for a strict vegetarian, check the packet for a “vegetarian” or “microbial rennet” label rather than assuming, since that varies by producer. The courgette, thyme, olive oil and ciabatta in the rest of the dish are plant-based, but ciabatta dough can occasionally include dairy or, less commonly, egg wash, so it’s worth a quick label check there too if you’re catering to anyone with a dairy allergy on top of the cheese itself.

    Keep reading

    Sources

  • Smoked BBQ Pulled Jackfruit: Girls Can Grill’s Method

    Smoked BBQ Pulled Jackfruit: Girls Can Grill’s Method

    This method comes from Christie Vanover, competitive pitmaster and founder of Girls Can Grill — see her Smoked BBQ Jackfruit recipe on girlscangrill.com. Unlike the skillet and oven versions that circulate online, this one actually goes into the smoker, so the fruit picks up real wood smoke rather than relying on liquid smoke or paprika to fake it.

    Why Canned Jackfruit Shreds Like Pulled Pork

    The trick is buying young jackfruit canned in water or brine, not the ripe fruit canned in syrup used for desserts. Young jackfruit is picked before it sweetens up, so the flesh stays firm and mild rather than fruity. Vanover describes it as having “a completely neutral flavor,” which is exactly why it takes on a BBQ rub and sauce so readily — there’s no competing taste to work around, just a fibrous texture that pulls apart in strands the way cooked pork shoulder does.

    Ingredients

    • 4 cans (14 oz each) young jackfruit in brine
    • 2 tablespoons BBQ pork rub
    • 1 1/2 cups barbecue sauce, divided

    Vanover is upfront that her own rub blend contains honey granules, and that many bottled barbecue sauces contain honey too — so if you want this dish to actually be vegan rather than just meat-free, check the label on whatever rub and sauce you use, or build your own from salt, pepper, granulated garlic, chili powder and brown sugar instead.

    Smoking the Jackfruit, Step by Step

    1. Drain the jackfruit and discard the canning liquid. Pull the chunks apart into strips by hand while they’re still cool — this is easier now than after cooking, and it means every strand gets seasoned and smoked rather than just the outside of a chunk.
    2. Spread the pulled fruit in a 13-by-9-inch pan and toss it with the BBQ rub.
    3. Heat a smoker or pellet grill to 250°F (121°C) using apple wood, and set up an indirect heat zone.
    4. Place the pan on the smoker and cook for 30 minutes. Toss the fruit so the smoke reaches every piece, then smoke for another 30 minutes.
    5. Remove the pan, stir in 1 cup of the barbecue sauce, and return it to the smoker for a final 15-20 minutes to let the sauce set.

    Total time runs about 1 hour 35 minutes, and the recipe makes roughly 10 servings — plenty for a crowd, with the leftover 1/2 cup of sauce held back for serving on the side.

    Serving It as Tacos or Sandwiches

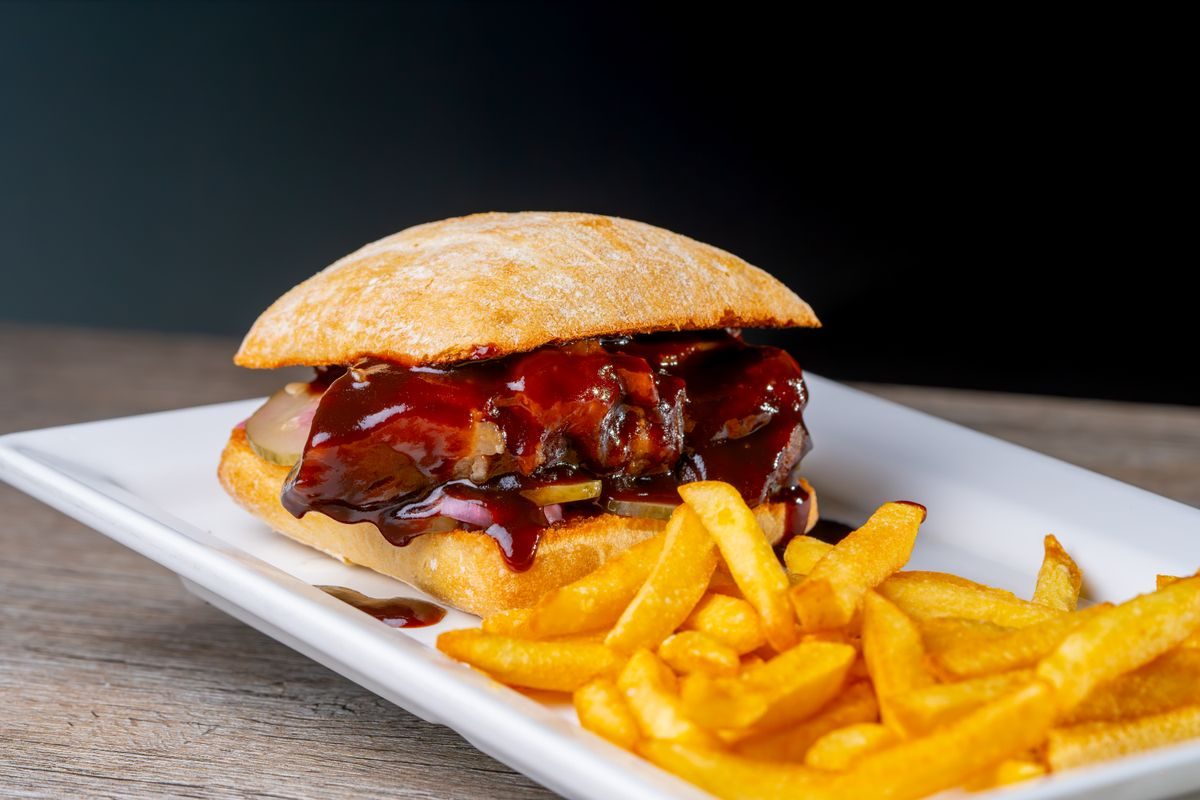
    Once it’s smoked and sauced, the jackfruit behaves like any other pulled barbecue filling. Pile it onto a bun with pickles for a sandwich, or wrap it in warm tortillas for soft tacos — the same batch also works as a pizza topping or over nachos if you’d rather skip the bread altogether. If you’re serving vegan guests, double-check the buns too, since some enriched doughs use dairy or egg.

    Where to Find It and What It Actually Tastes Like

    Vanover notes that canned jackfruit shows up in most Asian grocery stores, since it’s a common ingredient there beyond its newer role as a meat substitute, and it’s also increasingly stocked at natural grocers and larger supermarkets. As for texture once it’s cooked and shredded, she compares it to pulled chicken or pork, but firmer, with an underlying quality closer to mushroom than to fruit. She also flags that the canning brine leaves the dish a little higher in sodium than a from-scratch version would be, so rinsing the fruit before cooking is worth doing if that matters to you — though she personally skips the rinse because she likes what the brine adds to the flavor.

    A Note on the Fruit Itself

    Jackfruit (Artocarpus heterophyllus) is an evergreen tree native to tropical Asia, according to Encyclopaedia Britannica, which also notes it’s considered a staple food crop in Bangladesh and other parts of South and Southeast Asia. Britannica records it as the largest tree-borne fruit in the world, reaching up to about 2 feet long and 40 pounds on the tree — though the canned young fruit used in this recipe is a much more manageable size to work with than a whole one from the market.

    Keep reading

    Sources

  • America’s Test Kitchen Grilled Cabbage Wedges, Explained

    America’s Test Kitchen Grilled Cabbage Wedges, Explained

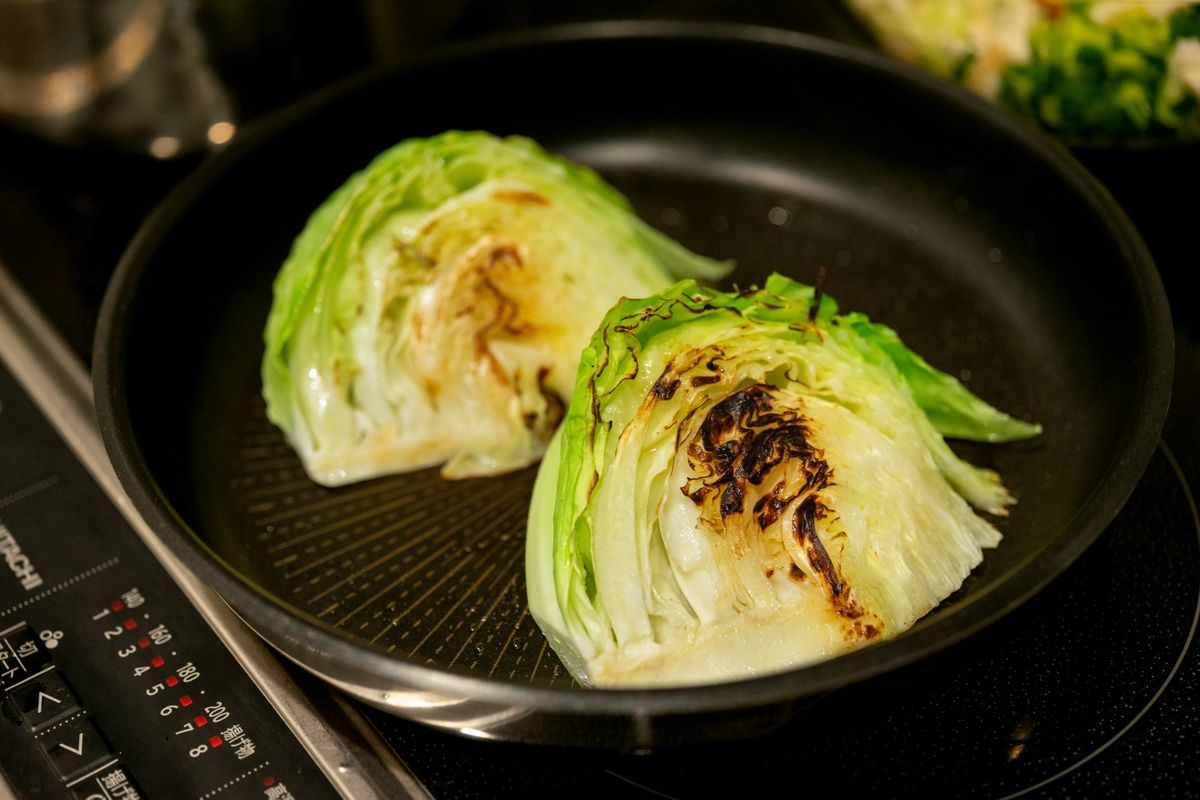
    This recipe is taken directly from America’s Test Kitchen, where Carolynn Purpura MacKay’s Grilled Cabbage was published in June 2013. It takes a plain green cabbage, salts it, brushes it with a thyme-and-lemon vinaigrette and grills it in wedges. It serves four, and the time is listed as 1 hour plus 45 minutes of salting.

    Ingredients (serves 4)

    • 1 head green cabbage (2 pounds, about 900 g, our conversion), cut through the core into 8 wedges
    • Salt and pepper
    • 1 tablespoon minced fresh thyme
    • 2 teaspoons minced shallot
    • 2 teaspoons honey
    • 1 teaspoon Dijon mustard
    • 1/2 teaspoon grated lemon zest, plus 2 tablespoons lemon juice
    • 6 tablespoons extra-virgin olive oil

    Method

    1. Sprinkle 1 teaspoon of salt over the cabbage wedges and leave them for 45 minutes.
    2. Whisk the thyme, shallot, honey, mustard, lemon zest and juice and 1/4 teaspoon pepper in a bowl. Whisk in the oil slowly until it is incorporated. Set aside 1/4 cup of this vinaigrette to serve.
    3. Heat the grill. For charcoal, the recipe opens the bottom vent fully, lights a large chimney starter (6 quarts of briquettes), pours the coals over the grill once the top ones are partly covered in ash, and covers with the lid vent fully open until hot, about 5 minutes. For gas, turn all burners to high, cover, and heat for about 15 minutes, then turn all burners to medium.
    4. Clean and oil the grate. Brush one cut side of each wedge with half of the vinaigrette and lay the wedges vinaigrette-side down. Grill, covered for gas, until well browned, 7 to 10 minutes.
    5. Brush the tops with the remaining vinaigrette, flip, and grill (covered for gas) until the second side is well browned and fork-tender, another 7 to 10 minutes.
    6. Move the wedges to a platter, drizzle with the reserved vinaigrette, and season with salt and pepper to taste.

    Why the Recipe Is Built This Way

    The published notes give three reasons for the steps that look fussy on paper.

    • Leave the core in. Cutting thick wedges through the core is what stops the wedges from falling apart on the grill; the recipe’s own tip is to leave the core intact.
    • Salt first. Salting the cabbage in advance draws out moisture, which turns to steam on the grill and helps soften the tough interior of the wedges.
    • Brush before grilling. The lemon vinaigrette goes on before the cabbage hits the heat, which the recipe says speeds browning as well as adding flavor. Reserving a portion means you still have a bright sauce to finish with.

    Handling the Cabbage Safely

    The FDA’s produce guidance is short and applies here. It says to wash all produce under running water before preparing it, and not to use soap, detergent or commercial produce wash. It also recommends cutting away damaged or bruised areas and washing your hands with soap and warm water for at least 20 seconds before and after preparing produce. If you also handle raw meat, poultry or seafood at the same barbecue, it suggests using a separate cutting board for produce.

    For leftovers, USDA’s Food Safety and Inspection Service says to put cooked food in shallow containers and refrigerate at 40°F (about 4°C, our conversion) or below within two hours. Its “danger zone” publication also says never to leave food out of refrigeration for more than 2 hours, or more than 1 hour above 90°F (about 32°C).

    Diet Note

    The vinaigrette contains honey, so the recipe is not vegan. It has no meat or fish ingredients as written, but we have not assessed the ingredients of the Dijon mustard, so we are not putting a vegetarian label on it either.

    Keep reading

    Sources

  • Weber’s Grilled Eggplant with Labneh and Pomegranate

    Weber’s Grilled Eggplant with Labneh and Pomegranate

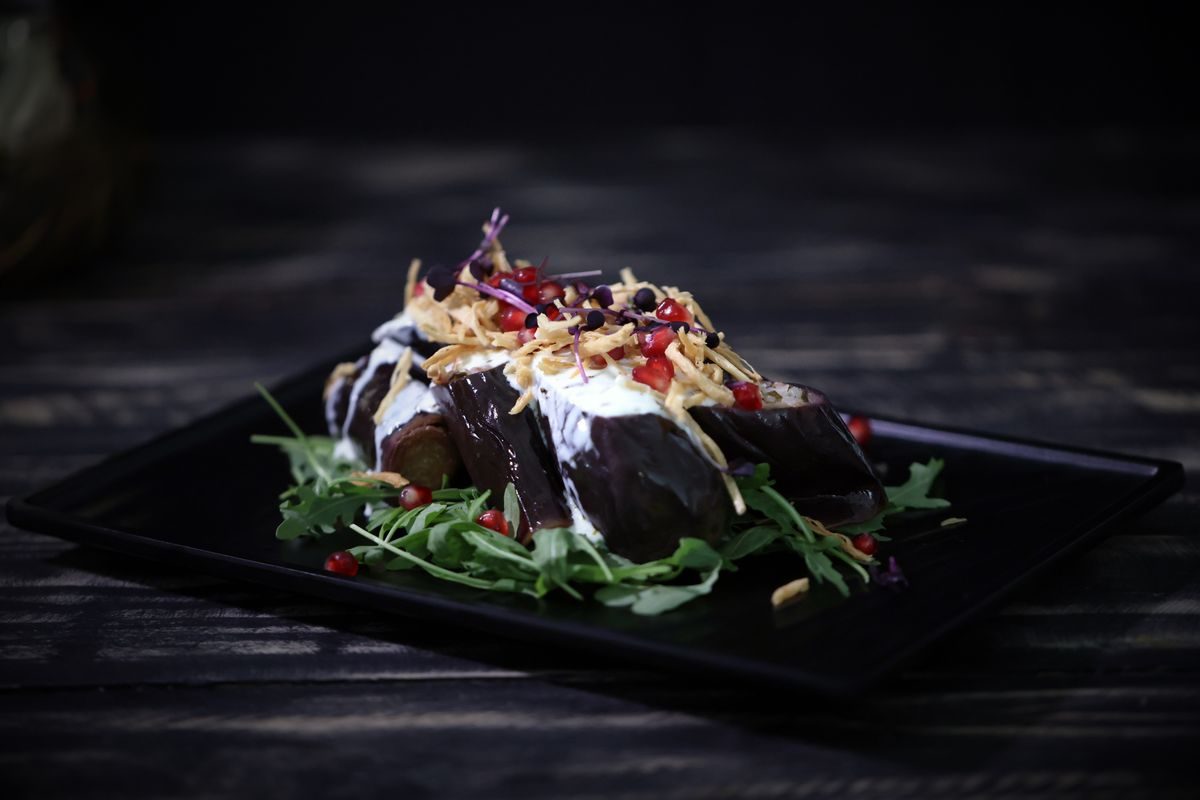
    This one is adapted directly from the Weber Grill Academy Canada, published on Weber’s site as Grilled Eggplant with Labneh and Pomegranate. It is a short, forgiving recipe: halved eggplants scored, seasoned, grilled in two stages, then finished with a cold, tangy sauce and a scatter of pomegranate seeds. Weber lists it as serving 2 to 4, with 10 minutes of prep and 12 to 15 minutes on the grill.

    Ingredients

    For the eggplant

    • 3 medium long eggplants
    • 1/4 cup olive oil (about 60 ml, our conversion)
    • 2 teaspoons thyme leaves
    • 1/2 teaspoon salt
    • 1/2 teaspoon pepper
    • 1 teaspoon za’atar
    • Seeds (arils) from 1 pomegranate
    • 1/4 cup chopped parsley

    For the sauce

    • 1/4 cup buttermilk
    • 1/4 cup labneh (or Greek yogurt)
    • 2 tablespoons olive oil
    • 1 garlic clove, crushed
    • 1/2 teaspoon za’atar
    • 1/4 teaspoon salt

    Method

    1. Set up the grill for both direct and indirect cooking over medium heat, 375 to 425°F (roughly 190 to 220°C, our conversion).
    2. Halve each eggplant lengthwise. Lightly score the flesh, taking care not to cut through the skin. Drizzle each half with olive oil, season with salt, pepper, thyme and za’atar, and let it sit for 5 to 10 minutes so the seasoning can absorb.
    3. Stir the sauce ingredients together and keep the bowl in the fridge until you serve.
    4. Place the eggplant cut-side down over direct heat for 3 to 5 minutes. Move the halves to the indirect side, turn them cut-side up, and cook another 5 to 7 minutes, until the insides are soft and creamy.
    5. Take them off the grill, spoon the sauce over the cut sides, and finish with a pinch of za’atar, plenty of pomegranate seeds and the parsley.

    Keeping the Sauce Safe Outdoors

    Since the labneh-and-buttermilk sauce is dairy, it belongs in the fridge until the eggplant is ready, exactly as the recipe says. USDA’s Food Safety and Inspection Service defines the “danger zone” as 40°F to 140°F (about 4°C to 60°C, our conversion), the range in which bacteria grow most rapidly. Its guidance is to keep cold food at or below 40°F, and never to leave food out of refrigeration for more than 2 hours, or 1 hour if the temperature is above 90°F (about 32°C). If you are serving outside, keep the sauce bowl in a container of ice and spoon it out at the table.

    Any cooked eggplant you do not finish should go into shallow containers and into the fridge at 40°F or below within two hours, per the same USDA publication. For the fresh produce, the FDA recommends washing it under running water before preparing it, and not using soap, detergent or commercial produce wash. It also advises washing hands with soap and warm water for at least 20 seconds before and after preparing produce.

    Diet Note

    This recipe contains dairy (buttermilk and labneh, or Greek yogurt), so it is not vegan. No meat or fish appears in the ingredient list, but we have not assessed the ingredients of the za’atar blend or how the dairy products were made, so we are not putting a vegetarian label on it. Check the labels if that matters to you.

    Keep reading

    Sources

  • Forks Over Knives Grilled Black Bean Burgers, Step by Step

    Forks Over Knives Grilled Black Bean Burgers, Step by Step

    This burger comes straight from the Forks Over Knives recipe library, where Ellen Boeke’s Grilled Black Bean Veggie Burgers was published in July 2023. Bean patties are notorious for sticking and crumbling on a grate, so it is worth learning from a published method that is built around that problem rather than improvising one.

    The patties combine mashed black beans with cooked brown rice and whole wheat panko for structure, plus smoked paprika and soy sauce for a savory, rounded flavor. Flaxseed meal soaked in water is stirred into the mix, and the recipe makes eight burgers.

    Ingredients (makes 8)

    • 1 tablespoon avocado oil (optional; the recipe includes an oil-free route)
    • 2 cans (15 ounces each) no-salt-added black beans, rinsed and drained, about 3 cups
    • 3/4 cup grated onion
    • 4 cloves garlic, minced
    • 2 teaspoons smoked paprika
    • 1/4 teaspoon freshly ground black pepper
    • 2 tablespoons flaxseed meal, plus 1/3 cup water
    • 1/4 cup no-salt-added tomato sauce
    • 2 tablespoons reduced-sodium soy sauce or tamari
    • 1 1/2 cups cooked brown rice
    • 1 cup whole wheat panko
    • 8 whole wheat hamburger buns, plus toppings such as sliced onion, lettuce, tomato, pickles, ketchup or mustard

    Method

    1. Cook the beans, onion, garlic, paprika and pepper in a large skillet over medium heat, stirring now and then, until the onion is tender. If you are using the optional oil, heat the skillet and coat it with the oil first, then add these five ingredients.
    2. Coarsely mash the bean mixture and let it cool a little.
    3. Stir the flaxseed meal into the 1/3 cup water in a large bowl and leave it for 15 minutes.
    4. Stir the tomato sauce and soy sauce into the flax mixture, then add the bean mixture, rice and panko and combine.
    5. Divide the mixture into eight portions and shape each into a patty about 3/4 inch (roughly 2 cm, our conversion) thick.
    6. Grill, covered, over medium heat for 5 minutes. Turn the patties carefully, then grill 5 minutes more, or until heated through. If they start to stick, the recipe suggests brushing them with water.
    7. Serve on the buns with your toppings.

    The Rule That Keeps Them Intact

    The recipe’s one big instruction is patience: wait the full 5 minutes before you try to flip, or the patties may stick and fall apart. That note is a good reason to resist the urge to check early.

    Food Safety: Cooked Rice and Leftovers

    Because this patty includes cooked brown rice, the UK Food Standards Agency’s rice guidance applies if you cook the rice ahead. The FSA notes that uncooked rice can carry Bacillus cereus spores that survive cooking, and that the longer cooked rice sits at room temperature, the more likely it is to become unsafe. Its advice is to chill leftover rice as quickly as possible, ideally within one hour, in smaller portions, rather than leaving it to cool in the pan or rice cooker, and to keep it in the fridge no more than one day.

    For cooked burgers you do not finish, USDA’s Food Safety and Inspection Service advises putting leftovers in shallow containers and refrigerating them at 40°F (about 4°C, our conversion) or below within two hours. It also says never to leave food out of refrigeration for more than 2 hours, or more than 1 hour when the temperature is above 90°F (about 32°C). For the toppings, the FDA advises washing produce under running water, without soap or detergent, and washing hands for at least 20 seconds before and after handling it.

    Diet Note

    Forks Over Knives files this recipe in its vegan burgers section, and the ingredient list as written has no meat, fish, dairy or eggs. We have not checked individual products, though: the ingredients of the panko, hamburger buns, tomato sauce, ketchup and pickles, and how any sugar in them was processed, are not assessed here, so check the labels if it matters to you.

    Keep reading

    Sources

  • Grilled Mediterranean Vegetable Skewers

    Grilled Mediterranean Vegetable Skewers

    This recipe is taken directly from Weber’s official recipe library: the Mediterranean Vegetable Skewers recipe published on weber.com (Weber’s UK site, so quantities are metric). It’s a simple marinate-then-grill approach built on three vegetables. We haven’t cooked it ourselves; this is a summary of Weber’s published method, plus a comparison with a second Weber vegetable recipe that skips the skewers.
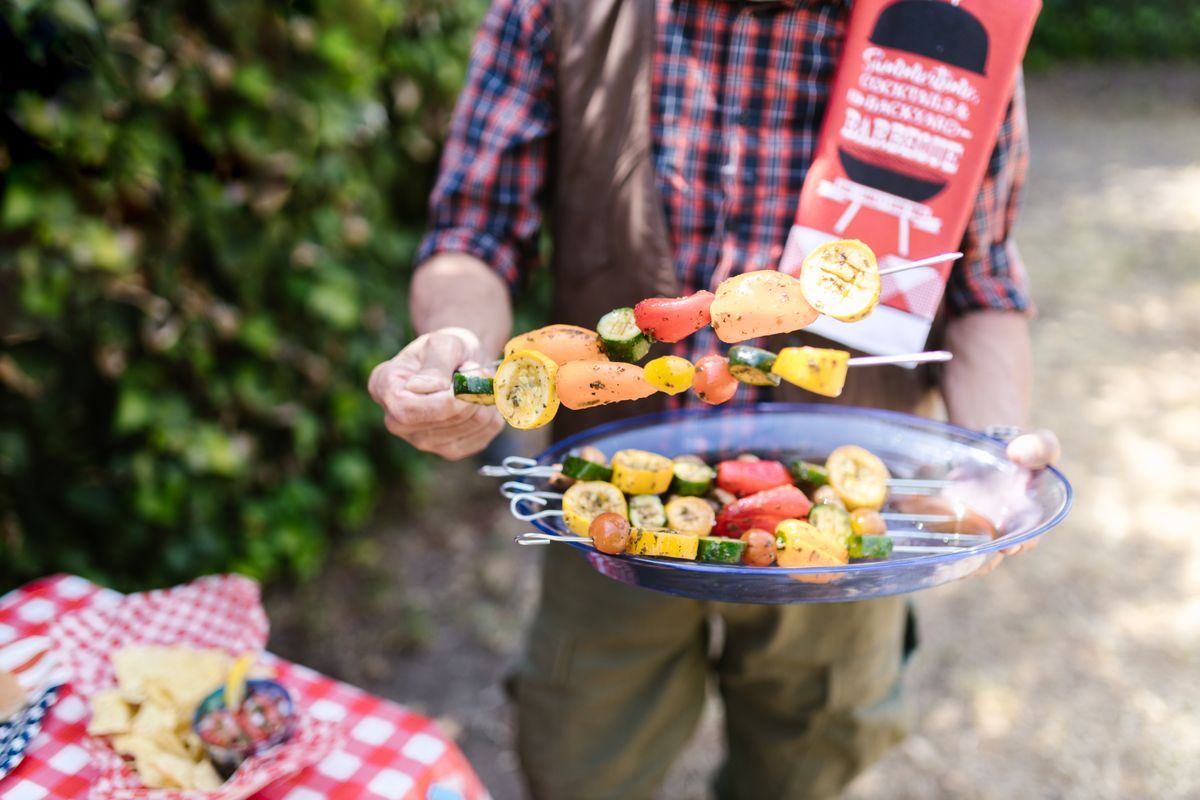
    About the Diet Label

    We aren’t labelling this recipe vegan or vegetarian. The ingredient list contains no meat, fish, dairy, egg or honey, but it does include balsamic and red wine vinegar, and we haven’t assessed how those are produced or fined. Check your bottles if that matters to you.

    Ingredients (serves 4)

    • 4 cloves garlic
    • 250 ml olive oil (about 1 cup, our conversion), as printed by Weber
    • 4 tablespoons balsamic vinegar
    • 2 tablespoons red wine vinegar
    • 2 teaspoons sea salt
    • 1 teaspoon freshly ground black pepper
    • 2 sprigs fresh thyme, leaves stripped
    • 1 small aubergine (eggplant)
    • 1 courgette (zucchini)
    • 1 red pepper and 1 yellow pepper (bell peppers)

    Method

    1. Finely grate the garlic into a bowl and stir in the oil, both vinegars, salt, pepper and thyme leaves.
    2. Cut the aubergine into rough 2 cm cubes (about 3/4 inch, our conversion) and the courgette into discs 2 cm thick.
    3. Halve the peppers lengthwise, remove stems and seeds, flatten them, and cut into irregular 2 cm squares.
    4. Put all the vegetables into the marinade, coat them well, cover, and refrigerate for at least one hour and up to four.
    5. Thread them onto skewers, alternating aubergine, courgette and pepper.
    6. Grill over medium direct heat, keeping the lid closed as much as you can, until tender. Weber lists 8 to 10 minutes of cooking time, with 10 minutes of prep.
    7. Turn the skewers only once. If they brown too fast, sear all sides first and then move them to indirect heat.

    Why the Uniform Cuts Matter

    Weber has you cut all three vegetables to roughly 2 cm, and then alternate them along the skewer. Matching the size of the pieces is the simplest way to help different vegetables on one skewer finish at close to the same time. The recipe doesn’t describe how each vegetable behaves, so treat “until tender” as the test and check a piece of each type before taking the skewers off.

    A Second Weber Method: No Skewers

    Weber’s Grilled Vegetables recipe reaches a similar result differently. It serves 6, with 15 minutes of prep and 10 minutes of direct-heat cooking, and it uses a grill pan or roasting basket rather than skewers. The ingredients are red and yellow bell peppers, 2 courgettes, 3 small spring onions, a preserved lemon, fresh coriander, olive oil, salt and pepper.

    The barbecue is set for direct heat at about 220°C (roughly 428°F, our conversion). The oiled pan is preheated, the pepper strips go in first with the lid closed for 3 minutes, and then the courgettes and spring onions are added and everything cooks 7 more minutes with regular stirring. The chopped preserved lemon and coriander go in toward the end. Two things stand out compared with the skewer recipe: there is no marinade at all, and the cuts are smaller, with the courgette chopped into pieces about 1/2 cm thick.

    Which you choose depends on your setup. Skewers give you neat portions and a one-turn cook, while a pan with regular stirring suits smaller pieces.

    Food Safety Notes

    Cooked vegetables are perishable too. USDA’s Food Safety and Inspection Service says food left out more than 2 hours, or 1 hour if temperatures are above 90°F (about 32°C, our conversion), should be discarded, and leftovers should go into shallow containers and into the refrigerator promptly. If your grill is also cooking meat or poultry, don’t use the same platter and utensils for raw and cooked items; FSIS notes that bacteria in raw juices can contaminate food that has been cooked safely.

    Keep reading

    Sources

  • Grilled Lemon-Ginger Tofu Steaks on the BBQ

    Grilled Lemon-Ginger Tofu Steaks on the BBQ

    This recipe is taken directly from Weber’s official recipe library: the Lemon-Ginger Tofu Steaks with Carrot and Cashew Salad recipe published on weber.com. Tofu can be awkward on a grill, so it helps to start from a tested method. We haven’t cooked it ourselves; this is a summary of Weber’s published method with some notes on how it compares to another Weber tofu recipe.

    About the Diet Label

    We aren’t labelling this recipe vegan or vegetarian. The ingredient list shows no meat, fish, dairy, egg or honey, but several items depend on the brand you buy, and we haven’t assessed them: the soy sauce, the chili-garlic sauce (Weber suggests Sriracha) and the light brown sugar, whose refining process can’t be judged from a recipe. Check those labels if you cook for someone who avoids animal products.

    Ingredients (serves 4)

    Marinade

    • 1/4 cup fresh lemon juice
    • 1/4 cup canola oil
    • 1/4 cup soy sauce
    • 2 tablespoons peeled, grated fresh ginger
    • 2 tablespoons packed light brown sugar
    • 1 teaspoon hot chili-garlic sauce

    Tofu

    • 2 packages (14 ounces each, about 400 g; our conversion) extra-firm tofu, not the silken style

    Carrot and cashew salad

    • 2 cups coarsely grated carrots
    • 1/2 cup roughly chopped cashews
    • 1/3 cup minced scallions, white and light green parts
    • 1/3 cup finely chopped cilantro or Italian parsley
    • 2 teaspoons fresh lemon juice
    • 1 teaspoon toasted sesame oil
    • 1 teaspoon soy sauce

    Method

    1. Whisk the marinade ingredients together in a medium bowl.
    2. Cut each tofu block lengthwise into four slices, each 1 inch (2.5 cm, our conversion) thick, and lay them in a single layer on a rimmed platter or baking dish.
    3. Pour the marinade over the slices and brush all sides. Cover and refrigerate for 3 to 4 hours, turning them now and then.
    4. Mix all the salad ingredients in a large bowl and leave it at room temperature.
    5. Set the grill up for direct high heat, 450-550°F (about 232-288°C, our conversion). Clean the grates, then lay a 12-by-16-inch sheet of aluminum foil directly on them.
    6. Put the tofu on the foil in one layer, keeping the leftover marinade back for glazing.
    7. Close the lid and grill 6 to 8 minutes, turning once and brushing now and then with the reserved marinade, until both sides are caramelized and the slices are warm.
    8. Serve on plates with the salad stacked on top, warm or at room temperature.

    A Second Weber Method to Compare

    Weber’s Asian Noodles with Grilled Tofu and Vegetables takes the same foil approach with a lighter touch. It uses a single 14-ounce block of extra-firm tofu, drained, cut lengthwise into five slices about 1/2 inch (1.3 cm, our conversion) thick, and patted dry. The slices are brushed with a peanut-butter dressing instead of soaked in a marinade, laid on foil, and grilled over direct medium heat, 350-450°F (about 177-232°C, our conversion), with the lid closed for about 8 minutes, turned once with a flexible spatula, until golden and warmed through.

    That gives you two ways to plan a cookout: a long refrigerated marinade and a very hot fire, or a quick brush-on dressing and moderate heat. The second recipe includes honey in the dressing, so it isn’t vegan, and it shouldn’t be swapped in for the lemon-ginger version if you’re cooking for that reason.

    Food Safety Notes

    Tofu is a perishable food. USDA’s Food Safety and Inspection Service says food left out for more than 2 hours, or 1 hour when temperatures are above 90°F (about 32°C, our conversion), should be discarded, and that leftovers should be refrigerated promptly in shallow containers.

    The recipe glazes the tofu with marinade saved from the bowl. FSIS’s guidance on marinades is written about raw meat and poultry: if a marinade has touched them and you want to reuse it, let it come to a boil for a few minutes first. If you’re grilling meat alongside the tofu, keep the tofu marinade and its brush separate from anything that has touched raw meat, and don’t share platters or utensils between raw and cooked food.

    Keep reading

    Sources