Recipes

Established outdoor cooking recipes from around the world.

  • Food Network Kitchen’s Grilled Zucchini

    Food Network Kitchen’s Grilled Zucchini

    This recipe comes from Food Network Kitchen: the Grilled Zucchini recipe by Julian Plovnick, published on foodnetwork.com. The accompanying article by Krissy Downey describes it as a simple, no-frills base for variations, and the method below follows the published steps. It serves 4, and the recipe lists 15 minutes for both total and active time.

    Ingredients

    • 3 tablespoons extra-virgin olive oil, plus more for the grill grates
    • 2 pounds (about 900 g) medium zucchini (about 4)
    • Kosher salt and freshly ground black pepper (1 teaspoon salt and 1/2 teaspoon pepper go on the zucchini before grilling)
    • 1 lemon, zested and juiced

    Every ingredient is a plant food, so the dish contains no meat, egg or dairy.

    Method

    1. Prepare the grill (or a grill pan) for medium-high heat and lightly oil the grill grates.
    2. Slice the zucchini lengthwise into 1/2-inch (about 1.3 cm) planks. In a medium bowl, toss the zucchini with 1 teaspoon salt, 1/2 teaspoon pepper and 2 tablespoons of the oil until fully coated.
    3. On an outdoor grill, lay the planks at a 45-degree angle across the grates. Grill uncovered until grill marks appear on the bottom, 2 to 4 minutes. Flip, keeping the planks at an angle, cover the grill, and cook until the second side is marked and the zucchini is fork-tender, 2 to 4 minutes longer.
    4. Move to a platter, sprinkle with the lemon zest, drizzle with the lemon juice and the remaining 1 tablespoon of oil, and season with salt and pepper. Serve immediately.

    If you are using a grill pan instead, the recipe gives longer times: 3 to 6 minutes per side, working in batches if needed to avoid crowding the pan.

    The Technique Notes Worth Keeping

    The accompanying article explains the reasoning behind several choices:

    • Size: it prefers a medium zucchini, about 6 to 8 inches (15 to 20 cm) long, which it says tends to be sweeter, more tender and less watery than oversized ones. The skin should be shiny, smooth and deep green, and the fruit firm rather than rubbery or squishy.
    • Planks: flat, wide 1/2-inch planks give more contact with the grates, cook through quickly without turning mushy or burning, and hold their shape better than slices or rounds, making them easier to flip.
    • Do not move them: clear, even grill marks come from leaving the zucchini alone once it is on the grill.
    • Do not overcook: it says about 3 minutes per side is all the zucchini needs, and that overcooked zucchini is mushy and less flavorful.
    • Stems: you can leave the stem on rather than trimming it, though the stems of some varieties and larger zucchini can be tough.

    Variations From the Same Source

    Food Network Kitchen suggests a few finishes:

    • Mediterranean: crumbled feta, fresh oregano and a drizzle of olive oil.
    • Zucchini Parmesan: after flipping, top with tomato sauce and grated Parmesan and let the cheese toast during the last 2 to 4 minutes.
    • Asian-inspired: chili crisp and sesame seeds over steamed rice.
    • Antipasto style: wrap in prosciutto before grilling and finish with balsamic glaze.

    The feta, Parmesan and prosciutto versions are no longer vegan, and the prosciutto version is not vegetarian.

    What to Serve It With

    Food Network Kitchen says grilled chicken is always a good pairing, and also suggests the zucchini as a lighter alternative to french fries beside a cheeseburger, a side for grilled steak, or an addition to a rice bowl, or cut up in lemon pasta. The recipe page lists a per-serving analysis for the base version (1 of 4 servings): 136 calories, 11 g total fat, 10 g carbohydrates, 3 g fiber, 3 g protein and 602 mg sodium.

    Storing and Reheating

    The article says to keep leftovers in an airtight container in the refrigerator for up to three days. Microwaving can make the texture mushier; for a firmer result it suggests reheating quickly in a skillet with a tablespoon of olive oil over medium-high heat, without letting the zucchini wilt down too much.

    Keep reading

    Sources

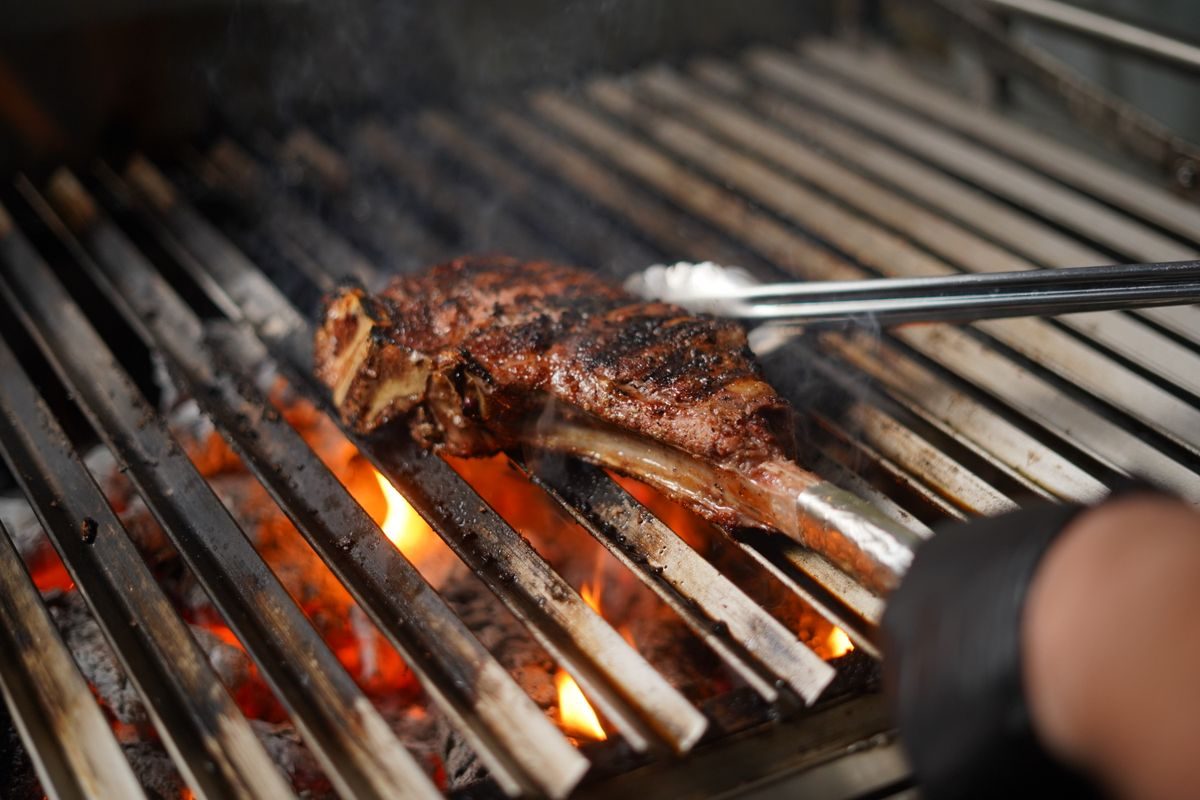
  • Reverse-Seared Tomahawk Ribeye: Hey Grill Hey’s Recipe

    Reverse-Seared Tomahawk Ribeye: Hey Grill Hey’s Recipe

    This recipe is taken from Susie Bulloch’s “Perfect Reverse Seared Tomahawk Steak” on Hey Grill, Hey. It is a slow-smoke-then-sear method for one big bone-in ribeye. We are reporting her published recipe, not our own test results. Celsius conversions are ours, and where her page contradicts itself or the USDA guidance, both figures are shown.

    A tomahawk is a bone-in ribeye with the rib bone left almost fully attached. Bulloch says the long bone adds nothing in flavor but makes for a striking presentation. If you want the general logic of cooking a thick cut at low heat first and searing last, this site has a separate reverse-sear technique article; this page sticks to her recipe.

    Ingredients

    • 1 tomahawk steak, about 3 pounds (roughly 1.4 kg)
    • 2 tablespoons of her Beef Rub, or 2 teaspoons each of salt, pepper and garlic powder
    • 2 tablespoons salted butter, cut into pads
    • Hardwood for smoke. She used oak and says hickory or alder also work.

    The recipe card lists two servings.

    Choosing the Steak

    Bulloch looks for bright red meat with no dark or brownish spots, and suggests checking it away from the meat-case lighting. If you buy from a butcher, she says her butcher cuts hers from the center of the rack, as thick as she likes. She also wants good marbling, and for ribeyes she picks a steak with a large spinalis muscle on top and a well-marbled eye in the center.

    Method

    1. Take the chill off. Remove the steak from the fridge 1 to 2 hours before cooking so it comes to room temperature.
    2. Heat the grill or smoker to 225°F (about 107°C).
    3. Season. Coat all sides liberally with the rub or salt and pepper, and press it into the meat with your hand rather than sprinkling. She warns that tomahawks are notoriously thick and need plenty of seasoning.
    4. Smoke. Set the steak directly on the grates, close the lid, and cook until the internal temperature is within 10°F of your target doneness. Her recipe card says to cook to 115°F (46°C) for medium rare and reports about 1 hour.
    5. Heat the skillet. Take the steak off to a plate. Warm a cast-iron skillet (the recipe card says medium-high; the post text says high), add the butter and let it melt and bubble. If searing on the grill instead, brush each side with butter.
    6. Sear. Sear each side for about 2 to 3 minutes until it reaches the doneness you want.
    7. Rest 10 to 15 minutes, then slice.

    Pull Temperatures

    The recipe card’s final temperatures are 125°F (52°C) for rare, 135°F (57°C) for medium rare, 145°F (63°C) for medium, 155°F (68°C) for medium well and 160°F (71°C) for well done. She recommends medium rare. The post also carries a table of temperatures for taking the steak off the smoker: 115°F for rare, 125°F for medium rare, 135°F for medium, 145°F for medium well and 150°F for well done. That table says 125°F for medium rare, whereas the recipe card says 115°F. The post’s text says to pull the steak about 10°F short of your desired doneness, which fits the table (125°F out, 135°F final) but not the card’s 115°F. Because the two disagree, rely on your thermometer and check it during the sear.

    Food Safety Note

    USDA’s Food Safety and Inspection Service advises cooking beef steaks to a minimum of 145°F (63°C), followed by a rest of at least three minutes. Bulloch’s medium-rare target of 135°F is below that, and only her medium (145°F) matches it. If you want to follow the USDA figure, finish the sear at 145°F and rest the steak for at least three minutes. Her 10 to 15 minute rest meets that timing.

    Skillet or Grill for the Sear

    For the sear, Bulloch offers two routes: a preheated 12-inch cast-iron skillet with melted butter, or the grill turned to high with butter brushed on the steak. The recipe card describes only the skillet.

    Timing Notes

    Bulloch gives roughly 1 hour of smoke and a total time of 1 hour 15 minutes, but tells readers to cook by thermometer, not clock, since every steak varies. A quick-read thermometer is, in her words, the most important tool for this method. She explains the appeal of reverse searing as an evenly cooked interior, as opposed to dry outer edges and a raw center.

    Keep reading

    Sources

  • Grilled Pound Cake with Berries: Taste of Home’s Recipe

    Grilled Pound Cake with Berries: Taste of Home’s Recipe

    This recipe is taken directly from Taste of Home‘s Test Kitchen — the Grilled Pound Cake with Berries recipe published on tasteofhome.com. It’s a short, six-serving recipe built around store-bought or homemade pound cake, so it works as a quick dessert to tack onto a cookout without lighting a second fire or firing up an oven.

    The idea is simple: butter goes on both sides of pre-sliced pound cake, and the slices pick up a light char over indirect heat while a fresh berry mixture and a lemon whipped cream come together on the side. Taste of Home’s own note on the recipe sums up the appeal — “the toasty flavor of lightly grilled pound cake makes it the perfect accompaniment for summertime berries.”

    Ingredients

    • 1 cup sliced fresh strawberries
    • 1 cup fresh raspberries
    • 1 cup fresh blueberries
    • 5 tablespoons sugar, divided
    • 1 tablespoon minced fresh mint
    • 1 cup heavy whipping cream
    • 1 tablespoon lemon juice
    • 1 teaspoon grated lemon zest
    • 3 tablespoons butter, softened
    • 6 slices pound cake, about 1 inch thick

    Method

    Making the Berry Mixture

    In a large bowl, combine the strawberries, raspberries, blueberries, 2 tablespoons of the sugar and the mint. Set the mixture aside so the berries have time to release some juice while you prepare the rest.

    Whipping the Lemon Cream

    In a small bowl, beat the heavy whipping cream until it begins to thicken. Beat in the remaining sugar, then add the lemon juice and zest and beat until soft peaks form. Cover and refrigerate the whipped cream until you’re ready to serve.

    Grilling the Cake

    Spread the softened butter over both sides of the pound cake slices. Grill them uncovered over indirect medium heat for 1 to 2 minutes on each side, or until light golden brown. Serve the warm slices with the berry mixture and the lemon whipped cream.

    Timing and Serving Size

    Taste of Home lists this as a 25-minute recipe in total — about 20 minutes of prep and 5 minutes of actual grill time — and it yields 6 servings, one slice of cake per person topped with berries and cream. Per the recipe’s own nutrition figures, one serving comes to 377 calories, 27g fat, 136mg cholesterol, 193mg sodium, 34g carbohydrate and 3g protein.

    A Few Practical Notes

    Because the cake only needs a minute or two per side over indirect heat, it’s easy to scorch if your grill is running hotter than expected — keep a close eye on the slices rather than walking away, since the sugar in the crust browns fast once it starts. If you’re already grilling something else over direct heat, the indirect side is usually free for the last few minutes of that cook, which makes this an easy dessert to fit in right at the end of a cookout rather than a separate production.

    The recipe calls for fresh berries specifically, so give them a rinse before slicing and hulling the strawberries — the berry mixture sits out at room temperature while the cake grills, so it’s worth keeping that window short if you’re cooking on a warm day.

    Getting the Timing Right

    Both the berry mixture and the lemon whipped cream are built to hold: the recipe has you set the macerating berries aside while the cream is prepared, then refrigerate the finished cream until serving, so both components can realistically be made before you even light the grill. That leaves the grilling step — the fastest part of the recipe at just a few minutes total — for right before you plate, so the cake reaches the table warm while the cream is still cold.

    Since the recipe only calls for indirect medium heat and a short grill time, this is also one of the easier desserts to fit onto a grill that’s already got something else going. On a two-zone charcoal or gas setup, the indirect side is simply the area without coals or an unlit burner underneath — keep the cake slices there rather than over direct flame so they toast instead of scorching in the minute or two the recipe calls for.

    Serving It

    Because the recipe is written for 6 servings of one cake slice each, it scales easily if you’re topping off a smaller cookout — halve the berry and cream quantities for 3 servings, or grill extra slices of cake to stretch the same batch of topping further if you’re feeding a bigger group. Either way, plate the cake first, spoon the berry mixture over it while both are still warm and cold respectively, and finish with a dollop of the lemon whipped cream so it doesn’t melt into the berries before serving.

    Keep reading

    Sources

  • Grilled Pineapple Upside-Down Cake: Weber’s Recipe

    Grilled Pineapple Upside-Down Cake: Weber’s Recipe

    This recipe is taken directly from Weber’s official recipe library — the Grilled Pineapple Upside-Down Cake recipe published on weber.com. Unlike a grilled pineapple side dish, this one is a full from-scratch cake, baked in a cast-iron skillet with the lid closed so the grill works like an outdoor oven.

    The method leans on the grill for two separate jobs: first as a direct-heat surface to char fresh pineapple rings, and then as an indirect oven to bake the batter poured right over that fruit in the same skillet. Weber’s recipe serves 6 to 8 and calls for a 12-inch cast-iron skillet as the one piece of special equipment.

    Ingredients

    Topping

    • 6 rings fresh (not canned) pineapple, each 1/2 inch thick
    • 2 tablespoons unsalted butter, melted
    • 1/2 cup packed dark brown sugar
    • 1/4 cup heavy whipping cream
    • 1/2 teaspoon ground cinnamon

    Batter

    • 1 cup all-purpose flour
    • 1 teaspoon baking powder
    • 1/2 teaspoon kosher salt
    • 1/4 teaspoon baking soda
    • 2/3 cup buttermilk (or whole milk mixed with 1 tablespoon fresh lemon juice)
    • 2 large eggs
    • 1 teaspoon pure vanilla extract
    • 1/4 pound (1 stick) unsalted butter, softened
    • 3/4 cup granulated sugar

    Method

    Charring the Pineapple

    1. Prepare the grill for indirect cooking over medium heat, 350°F to 450°F (177°C to 232°C).
    2. Brush the pineapple rings with the melted butter. Brush the cooking grates clean, then grill the pineapple over direct heat, lid open, until nicely marked, 4 to 6 minutes, turning once. Remove from the grill and let cool. Leave one ring whole and cut the rest into halves.

    Building the Skillet Topping

    1. In the 12-inch cast-iron skillet over direct heat, combine the brown sugar, cream, cinnamon and any melted butter left over from brushing the pineapple. Cook until the sugar has melted and the liquid starts to bubble around the outer edge, about 2 minutes.
    2. Remove the skillet from the heat and set it on a sheet pan. Place the whole pineapple ring in the center, then arrange the pineapple halves around it. Set aside.

    Mixing and Baking the Cake

    1. In a large bowl, mix the flour, baking powder, salt and baking soda. In a small bowl, whisk the buttermilk, eggs and vanilla.
    2. In a large bowl, using an electric mixer, cream the butter and granulated sugar on medium-high speed until light and fluffy, 2 to 4 minutes. With the mixer on low, add the flour mixture in thirds, alternating with two equal additions of the buttermilk mixture, beginning and ending with the flour mixture. Mix until smooth, scraping down the sides as needed.
    3. Spread the batter evenly over the pineapple in the skillet with a rubber spatula.
    4. Bake the cake over indirect medium heat, keeping the grill as close to 350°F (177°C) as possible, lid closed, until the top is golden brown and a wooden skewer inserted into the center comes out clean, 40 to 50 minutes.
    5. Wearing barbecue mitts, remove the cake from the grill and let it cool at room temperature for about 10 minutes.
    6. Run a paring knife around the edge of the skillet to loosen the cake. Set a serving platter over the top of the skillet, then, wearing barbecue mitts, invert the skillet and platter together and slowly lift the skillet away. Replace any pineapple that stuck to the bottom. Let the cake cool briefly before slicing into wedges.

    Timing at a Glance

    Weber lists 30 minutes of prep time and 46 to 58 minutes of grilling time in total, which lines up with the roughly 6 minutes to char the pineapple plus the 40-to-50-minute bake once the batter goes on. The cake is best served warm or at room temperature the same day it’s made, according to the recipe.

    A Few Practical Notes

    The two-stage heat setup — direct for the pineapple, indirect with the lid down for the cake — means you need a grill that can hold a steady temperature around 350°F for the better part of an hour, so this is a better fit for a kettle or gas grill you can dial in than for a small hibachi-style setup with no lid. Running the skillet on direct heat first to build the caramel topping, then moving straight to indirect for baking, also means you don’t need to dirty a second pan for the topping — it’s the same skillet the cake bakes in.

    Because the recipe calls for fresh pineapple rather than canned, plan to core and slice your own pineapple into 1/2-inch rings before you start, since the grilling and skillet steps both assume rings of that thickness.

    Keep reading

    Sources

  • Campfire Doughboys: KOA’s Biscuit-on-a-Stick Recipe

    Campfire Doughboys: KOA’s Biscuit-on-a-Stick Recipe

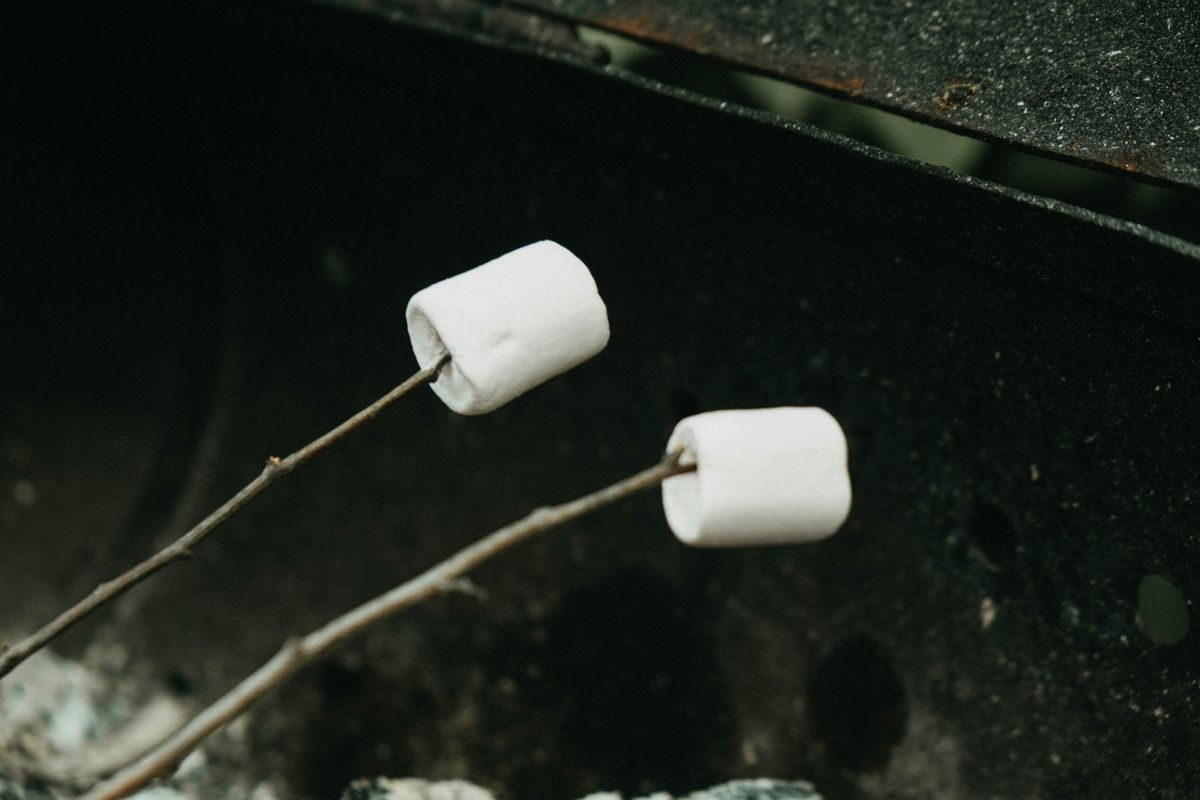
    This recipe is taken directly from KOA (Kampgrounds of America), the campground network’s official camping recipes collection — the Dough Boys recipe published on koa.com, submitted by fellow camper Daphne Weaver of Petersburg, VA. It’s one of the simplest campfire desserts around: a roll of biscuit dough, a stick and a fire are basically the whole ingredient list.

    Dough boys go by a few names around different campgrounds — twists, doughboys, stick bread — but the technique is the same everywhere: dough gets wrapped around a stick, held near the fire until it sets, then pulled off and filled. KOA’s version keeps it as a sweet, cinnamon-sugar treat, which makes it an easy one to hand to kids at the campsite once you’ve covered the basics of handling a stick safely near an open flame.

    Ingredients

    • Instant biscuits (from a refrigerated tube or roll)
    • Squeezable butter
    • Cinnamon
    • Sugar

    Method

    Prepping the Stick

    Find a large stick, at least 1 inch in diameter, and cover the end with foil. This gives you a clean, food-safe surface to wrap the dough around instead of bare bark.

    Wrapping and Roasting

    1. Tear a single biscuit off the roll of biscuits.
    2. Stretch the biscuit over the foil-covered end of the stick.
    3. Roast the biscuit over the campfire until it’s light brown all over.
    4. Remove the hardened biscuit from the stick.
    5. Fill the inside with squeezable butter and sprinkle with a cinnamon and sugar mix.
    6. Squeeze the biscuit together to seal in the filling.

    That’s the entire recipe as KOA publishes it — no exact roasting time is given, because it depends heavily on how close you’re holding the dough to the coals and how hot your fire is running. Rotate the stick slowly and pull it back if the outside is browning faster than the inside is cooking through.

    Cooking Safely Around the Fire

    Because this recipe means holding food, and often a child’s hands, right next to an open flame for several minutes at a stretch, it’s worth pairing it with the basic fire-safety points from the National Park Service and Smokey Bear before you start. The NPS’s overview of campfire cooking advises keeping a safe distance and using long-handled tools, framing it as staying “close enough to toast marshmallows, not hands.” The same NPS page also recommends looking for cooking tools with insulated handles to avoid burns, and keeping a close eye on children around any campfire.

    Smokey Bear’s official campfire safety guide adds a few more points that apply directly here: keep the fire small rather than tall, stay at least 15 feet from tents and other flammable gear when you’re set up near the pit, and never leave the fire unattended while anyone is cooking over it. When you’re done for the night, Smokey Bear’s extinguishing method is drown, stir, drown and feel — pouring water over the coals until the hissing stops, stirring it in with a shovel, and confirming with the back of your hand that nothing is still hot before you walk away.

    A Few Practical Notes

    Because the dough is hollow once it’s roasted, dough boys work like a pocket — the KOA recipe fills it with butter and cinnamon sugar, but the same shell holds up to other fillings if you want to switch it up, like a spoonful of jam or a few mini marshmallows and chocolate chips. Just keep in mind the filling goes in after the dough comes off the stick and has cooled enough to handle, not before.

    If you’re cooking for a group, it helps to stagger who’s roasting at any one time rather than crowding several long sticks around the same small fire — both for the sake of even heat and so everyone has enough room to keep their stick at a safe distance the whole way through.

    Keep reading

    Sources

  • Grilled Bananas Foster: Grill Girl’s Rum Caramel Recipe

    Grilled Bananas Foster: Grill Girl’s Rum Caramel Recipe

    This recipe is taken directly from GrillGirl.com, the site run by cookbook author Robyn Lindars — the Bananas Foster Grilled with Myer’s Rum Sauce recipe published on grillgirl.com. Lindars has appeared on The Today Show, the Cooking Channel and the Travel Channel, and competes with the Shed BBQ Competition Team, so her grill-safe method for building the rum caramel sauce right on the cooking grate is a solid baseline before you start adjusting it to your own taste.

    Classic bananas foster is normally built in a skillet on the stovetop. This version moves the whole process outside: the caramel sauce reduces in a saucepan set on the indirect side of the grill while the bananas themselves char, skin-on, over direct heat a few inches away. The result is a dessert that picks up a bit of smoke alongside the usual butter, brown sugar and rum flavors.

    Ingredients

    For the bananas

    • 2 bananas, sliced lengthwise with the skin left on
    • 2 teaspoons cinnamon

    For the rum caramel sauce

    • 2 tablespoons butter
    • 1/4 teaspoon allspice
    • 1/4 teaspoon nutmeg
    • 1/2 cup brown sugar
    • Dash of salt
    • 1/3 cup dark rum (the recipe specifies Myer’s Rum)

    To serve

    • Vanilla ice cream
    • 1/4 cup candied pecans or pralines (optional)

    Method

    1. Prepare a grill for medium heat at 350°F (177°C), creating a direct zone and an indirect zone.
    2. In a grill-safe saucepan set on the indirect side, melt the butter, then add the brown sugar, allspice, nutmeg and salt, stirring to combine.
    3. Add the rum and let the sauce reduce while you work on the bananas.
    4. Grill the bananas exposed-side down over direct heat until char marks form, then flip and repeat on the skin-on side — leaving the skin on helps keep the bananas intact as they cook.
    5. Remove the bananas from the grill and sprinkle with the cinnamon.
    6. Scoop ice cream into a bowl. Remove each banana from its skin and set it on top of the ice cream, then drizzle the rum sauce generously over the banana and ice cream. Finish with candied pecans or pralines if you like.

    Why the Skin Stays On

    The one detail worth calling out is the instruction to slice the bananas lengthwise without peeling them first. Grilling fruit without its skin usually means it falls apart on the grate as it softens; the peel here acts as a shell that holds the banana together through both sides of direct heat, so you get clean char marks on the cut side and a fully cooked, intact piece of fruit to plate rather than banana pulp stuck to the grates. You only peel it away once it’s off the heat and ready to serve.

    A Few Practical Notes

    Because the sauce is built in a saucepan rather than flambéed tableside like the original New Orleans version, there’s no open-flame moment to manage — the alcohol cooks off gradually as the rum reduces on the indirect side rather than being ignited. That makes this a more forgiving way to get the same flavor profile without the theatrics, though it does mean you should budget a few extra minutes for the sauce to thicken before the bananas come off the grill.

    If you don’t want to buy a bottle of dark rum for one dessert, the recipe itself notes a preference for Myer’s specifically, so it’s worth checking whether you already have a similar dark or spiced rum on hand rather than picking up something unfamiliar. The sauce, cinnamon and pecans are what carry most of the flavor here, so small substitutions in the rum shouldn’t throw off the result.

    Serve this one immediately — the whole point is the contrast between the warm, charred banana and rum sauce against cold vanilla ice cream, and that contrast disappears fast once the ice cream starts to melt into the sauce.

    Keep reading

    Sources

  • Taste of Home’s Cajun Seafood Boil in Foil

    Taste of Home’s Cajun Seafood Boil in Foil

    This recipe is taken directly from Taste of Home — Seafood Boil on the Grill (published on the recipe card as “Cajun Boil on the Grill”), created by home cook Allison Brooks of Fort Collins, Colorado, and tested by the Taste of Home Test Kitchen. It swaps the giant stockpot and strainer basket a traditional seafood boil needs for individual foil packets on the grill, which makes it easy to scale up or customize per person.

    The packet method solves two real problems with a stovetop boil: it doesn’t fill the house with seafood smell, and there’s no big pot or basket to buy or store afterward. Everything steams inside its own sealed foil packet instead, so the corn, potatoes, shrimp and sausage all pick up the same seasoning without ever touching boiling water.

    Ingredients

    Makes 4 packets.

    • 1 package (20 ounces) refrigerated red potato wedges
    • 2 salmon fillets (6 ounces each), halved
    • 3/4 pound uncooked shrimp (31-40 count per pound), peeled and deveined
    • 1/2 pound summer sausage, cubed
    • 2 medium ears sweet corn, halved
    • 2 tablespoons olive oil
    • 1 teaspoon seafood seasoning
    • 1/2 teaspoon salt
    • 1/4 teaspoon pepper
    • 1 medium lemon, cut into 4 wedges
    • Optional: butter and chopped parsley, for serving

    Method

    1. Cut four rectangles of heavy-duty aluminum foil, about 18×12 inches each.
    2. Divide the potato wedges, salmon, shrimp, sausage and corn evenly among the four pieces of foil.
    3. Drizzle each portion with olive oil, then sprinkle with the seafood seasoning, salt and pepper.
    4. Squeeze the lemon wedges over each packet and tuck the squeezed wedges in with the rest of the ingredients.
    5. Fold the foil up and around the mixture, sealing each packet tightly so steam can’t escape.
    6. Grill the packets, covered, over medium heat for 12 to 15 minutes, or until the salmon flakes easily with a fork, the shrimp have turned pink, and the potatoes are tender.
    7. Open each packet carefully — hot steam will escape immediately — and serve with butter and chopped parsley if you like.

    Checking for Doneness Safely

    Taste of Home’s cues here are all visual: salmon that flakes with a fork, shrimp that have turned pink, potatoes that are fork-tender. Those are reasonable checks, and the fish cue in particular lines up with FDA guidance — the agency’s standard for fin fish is that it’s done at 145°F (63°C), or when the flesh is opaque and separates easily with a fork. For the shrimp, the FDA’s benchmark is flesh that’s gone firm, pearly and opaque, alongside that same 145°F reference point. Because everything is sealed in foil, you can’t see color changes as they happen, so if you’re at all unsure when you open a packet at the 12-minute mark, reseal it and give it another few minutes rather than serving it underdone.

    Note that this particular recipe adds two salmon fillets to the packets alongside the shrimp, corn, potatoes and sausage — Taste of Home includes it “for added heft,” but it’s easy to leave out if you’d rather keep the packets closer to a classic boil.

    A Few Practical Notes

    Use genuinely heavy-duty foil, or double up on regular foil — a torn packet mid-grill means lost steam and juices dripping onto the burners. Seal the seams with a tight double fold rather than just pinching the edges closed, since that’s usually where a packet gives out first.

    Summer sausage is fully cooked and shelf-stable already, so its job here is mostly to render a little fat and pick up smoke flavor rather than to cook through — if you’d rather use a raw Cajun-style link like andouille, budget extra time and confirm it separately, since it won’t be done on the same schedule as the shrimp and potatoes.

    Leftovers keep in an airtight container in the fridge for up to four days; reheat gently in a covered pan with a splash of water so the seafood doesn’t dry out or turn rubbery.

    Keep reading

    Sources

  • Judy Jumonville’s Grilled Soft-Shell Crabs

    Judy Jumonville’s Grilled Soft-Shell Crabs

    This recipe is taken directly from Food Network — Grilled Soft-Shell Crabs, courtesy of Judy Jumonville. It’s a simple low-and-slow grill method built around a Cajun-spiced lemon butter baste, finished with a slice of tomato and a little melted mozzarella.

    Soft-shell crab is one of the few seafoods where the whole point is that you’re not picking anything out of a shell. Once you understand what makes it different from a hard-shell crab, the cooking itself is fairly forgiving — this is a low-fire, baste-as-you-go method rather than a fast sear.

    What Makes a Soft-Shell Crab Different

    A soft-shell crab isn’t a separate species — it’s a blue crab (Callinectes sapidus) caught in the brief window right after it has molted its old, hard exoskeleton, before the new one has had time to harden. NOAA Fisheries describes the stages watermen watch for as crabs approach a molt, moving from hard-shell, to peeler, to buster, to soft-shell — a crab that has just molted and hasn’t hardened back up yet. Because that window is so short, crabs are pulled from the water right at that stage and sold whole, soft shell and all.

    That timing is what changes how you eat it. With a hard-shell crab, you crack the shell and pick out the meat. A soft-shell crab skips that step almost entirely: as Wikipedia’s summary of the term puts it, the shell is soft enough that “almost the entire animal can be eaten.” The only parts removed during cleaning are the mouthparts, gills and abdominal cover — everything else, shell included, is soft enough to eat.

    Ingredients

    For the crabs

    • 6 to 8 soft-shell crabs, cleaned (gills, eyes and mouth removed)
    • Sliced tomatoes
    • Mozzarella cheese

    For the lemon butter sauce

    • 1 pound butter
    • 8 to 10 lemons, juiced
    • 1 tablespoon Cajun seasoning
    • 1 tablespoon Worcestershire sauce
    • 1 tablespoon minced garlic
    • Salt, to taste

    Method

    1. Make the lemon butter sauce: combine the melted butter with the lemon juice, Cajun seasoning, Worcestershire sauce, garlic and salt, and let it simmer for about 20 minutes, adjusting seasoning to taste.
    2. Have your fishmonger clean the crabs, or do it yourself by removing the gills and cutting off the eyes and mouth.
    3. Set the crabs on a pan or a sheet of aluminum foil and place them on the grill over a low fire.
    4. Baste the crabs generously with the lemon butter sauce, then cook for 5 to 6 minutes per side, continuing to baste as they cook.
    5. Just before serving, top each crab with a slice of tomato and a small amount of mozzarella, and leave it on the heat only long enough for the cheese to melt.
    6. Remove from the grill and serve immediately.

    Checking for Doneness Safely

    The original recipe is timed rather than described visually — 5 to 6 minutes per side over a low fire. The FDA’s guidance for crab is that the flesh should be firm, pearly and opaque throughout, or, measured with a thermometer, cooked to an internal temperature of 145°F (63°C). Soft-shell crabs are thin enough that this is rarely an issue at 5 to 6 minutes per side over live heat, but if your fire is running cooler than expected, check that the body meat has gone from translucent to opaque before pulling them off.

    A Few Practical Notes

    Buy soft-shell crabs live or already cleaned and ask your fishmonger about timing — they’re genuinely seasonal, sold mostly from spring into early fall while blue crabs are molting, and they don’t keep well, so plan to cook them within a day of buying. If you’re cleaning them yourself, do it right before cooking rather than ahead of time.

    Keep the fire low and resist the urge to rush this one. Because the whole crab is going on the heat rather than just a fillet, a hotter fire risks scorching the legs and thin shell edges before the body is cooked through, which is exactly why this recipe calls for a low fire and frequent basting instead of a hard sear.

    Keep reading

    Sources

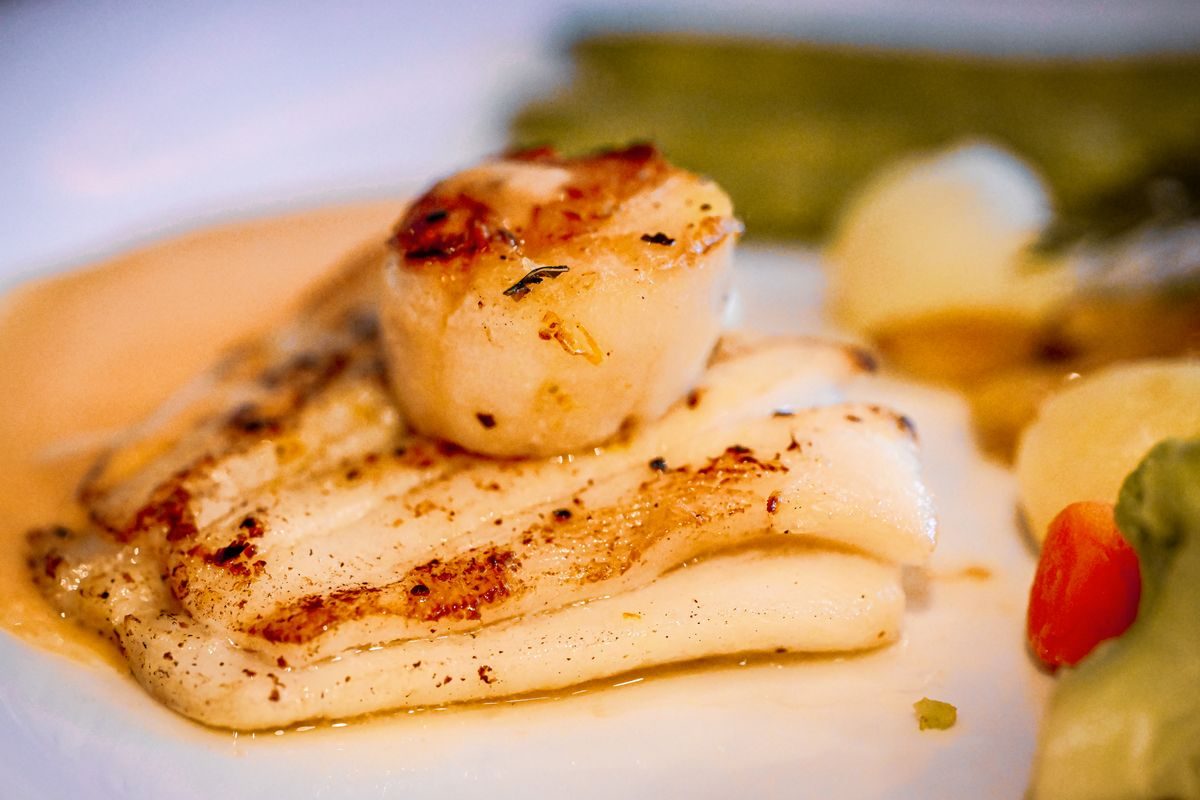
  • Bobby Flay’s Skewered Sea Scallops with Lemon-Fennel

    Bobby Flay’s Skewered Sea Scallops with Lemon-Fennel

    This recipe is taken directly from Food Network — Skewered Sea Scallops with Lemon-Fennel Dressing, from Bobby Flay’s Boy Meets Grill. It’s built around a short Pernod marinade and a double-skewer trick that keeps the scallops flat on the grate, finished with a bright lemon and fennel dressing rather than a heavy sauce.

    Scallops are one of the trickier things to grill because they’re small, round, and prone to spinning or falling through the grates. Threading them onto two parallel skewers instead of one solves that problem — the scallops stay flat and turn as a unit, which makes flipping far less fiddly than working with individual pieces or a single center skewer.

    Ingredients

    For the scallops

    • 2 cloves garlic, finely chopped
    • 3 tablespoons Pernod
    • 3 tablespoons olive oil
    • Salt and freshly ground black pepper, to taste
    • 12 sea scallops
    • 8 wooden skewers, soaked in water for 30 minutes
    • 2 lemons, halved

    For the lemon-fennel dressing

    • 2 tablespoons fresh lemon juice
    • 2 tablespoons red wine vinegar
    • 1 teaspoon Dijon mustard
    • Salt and freshly ground pepper, to taste
    • 1/3 cup extra-virgin olive oil
    • 2 tablespoons finely chopped fresh fennel tops

    Method

    1. Heat the grill to high.
    2. Whisk together the garlic, Pernod, olive oil, and salt and pepper in a large baking dish. Add the scallops, turn to coat, cover, and refrigerate for 20 minutes.
    3. While the scallops marinate, make the dressing: whisk the lemon juice, vinegar, mustard, and salt and pepper together in a medium bowl, then slowly whisk in the olive oil until it emulsifies. Stir in the chopped fennel tops.
    4. Thread 3 scallops onto 2 parallel skewers so they lie flat, rather than spin, on the grate — you’ll end up with 4 double-skewered portions. Season both sides with salt and pepper.
    5. Grill the scallop skewers for about 2 minutes per side, or until just cooked through. Grill the halved lemons alongside them at the same time.
    6. Transfer the skewers to a platter and immediately drizzle with the lemon-fennel dressing. Serve with the grilled lemon halves.

    Checking for Doneness Safely

    The original recipe calls for roughly 2 minutes per side “or until just cooked through” — a visual, time-based cue rather than a temperature one. The FDA’s guidance for shellfish is more specific: scallop flesh should be cooked until it is milky white or opaque and firm, and as a general seafood benchmark, an internal temperature of 145°F (63°C) is the safe target. Because scallops are small and cook fast, it’s easy to overshoot that window by even 30 seconds, so pull one off the skewer to check the center if you’re not confident gauging it by eye.

    Recipes courtesy of individual chefs, including this one, don’t always carry a nutrition label beyond what the publisher runs through their own analysis. Food Network’s published nutrition figures for this dish list 342 calories and 10 grams of protein per serving, which is useful context if you’re portioning the dish as a main rather than a starter.

    A Few Practical Notes

    Buy dry-packed sea scallops if you can find them — scallops treated with a sodium tripolyphosphate solution (“wet-packed”) hold water and steam rather than sear, which makes it much harder to get any color on the outside in a 2-minute window per side. Pat them dry with paper towels before they go into the marinade, and again just before they hit the grate.

    Pernod is an anise-flavored liqueur; if you don’t want to buy a bottle for three tablespoons, a splash of dry white wine with a pinch of fennel seed gets you most of the way to the same background flavor, though it won’t be identical. Either way, keep the marinade time short — 20 minutes is plenty for scallops, and the citrus and alcohol in a longer soak can start to firm up the surface texture before the fish even touches the grill.

    Keep reading

    Sources

  • Weber’s Grilled Swordfish with Jalapeño-Mint Butter

    Weber’s Grilled Swordfish with Jalapeño-Mint Butter

    This recipe is taken directly from Weber’s official recipe library — Swordfish Steaks with Jalapeño-Mint Butter Sauce, developed by grilling author Jamie Purviance. It’s a straightforward direct-heat method that pairs seared steaks with a smoky, herb-flecked butter sauce, and it’s a solid baseline for learning swordfish technique before you start adjusting the seasoning to your own taste.

    Swordfish is one of the more forgiving fish to put straight on the grate. The steaks are thick, dense and meaty enough to hold together without a basket or foil, so all you really need is a hot grill, a spatula, and a thermometer or a close eye on color. This version builds its flavor around charred jalapeños and fresh mint folded into melted butter, rather than a marinade, which keeps the prep quick.

    Ingredients

    For the jalapeño-mint butter sauce

    • 2 medium jalapeño chile peppers
    • 1/2 cup (1 stick) unsalted butter
    • 1/4 cup minced fresh mint leaves (from 8 to 10 sprigs)
    • 3 tablespoons fresh lemon juice
    • 2 scallions (white and light green parts only), thinly sliced
    • 1 teaspoon kosher salt, divided

    For the swordfish

    • 4 swordfish steaks, each about 8 ounces and 1 inch thick
    • Extra-virgin olive oil
    • 1/4 teaspoon freshly ground black pepper
    • 4 lemon wedges

    Method

    1. Set up the grill for direct cooking over medium heat, roughly 350-450°F (177-232°C).
    2. Clean the cooking grates, then grill the whole jalapeños directly over the heat, lid closed, until the skins blacken all over, about 10 minutes, turning occasionally. Transfer them to a bowl, cover with plastic wrap so they steam, and let them sit for about 10 minutes before peeling off the charred skin and removing the stems and seeds. Dice finely.
    3. In a small saucepan on the stove over medium heat, melt the butter until it’s frothy, then stir in the diced jalapeños, mint, lemon juice, scallions and half the salt. Keep it warm over very low heat while the fish cooks.
    4. Brush both sides of the swordfish steaks with olive oil and season evenly with the remaining salt and the pepper.
    5. Grill the steaks directly over medium heat, lid closed, turning once, until the center is just opaque but still juicy — about 8 to 10 minutes total.
    6. Spoon the warm butter sauce over the steaks and serve with lemon wedges.

    Checking for Doneness Safely

    Weber’s own cue for this recipe is visual — pull the steaks when the center looks “just opaque” but still juicy. That’s a reasonable way to judge swordfish by eye, but it’s worth backing it up with a thermometer. The FDA’s guidance for fin fish is to cook to an internal temperature of 145°F (63°C), or until the flesh is opaque and separates easily with a fork. If you’re cooking to time rather than temperature, checking the thickest steak with an instant-read thermometer near the end of the 8-to-10-minute window is the safer way to confirm it’s actually there, rather than relying on color alone.

    Because swordfish steaks are usually cut to a fairly even thickness, they cook more predictably than a whole fillet with a tapered end — one more reason this cut is a good one to start with if you’re new to grilling fish.

    A Few Practical Notes

    Steak thickness matters more than most other variables here. A steak under an inch thick can go from underdone to dry in the time it takes to answer your phone, since there’s so little mass to buffer the heat. If your fishmonger’s steaks run thin, either shorten the cooking time and watch closely, or ask for a thicker cut — Weber’s recipe is built around roughly 1-inch, 8-ounce portions, and that thickness is part of why the timing works.

    The jalapeño char step can be done well ahead: grill and peel the peppers earlier in the day, then just reheat the butter sauce while the swordfish cooks. That keeps the actual grilling stretch short and lets you focus on timing the fish itself, which is the part that actually needs your attention.

    If you don’t want the heat, swap in a milder pepper or skip it and use the mint-lemon butter on its own — the base sauce technique (melted butter plus an acid and fresh herbs) works with most firm grilled fish, not just swordfish.

    Keep reading

    Sources