Author: Outdoor Cooking King

  • Minimalist Baker’s Grilled Corn with Sriracha Aioli

    Minimalist Baker’s Grilled Corn with Sriracha Aioli

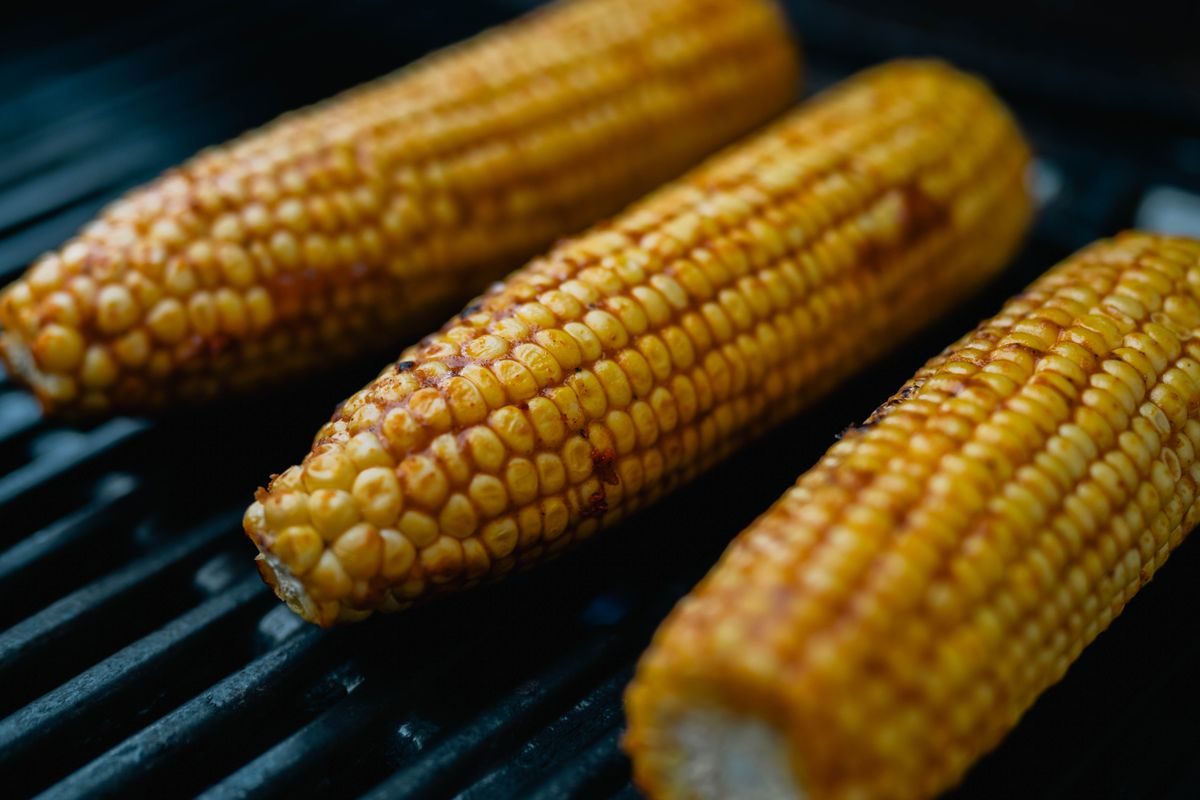
    This recipe is taken from Minimalist Baker’s Grilled Corn with Sriracha Aioli, which the site tags directly as gluten-free, vegan and dairy-free. The grilling method itself is adapted, by Minimalist Baker’s own note, from a technique published by Bobby Flay, while the cashew-based aioli is their own creation — a plant-based, egg-free stand-in for a classic garlic aioli that pairs corn with lime, sriracha and fresh herbs instead of the usual butter.

    Ingredients

    For the sriracha aioli

    • ¾ cup raw cashews
    • 5 cloves garlic, minced or smashed
    • ¼ cup water
    • 1-2 tablespoons olive oil
    • 1 teaspoon maple syrup
    • 1 tablespoon lime juice
    • Sea salt and black pepper, to taste
    • 1 teaspoon sriracha (or other hot sauce), plus more to taste
    • 1 pinch each chili powder, smoked paprika, and ground cumin
    • ½ teaspoon nutritional yeast (optional)

    For the corn

    • 8 large ears corn, unhusked
    • Optional for serving: lime juice, chili powder, fresh chopped cilantro or parsley

    Method

    1. Cover the cashews with boiling water and let them soak, uncovered, for 45 minutes to 1 hour, until very soft, then drain.
    2. Meanwhile, cover the unhusked corn with cool water for about 10 minutes to keep it from burning too fast on the grill.
    3. Begin preheating the grill. Blend the drained cashews with garlic, water, olive oil, maple syrup, lime juice, salt, pepper, sriracha and the spice pinch until smooth and creamy, adding more water if it’s too thick. Set the aioli aside.
    4. Place the corn, still in its husk, directly on the hot grill for 7-8 minutes with the lid closed, rotating at the halfway point.
    5. Once the husk is browned, pull it back (or remove it entirely) and return the corn to the grill. Close the lid and rotate until all sides are deep golden brown.
    6. Serve drizzled with the aioli, a squeeze of lime, a dusting of chili powder and fresh herbs.

    As written this makes 8 ears with aioli, and Minimalist Baker notes it keeps 2-3 days refrigerated, though it isn’t freezer-friendly.

    Why the Aioli Stays Gluten-Free

    Nothing in the aioli’s ingredient list is a typical gluten carrier — cashews, garlic, water, olive oil, maple syrup, lime juice, salt, pepper, chili powder, smoked paprika, cumin and nutritional yeast are all naturally gluten-free. The one line worth reading twice is the “sriracha (or other hot sauce)” note. Sriracha itself is a chili-based condiment, but the “or other hot sauce” substitution is exactly the kind of swap that can introduce a problem, since the Celiac Disease Foundation flags malt vinegar as a hidden ingredient in some condiments and dressings, listing it under gluten-containing malt derivatives. If you’re substituting a different hot sauce, checking that its label doesn’t list malt vinegar (or simply confirming it’s labeled gluten-free) keeps this recipe’s status intact.

    A Few Practical Notes

    Minimalist Baker’s own tip for corn is worth repeating: soaking it in its husk before grilling isn’t optional garnish advice, it’s what keeps the husk from scorching through before the kernels cook. The two-stage grilling method — husk-on first, then husk pulled back for direct char — is also what gives the corn its color without drying it out. In the post, Minimalist Baker describes the finished dish as “kind of like a plant-based version of elotes,” the Mexican street-corn snack usually finished with mayonnaise, cotija cheese and chili powder — this version swaps that dairy-based topping for the cashew aioli instead, while keeping the lime, chili powder and fresh herb finish.

    If you’re grilling this alongside anything gluten-containing, the aioli is a good candidate for a squeeze bottle or a clearly labeled, separate bowl rather than a shared dip, particularly if a basting brush or spoon is going to move between dishes. And because the corn itself grills unhusked before the husk is pulled back, it never actually touches the grate directly until the final char stage — worth keeping in mind if you’re also grilling gluten-containing food on the same grate and want to sequence which food goes on first.

    Keep reading

    Sources

  • Grilling Gluten-Free Safely: Avoiding Cross-Contact

    Grilling Gluten-Free Safely: Avoiding Cross-Contact

    Grilling raises a gluten-cross-contact problem that indoor cooking mostly doesn’t: the same hot grate, tongs and basting brush usually touch everything on the menu. This piece draws directly on guidance from two coeliac-focused organizations — the Cross-Contact page from Beyond Celiac, which is the only one of the three major bodies we checked with grill-specific guidance, and Coeliac UK’s general cross-contamination guidance, plus the Celiac Disease Foundation’s Sources of Gluten reference for hidden ingredients. None of this is medical advice, and sensitivity to trace cross-contact varies by individual — the goal here is to lay out what these organizations actually publish, not to declare any setup “safe.”

    What Cross-Contact Actually Means

    Beyond Celiac draws a specific distinction that matters for grilling: cross-contact is not the same as cross-contamination. Cross-contamination is about bacteria, which heat can kill. Cross-contact is about a protein — gluten — transferring from one food or surface to another, and “you don’t ‘kill’ gluten.” A grill running at 450°F does nothing to neutralize gluten residue sitting on the grate; only removing it physically, by cleaning, does that.

    Grills and Griddles: The Highest-Risk Surface

    Beyond Celiac addresses shared grills directly: “it is not recommended that you use the same grills or griddles to prepare gluten-free foods as you do to make gluten-containing foods,” because “crumbs from toasting hamburger buns or sticky marinade residue can easily be left on the grate of the grill, and it is difficult to clean after it has charred on properly.” Their suggested mitigations, in order of practicality: ask whether the grill has toasted bread or been used for pancakes or other gluten-containing food; if it hasn’t and “only raw meats and vegetables with no marinades are used, a char grill is a safe choice” by their own description; if it has, put heavy-duty foil down as a barrier or use a separate pan or skillet on the grate instead; and if cross-contact risk at home is a persistent concern, they note some households buy a second, dedicated grill used only for gluten-free food.

    Marinades, Basting Brushes and Squeeze Bottles

    The same logic extends to anything brushed on repeatedly. Beyond Celiac’s guidance on shared condiments applies directly to basting: utensils “used to spread butter, peanut butter, jelly, mayonnaise, cream cheese, and other condiments will expose the product to gluten,” which is exactly what happens when one basting brush goes from a gluten-containing marinade back into a gluten-free one, or when a brush dips into a shared BBQ sauce bowl after touching raw, breaded, or bun-adjacent food. Their recommended fix is condiments in squirt bottles rather than shared tubs or bowls — “as long as those using the condiments know they cannot wipe the tip of the squirt bottle on their gluten-containing foods” — with dedicated, clearly labeled gluten-free condiments as the safest option.

    Communal Condiments and Buns

    Buns are a specific flag on both organizations’ lists. Beyond Celiac names “crumbs from toasting hamburger buns” as a direct grill contaminant, and the Celiac Disease Foundation separately lists buns and rolls among common bread products that contain gluten unless specifically labeled otherwise. Practically, that means a gluten-free burger or sausage should come off the grill onto a clean plate, not next to (or under) a bun that’s been toasting on the same grate.

    Cleaning Between Uses

    Coeliac UK’s general kitchen guidance applies just as well to grill tools: “standard washing up liquid or using a dishwasher will remove gluten,” and their advice is to “wipe down surfaces and clean pots, pans and cooking utensils with hot soapy water” — notably, they say separate cloths or sponges aren’t required for this, which is a lighter standard than some other groups recommend. Beyond Celiac goes further for shared kitchens generally, citing steps from registered dietitian Rachel Begun: dry-wipe crumbs and residue first, then wash thoroughly with warm soapy water, rinse, and where possible run items through a dishwasher.

    Keep reading

    Sources

  • Phoebe Lapine’s Gluten-Free Grilled Chicken Marinade

    Phoebe Lapine’s Gluten-Free Grilled Chicken Marinade

    This marinade comes from Phoebe Lapine, a gluten-free chef, culinary instructor and cookbook author — it’s The Best Gluten-Free Marinade (for Chicken or Steak!), published on Feed Me Phoebe, and it’s tagged directly on the recipe card as “Gluten Free, Low Lactose, Vegetarian.” The marinade’s gluten-free status hinges on one swap — tamari in place of regular soy sauce — which is the exact substitution that turns an ordinary steakhouse-style marinade into one that’s actually safe to serve to someone avoiding gluten.

    Ingredients

    • ¼ cup balsamic or red wine vinegar
    • ¼ cup Dijon mustard
    • ¼ cup tamari or gluten-free soy sauce
    • ¼ cup olive oil
    • 1 tablespoon honey or maple syrup
    • ½ teaspoon salt
    • 1 minced garlic clove (optional)

    Lapine notes the recipe makes about 1 cup of marinade, enough for a few grilling sessions since it keeps a month in the refrigerator.

    Method

    1. In a small mixing bowl, whisk together the vinegar, Dijon mustard and tamari.
    2. Slowly whisk in the olive oil until it emulsifies and incorporates easily.
    3. Sweeten with the honey or maple syrup, and season with the salt. Stir in the garlic if using.
    4. To use on chicken: marinate 1 pound of chicken thighs in ½ cup of the marinade for at least 30 minutes, or overnight in the refrigerator, then remove the chicken and season generously with salt and pepper before grilling.

    Grilling for Doneness, Not Just Char

    Lapine’s own instructions say to “sear over high heat on the stove-top or grill until medium rare and nicely charred on both sides” — that line is written with steak in mind, since the recipe covers both proteins. It doesn’t apply to chicken. Per the USDA’s Food Safety and Inspection Service, “FSIS recommends cooking whole chicken to a safe minimum internal temperature of 165°F as measured with a food thermometer,” and the same guidance applies to pieces: “breasts, drumsticks, thighs, and wings should be cooked until they reach a safe minimum internal temperature of 165°F.” Charring on the outside tells you nothing about the inside — check the thickest part of the thigh with a thermometer rather than going by color or grill marks.

    Watch the Soy Sauce Line

    The whole point of this marinade, gluten-wise, is the “tamari or gluten-free soy sauce” ingredient. That phrasing matters because it’s easy to reach for whatever soy sauce is already in the fridge. The Celiac Disease Foundation lists soy sauce among common gluten-containing sauces — “traditional soy sauce” is specifically called out as using wheat — while noting that “tamari made without wheat is gluten-free.” Check the tamari bottle itself, too: some tamari blends still include a small percentage of wheat, so a label that explicitly says gluten-free is the only reliable check, not the word “tamari” alone.

    A Few Practical Notes

    Lapine built this as an all-purpose marinade rather than a chicken-only one — she uses the same batch on steak, fish, mushrooms and grilled vegetable planks, and notes it’s also dairy-free and adaptable to low-FODMAP diets if the garlic is left out. Her own reasoning for developing it was frustration with the alternative: “store bought gluten-free sauces can leave a lot to be desired,” which is part of why she’s kept making this one on repeat for years rather than buying a bottled version off the shelf.

    If you’re cooking for a mixed table where some guests need gluten-free food and others don’t, marinating the chicken separately in its own dish — rather than pouring shared marinade back and forth between raw and cooked portions, or brushing extra marinade onto food that’s already on the grill — keeps things straightforward. Any marinade that touched raw chicken shouldn’t be reused as a finishing sauce unless it’s boiled first; Lapine’s batch is generous enough (about a cup) that portioning some out before it touches raw meat, to use later as a dressing on the same grilled vegetables, avoids that problem entirely. She also notes the unused portion freezes well in ice cube trays for later use.

    Keep reading

    Sources

  • Minimalist Baker’s Gluten-Free BBQ Sauce, Step by Step

    Minimalist Baker’s Gluten-Free BBQ Sauce, Step by Step

    This sauce is taken directly from Minimalist Baker’s own recipe library — the 15-Minute Vegan BBQ Sauce (GF), published by Minimalist Baker. Minimalist Baker tags the recipe itself as gluten-free and vegan, and it’s a genuinely useful one to know because most bottled and copycat BBQ sauces get their gluten risk from two places this recipe deliberately avoids: malt vinegar and regular soy sauce. For hidden-gluten context on both of those ingredients, we’re also drawing on the Celiac Disease Foundation’s Sources of Gluten reference.

    Ingredients

    • 1 cup ketchup
    • 2 tablespoons water
    • 1½ tablespoons apple cider vinegar
    • 1 tablespoon lemon juice
    • ½ tablespoon tamari or soy sauce (ensure gluten-free as needed)
    • ½ teaspoon plain yellow mustard (from a jar, not mustard powder)
    • ¼ cup coconut sugar or brown sugar
    • 1½ teaspoons chili powder blend (not cayenne or chili flakes)
    • 1 teaspoon smoked paprika
    • ½ teaspoon onion powder
    • 1 pinch cayenne pepper or ground chipotle pepper
    • ⅛ teaspoon each sea salt and black pepper

    Method

    1. Add all the ingredients to a large saucepan and whisk thoroughly to combine. Warm over medium heat.
    2. Once bubbling, reduce the heat to low and continue simmering for 8-10 minutes, whisking occasionally. Reduce the heat or cover if it splatters.
    3. Taste and adjust: more sugar for sweetness, vinegar for brightness, chili powder for smokiness, or cayenne/chipotle for heat. The flavor will keep developing as it cools.
    4. Let the sauce cool completely before transferring it to a storage container. It keeps 2 weeks refrigerated or 1 month frozen, and Minimalist Baker recommends serving it at room temperature for the best flavor.

    As written, this makes about 1¼ cups — roughly ten 2-tablespoon servings.

    Why This Recipe Is Actually Gluten-Free

    Two ingredient choices matter more than they look here. First, the vinegar: this recipe uses apple cider vinegar, not malt vinegar. Malt vinegar is made from malted barley, and the Celiac Disease Foundation lists it directly under gluten-containing derivatives of malt, alongside malted milk, malt extract, and malt syrup — it’s a genuinely common hiding spot in bottled BBQ and steak sauces that this homemade version simply doesn’t use.

    Second, the soy sauce line. The recipe calls for “tamari or soy sauce (ensure gluten-free as needed),” which is the correct way to flag this ingredient rather than assume it. Per the Celiac Disease Foundation, traditional soy sauce is brewed with wheat and is a listed source of gluten, while “tamari made without wheat is gluten-free.” In practice, that means the sauce is only gluten-free if you actually reach for a gluten-free tamari or a soy sauce labeled gluten-free — a regular bottle of soy sauce from the pantry would undo the rest of the recipe’s careful ingredient list.

    Everything else in the sauce — ketchup, water, lemon juice, prepared yellow mustard, coconut or brown sugar, chili powder, smoked paprika, onion powder, cayenne or chipotle, salt and pepper — is a naturally gluten-free pantry staple, though it’s still worth a quick label check on any pre-blended chili powder, since spice blends occasionally carry anti-caking agents worth verifying if you’re cooking for someone with celiac disease.

    A Few Practical Notes

    Minimalist Baker built this to double as a dip as well as a basting sauce — it’s listed as good on sandwiches, veggie burgers, and grilled vegetables, not just meat. If you’re serving it at a shared cookout, that versatility is also a cross-contact convenience: a squeeze bottle or a clearly labeled jar of this sauce can sit apart from any communal condiments that might have seen a gluten-containing bun or brush.

    One ingredient question worth settling before you start: the recipe specifically calls for prepared yellow mustard from a jar, not powdered mustard, and Minimalist Baker confirmed this directly in their recipe comments. Using mustard powder instead will throw off both the texture and the quantity.

    Keep reading

    Sources

  • Cleaning an Offset Smoker’s Firebox

    Cleaning an Offset Smoker’s Firebox

    An offset smoker’s firebox does a different job than a kettle’s charcoal grate or a gas grill’s burner tubes — it’s running a live wood or charcoal fire for hours at a stretch, off to the side of the meat, and that changes what actually needs cleaning and how often. This draws on Oklahoma Joe’s own FAQ page for its offset smokers and on Meathead’s “Cleaning And Maintaining Your Grill Or Smoker,” published by AmazingRibs.com, for what each source says about ash, creosote, and the firebox specifically, as distinct from the cooking grates and grease trays covered elsewhere.

    Why Firebox Ash Isn’t Just Leftover Charcoal

    Oklahoma Joe’s maintenance guidance is direct about why ash shouldn’t sit in the firebox between cooks: “Ashes collect moisture, which can lead to premature rusting and decay.” That’s a firebox-specific concern rather than a general grate-cleaning one — a firebox holds ash against bare steel for hours at high heat, and Oklahoma Joe’s instructs owners to clean out all remaining ashes once the unit has “adequately cooled” after each cook, wiping the interior with a cloth or paper towels. AmazingRibs’ Meathead makes the same underlying point about charcoal grills more broadly: “Ash holds moisture and can chemically attack steel,” and his advice is to scoop out cold ashes with something like a cut-up plastic milk jug, never removing hot ashes, since embers “can glow far longer than you think.”

    Getting the Ash Out Safely

    Oklahoma Joe’s names a specific tool for this job: its Blacksmith Rake & Brush, described as combining “a scraper blade to clean offset firebox ash beds” with a removable brush head, used to clean out coals and ash from the firebox into a non-combustible garbage bin once everything has cooled. Meathead doesn’t name a specific rake, but his warning on timing lines up with Oklahoma Joe’s cooling instruction: ashes should always go into a metal container, never a combustible one, and hot coals should be left alone rather than scooped while still active.

    When Buildup Turns Into Creosote

    This is where the two sources add different pieces of the picture. Oklahoma Joe’s FAQ page, as fetched, doesn’t use the word “creosote” directly in its maintenance section — its firebox guidance focuses on ash removal, rust prevention, and periodically coating interior surfaces with vegetable oil. Meathead’s AmazingRibs article fills that gap: he describes “scale” as “a buildup of carbon, soot, creosote, combustion by-products, and schmutz,” most often found on the hood and sides of a cooker, and his removal method is to wait until it “starts to crack and curl,” then scrape it off with a plastic putty knife and clear it with a vacuum cleaner fitted with a hose attachment. He also warns that scraped-off scale can come away as “serious black liquid and large chips of carbon flakes,” which is worth expecting before starting rather than discovering partway through.

    The Firebox Isn’t the Only Place Grease Collects

    Meathead’s article makes a point specific to offset smokers that doesn’t come up in general grate-cleaning advice: “Grease can pool in the smoke chamber of an offset smoker,” and his preventive fix is to line the smoke chamber with foil before cooking, which keeps that grease from pooling directly on bare steel in the first place. That’s a chamber-side habit rather than a firebox one, but it’s part of the same maintenance routine on the same style of cooker, and it reduces how much scraping the chamber itself needs later.

    Rust Prevention Is Where the Two Sources Overlap Most

    Both sources treat rust as the real long-term threat to an offset smoker’s steel, and both connect it back to moisture sitting somewhere it shouldn’t. Oklahoma Joe’s recommends periodically coating interior surfaces with vegetable oil to protect against rust, and separately warns never to paint the interior of the unit, reserving high-temperature paint touch-ups for the exterior only. Meathead’s broader cleaning article echoes the same logic from the charcoal-grill side — ash and moisture “chemically attack steel” if left in place — without contradicting anything in Oklahoma Joe’s firebox-specific instructions.

    Building the Firebox Cleaning Routine

    Taken together, the two sources point to a routine built around timing and tools rather than frequency alone: let the fire go out and the unit cool fully before touching the ash, clear it into a metal or non-combustible container using a rake or scraper rather than bare hands, watch for the flaking, dark buildup Meathead calls scale or creosote and scrape it before it drops onto food, and keep the bare steel lightly oiled between cooks so ash and grease left over from a cook don’t sit directly against unprotected metal.

    Keep reading

    Sources

  • Pellet Grill Hopper and Auger Maintenance

    Pellet Grill Hopper and Auger Maintenance

    Every pellet grill runs on the same basic mechanism — an auger feeding wood pellets from a hopper into a firepot — and that mechanism has exactly one enemy: water. This draws on the printed owner’s manual for a Pit Boss PB820D pellet grill and three official support articles from Traeger, covering how each manufacturer describes keeping pellets dry, clearing a jammed auger, and cleaning out the firepot.

    Why Moisture Is the Root Cause of Almost Every Jam

    Pit Boss’s owner’s manual states the mechanism plainly: if a grill is “stored outside during the rainy season or seasons of high humidity, care should be taken to insure that water does not get into the pellet hopper,” because wood pellets “when wet or exposed to high humidity, expand greatly, break apart, and could jam the feed system.” Traeger’s support article on removing and replacing pellets lists the warning signs of pellets that have already absorbed moisture: they’re “dull and have no sheen,” they “easily crumble,” and a bag or hopper may show visible moisture, clumping, or loose sawdust. Both manufacturers point to the same underlying fix — keep pellets dry before they ever reach the auger — rather than treating a jam as a mechanical problem to solve after the fact.

    Storing Pellets Between Cooks

    Pit Boss’s manual tells owners to keep pellet fuel “moisture free,” storing opened bags in an airtight container and emptying the hopper if the grill won’t be used for a longer stretch. Traeger doesn’t put a number on how long “long-term” storage is, but its cleaning guidance treats hopper moisture as an ongoing inspection item, not just a seasonal one: after a damp stretch of weather, Traeger recommends inspecting the hopper for “any signs of moisture or mold buildup” and wiping it clean with a dry cloth. Neither source suggests leaving pellets sitting in the hopper by default; both treat an emptied, dry hopper between uses as the safer default, especially with the grill stored outdoors.

    Clearing a Jammed Auger

    This is where the two manufacturers’ instructions diverge the most, mainly because their hardware differs. Traeger publishes a separate support article for clearing an auger jam on its WiFIRE-enabled grills, which this article could not load to confirm the exact steps — so treat that model line as needing its own manufacturer instructions rather than the process below. For Traeger’s AC-powered grills, the support article describes a manual teardown: emptying the hopper completely, removing screws to access the hopper assembly and auger, then working the auger back and forth by hand, using a shear pin release and, as a last resort, tapping a block of wood against the auger motor with a mallet until the jam breaks free.

    Pit Boss’s manual doesn’t describe an equivalent digital clearing function; its printed instructions focus on prevention and on periodic checks — the manual instructs owners to check the burn grate for obstructions and foreign objects “in the grill and the hopper” after any period of storage or non-use, before firing it up again. Where Traeger gives owners a documented mechanical teardown procedure for a jam that’s already happened, Pit Boss’s manual is built around catching the moisture problem before it becomes a jam in the first place.

    What Creosote Looks Like Before It Becomes a Problem

    Pit Boss’s manual gives an unusually specific warning sign: “DO NOT operate the appliance if the flame becomes dark and sooty or if the burn pot overfills with pellets.” According to the manual, soot or creosote forms “when pellets are burned without the correct amount of air to fuel or incomplete combustion,” producing a tar-like residue, and the fix it specifies is to turn the unit off, let it cool completely, then inspect it before running it again — rather than continuing to cook through a sooty flame.

    Cleaning the Firepot Itself

    Both manufacturers treat the firepot as a component that needs regular attention separate from the rest of the grill. Pit Boss’s manual instructs owners to “always clean or check your burn pot before each use” and, two or three times a year, to remove the cooking grids and flame broiler to clean in and around the burn pot area with a shop-vac, only once the grill is completely cold. Traeger’s cleaning guide is similar in substance but names the tool explicitly: “a dedicated vacuum cleaner is the best way to remove ashes from the firepot,” and Traeger adds a caution Pit Boss’s manual doesn’t spell out in the same words — this “must be done with extreme care to avoid the risk of fire,” and the grill needs to be cold, not just cooled, before starting.

    Where the Two Manufacturers Agree Without Reservation

    Strip away the differences in hardware and wording, and Pit Boss and Traeger are describing the same three-part discipline: keep pellets and the hopper dry, don’t ignore a dark or sooty flame, and vacuum out the firepot on a cold grill rather than scraping or hosing it. Where they part ways is procedural detail — Traeger documents a full manual teardown for AC-powered grills and a separate procedure for its WiFIRE-enabled line, while Pit Boss’s manual leans on prevention and routine checks rather than a published jam-clearing sequence of its own.

    Keep reading

    Sources

  • Grill Baskets, Mats and Skewers: Care and Limits

    Grill Baskets, Mats and Skewers: Care and Limits

    Grilling baskets, mesh mats and skewers all solve the same basic problem — small or delicate food falling through the grates — but they aren’t interchangeable, and each comes with its own care instructions and limits. This rounds up what the accessories actually call for, using Weber’s official care guide for its stainless Grilling Basket, a stated heat rating from mat maker Grillaholics, and skewer guidance published by cast-iron cookware maker Lodge.

    When a Basket Beats the Bare Grates

    Weber’s own instructions for its stainless steel Grilling Basket describe it as suited to “veggies, smaller pieces of meat, and delicate food such as seafood, without worrying it will fall through the cooking grates.” That’s the core case for any grilling basket or mesh mat over bare grates: food that’s cut small, irregularly shaped, or fragile enough to fall apart when flipped with tongs. Weber’s setup instructions call for preheating the grill for 10 to 15 minutes with the basket already in place before food goes in, which lets the metal come up to temperature the same way bare grates would.

    Caring for a Metal Grilling Basket

    Weber’s care instructions are specific: clean the basket after each use, and while it’s labeled dishwasher safe, Weber recommends handwashing with “a mild detergent with a non-abrasive nylon brush or sponge” to extend the product’s life, followed by drying it thoroughly before storing. For food residue that’s built up over time, Weber’s deep-cleaning method is a paste of three parts baking soda to one part water, applied generously and left to sit for a few hours or overnight, then scrubbed with a non-abrasive nylon brush and rinsed. For particularly stubborn residue, Weber suggests pouring vinegar over the baking soda paste just before cleaning and scrubbing once the fizzing reaction settles.

    Weber’s safety notes for this accessory line are also worth carrying over to any metal grilling basket: use heat-resistant grill mitts or gloves rated to EN 407 contact-heat level 2 or higher when handling it hot, and never set it down on a combustible surface, glass, or anything else that heat could damage.

    Non-Stick Mats Have a Stated Ceiling

    A mesh basket and a flat non-stick grill mat solve different problems — the mat is built for food too small or too sauce-heavy to sit directly on grates, like chopped vegetables or marinated shrimp, rather than for holding a basket’s larger cargo. According to Grillaholics, its PTFE-fiberglass coated mats “can withstand temperatures up to 500 degrees Fahrenheit without melting or burning” — about 260°C, a conversion done for this article, not a figure Grillaholics itself publishes in Celsius — and the company markets them as free of PFOA and silicone. That figure matters because it’s a hard ceiling, not a suggestion: running a grill on a high, searing setting can exceed the temperatures a coated mat is rated for, which is a different failure mode than anything Weber’s stainless steel basket has to worry about, since bare metal doesn’t carry a coating that can degrade under heat.

    Neither source in this article gives a single universal number for every mat on the market — Grillaholics’ 500°F (260°C) figure applies to its own product line, and other manufacturers set their own limits for their own coatings. The practical takeaway both sources support is the same: check what a specific mat is rated for before running it at a grill’s highest setting, since a basket’s bare stainless steel and a mat’s non-stick coating don’t share the same heat tolerance.

    Skewers: Metal Doesn’t Need Soaking, Wood Does

    Skewers split into the same two broad categories most grilling accessories do — metal and wood or bamboo — and Lodge’s published tips lay out why the prep differs. Metal skewers are, in Lodge’s words, “durable, reusable, and won’t catch on fire,” but they also heat up and stay hot, and Lodge notes they can get “hot enough to begin cooking food from the inside out,” so cook times may need to be shortened and serving requires care since the skewer itself stays hot after the food comes off the grill. Wood or bamboo skewers carry the opposite risk — they can catch fire — and Lodge’s guidance is to soak them in water for at least 15 minutes before threading food if they’ll be exposed to open flame. Lodge also mentions that alternatives like rosemary stalks or sugarcane need the same soaking treatment if they’ll touch open flame directly.

    Matching the Accessory to the Food

    None of these three sources frames one accessory as categorically better than another — each is suited to a different failure mode. Weber’s basket is built for food that would otherwise fall through the grates and holds up to direct, repeated heat as bare stainless steel. Grillaholics’ mat is for food that needs a barrier against sticking or dripping, within its stated 500°F limit. Lodge’s skewer guidance is less about the metal-versus-wood choice itself and more about matching the prep step — soaking or none — to the material actually being used. Reading the manufacturer’s own limit or instructions before assuming an accessory can handle a grill’s hottest setting is the one point all three sources support without contradiction.

    Keep reading

    Sources

  • Winterizing a Grill: Weber and NC Storage Rules

    Winterizing a Grill: Weber and NC Storage Rules

    Putting a grill away for the season looks like a two-minute job: wipe it down, throw a cover over it, done. According to Weber’s own “Preparing Your Grill For Storage” guide, that shortcut is exactly how a grill ends up housing mice or growing mold over the winter. And covering isn’t the only decision that matters — what happens to the propane tank sitting next to the grill is a separate question with its own rules, covered here using guidance from the North Carolina Department of Agriculture & Consumer Services’ Standards Division, which administers the state law referencing NFPA 58, the LP-Gas Code.

    Why a Dirty Grill Attracts Trouble

    Weber’s storage guide is blunt about the cause: “leftover food and grease” left inside a grill over winter create exactly the conditions wildlife and mold both look for. Mice in particular treat an unused grill as ready-made shelter — the lid works as a roof, and any grease or food scraps left on the grates or in the tray becomes a food source. Weber’s fix is the same for gas, electric, and charcoal models: brush the grates and burners clean, scrape the interior surfaces with a putty knife, and push the loosened debris into the grease tray or ash catcher, then actually empty that tray or catcher rather than leaving it in place over winter.

    Mold Doesn’t Need Freezing Temperatures to Take Hold

    It’s tempting to assume a grill left outside all winter is too cold for anything to grow in it. Weber’s guide complicates that assumption: mold “typically doesn’t grow at temperatures below freezing,” but the milder stretches at the start and end of the cold season — late fall and early spring — sit right in the range mold favors, and it feeds on the same grease and food residue that draws mice. Weber also flags a slower, related problem: grease and food residue trap moisture against metal, and that trapped moisture is what drives corrosion and oxidation over a season of disuse.

    If You’re Already Too Late

    Weber’s advice for a grill already hosting mice or mold by spring is not to panic. For mold, the guide says to scrape it off any surface it has grown on, then run the grill on high for at least 15 minutes before cooking on it again. For wildlife, the instruction is nearly identical: clean out whatever has been left behind, then run the grill on high for that same 15-minute stretch.

    Does the Grill Itself Need to Come Indoors?

    No, according to Weber: “Weber grills don’t need to be brought inside for the winter,” though the guide adds that bringing one in “definitely won’t hurt anything” if space allows. For a grill staying outdoors, Weber recommends a cover mainly to keep the exterior surfaces clean rather than as a mold-prevention measure on its own — the cleaning step above is what actually reduces mold risk. A cover with no way for air to move underneath can just as easily trap the same moisture Weber warns about, so cleaning the grill thoroughly and letting it dry before covering matters more than the cover itself.

    The Propane Tank Is a Separate Rulebook

    Weber’s storage guide contains one firm instruction on this point: “NEVER store a propane tank indoors,” and if the grill has a propane tank, that tank should be left outside even if the grill itself gets moved into a garage or shed. The North Carolina Standards Division’s guidance goes considerably further than that single line, since it’s describing what state law — built on NFPA 58 — actually requires of anyone storing an LP-gas cylinder.

    Per that guidance, a stored tank should be kept outdoors, away from heat sources and out of direct sun where possible, standing upright on its foot ring, and in an out-of-the-way spot where it can’t be knocked over, particularly if children are around. The list of what not to do is just as specific: don’t store a tank indoors, under the house or in a crawl space, laying on its side or upside down, near a flame or ignition source, or beside a gas grill that’s currently in use (a spare tank should be kept away from the grill entirely, not tucked underneath it). Older cylinders with only internal, counter-clockwise threaded valves should have a plug screwed into the valve outlet whenever they’re disconnected — but that plug should never go into an Acme-type valve, which has external threads, because a plug there disables a safety feature rather than adding one.

    Where the Two Sources Line Up, and Where One Goes Further

    Weber and the NC Standards Division agree completely on the rule that matters most: a propane tank never goes indoors, full stop. Where they diverge is depth, not disagreement. Weber’s blog is written for a home cook winterizing a backyard grill and gives that single rule plus a brief note on keeping tanks outside. The Standards Division’s page explains a regulatory standard built on NFPA 58, so it adds detail Weber doesn’t cover, including condition checks worth doing before storage: confirming the valve closes fully, checking that the tank isn’t severely corroded or pitted, and making sure the collar and foot ring are still securely attached. A corroded or pitted tank wall is a weakened wall, and severe corrosion at the collar or foot ring is itself a reason to consider replacing the cylinder.

    Keep reading

    Sources

  • Crispy Smoked Chicken Wings: Hey Grill Hey’s Method

    Crispy Smoked Chicken Wings: Hey Grill Hey’s Method

    This recipe is taken from Hey Grill Hey — Susie Bulloch’s Crispy Smoked Chicken Wings, adapted from a baking-powder method originally developed by Nagi at RecipeTin Eats. It’s a hot-smoked wing, cooked well above the smoke-flavor-only territory covered elsewhere on this site, and its finishing temperature is worth comparing against the USDA’s official minimum safe temperature guidance for poultry.

    Ingredients

    • 5 pounds chicken wings (flats and drumettes)
    • 2½ Tablespoons baking powder
    • 1 teaspoon salt

    Method

    1. Dry the chicken wings thoroughly on all sides with paper towels.
    2. Place the wings in a zip-top bag, add the baking powder and salt, close the bag, and toss to coat evenly.
    3. Preheat your smoker to 250°F (121°C) using your favorite wood.
    4. Place the wings directly on the grill grates, close the lid, and smoke for 30 minutes.
    5. Increase the smoker temperature to 425°F (218°C) and continue cooking until the internal temperature of the wings reads 175°F, rotating or flipping as needed to avoid hot spots.
    6. Remove from the grill and serve plain, or toss in a BBQ seasoning or hot sauce of your choice.

    Why Baking Powder, Not Baking Soda

    The dry-brine step is where this method earns its “crispy” name. Bulloch is explicit that the ingredient has to be baking powder, “NOT baking soda,” because the powder is what draws moisture out of the skin during the smoke. Getting the wings bone-dry with paper towels first matters for the same reason: any surface moisture left on the skin works against the baking powder and slows down the crisping that’s supposed to happen once the heat goes up.

    Two Temperatures, One Cook

    The recipe runs in two stages rather than one steady temperature: 30 minutes at 250°F to render fat out from under the skin and build smoke flavor, then a jump to 425°F to actually crisp the skin and finish the wings through. That’s a deliberate departure from the steadier low-and-slow range USDA’s own consumer guidance describes for smoking in general — “the air temperature in the smoker or grill stays between 225 and 300°F throughout the cooking process,” per USDA’s 2024 grilling and smoking safety release. Wings are thin and quick-cooking compared to what that steady-range guidance is really aimed at, and Bulloch’s method leans on that by using the low stage purely for smoke and fat rendering, then finishing hot and fast for texture — something a pellet smoker that can climb quickly handles directly, while a slower-recovering smoker may need the wings finished in a preheated oven instead.

    175°F, Not 165°F

    USDA’s food-safety guidance is unambiguous on the minimum: “cook all poultry to a safe minimum internal temperature of 165 F.” Bulloch’s recipe pulls the wings well past that floor, to 175°F, and explains why in her own notes: wings are “actually best cooked to 175 degrees F, instead of the usually recommended 165 degrees F for chicken,” because the higher temperature has more time to break down the tight connective tissue running through a wing joint, leaving the meat closer to fall-off-the-bone than a wing pulled at the bare minimum. It’s a texture choice built on top of the safety floor, not a substitute for it — 165°F is still where poultry becomes safe to eat, 175°F is simply where Bulloch’s wings become the texture she’s after. Either way, the recipe calls for checking with an instant-read thermometer rather than going by time alone.

    Two Thermometers, Per USDA

    USDA’s smoking guidance calls for two separate thermometers on any smoke, not one: “one for the food to determine safe internal temperature and an oven-safe thermometer to monitor that the air temperature in the smoker or grill stays” in range. Bulloch’s recipe only calls out the first of those directly — “make sure to use a thermometer to check for doneness” on the wings themselves — but the same USDA release is clear that watching the smoker’s own air temperature during the 250°F stage and the 425°F stage is a separate check from watching the meat, not something the meat reading substitutes for.

    Saucing Without Losing the Crisp

    Bulloch’s own tip for serving is to only toss wings in sauce that’s been warmed through first, since cold sauce straight from the bottle or fridge will soften the crispy skin on contact. Her suggested Buffalo sauce is simply 1 cup of Buffalo sauce warmed with 2 Tablespoons of butter over medium heat, stirred until combined and kept below a boil so the butter doesn’t separate out.

    Keep reading

    Sources

  • Hey Grill Hey’s Smoked Cinnamon Almonds, Step by Step

    Hey Grill Hey’s Smoked Cinnamon Almonds, Step by Step

    This recipe comes straight from Hey Grill Hey — Susie Bulloch’s Smoked Cinnamon Almonds. It’s a smoker take on the cinnamon-roasted almonds sold at fairs and malls, cooked low and slow at a genuine smoking temperature rather than roasted hot, so the almonds and their sugar coating both pick up real wood smoke as they cook through.

    Ingredients

    • 1 pound raw, unsalted almonds
    • 1 egg white
    • 2 teaspoons vanilla extract
    • 1 cup light brown sugar
    • 1 teaspoon ground cinnamon
    • ¾ teaspoon kosher salt
    • ½ teaspoon ground nutmeg
    • ¼ teaspoon ground ginger

    Method

    1. Preheat your smoker to 225°F (107°C) using a mild wood such as maple, pecan, or alder.
    2. In a large mixing bowl, whisk the egg white until frothy, then mix in the vanilla extract.
    3. In a separate, smaller bowl, combine the brown sugar, cinnamon, salt, nutmeg, and ginger, and stir until evenly mixed.
    4. Pour the almonds into the egg white mixture and stir gently until they’re all evenly coated.
    5. Pour the cinnamon-sugar mixture over the almonds and stir again to coat.
    6. Spread the almonds in a single layer on a parchment-lined cookie sheet that’s been lightly coated in cooking spray.
    7. Place the almonds in the smoker and cook for 1 hour, or until they’re no longer sticky to the touch — this can take an extra 15-20 minutes depending on the smoker.
    8. Remove from the smoker and let the almonds cool slightly before breaking them apart. Let them cool completely before transferring to a lidded container, or trapped steam will make them go soft.

    Where This Recipe Comes From

    Bulloch’s starting point wasn’t a smoker recipe at all — it was the cinnamon-roasted almonds sold at fairs, sporting events, and shopping malls, which she describes as normally “slow-roasted on the spot and served in paper cones.” Her adaptation keeps that same coating and roasting logic but swaps the kettle or roaster for a smoker running at an actual smoking temperature, so the almonds spend the same hour taking on wood smoke that they’d otherwise spend simply drying out and caramelizing over direct heat.

    Why 225°F and a Mild Wood

    Bulloch’s recipe runs at 225°F specifically because, as she puts it, that’s “an ideal smoking temperature,” low enough that it can share smoker space with something else already cooking low and slow, like a pork shoulder, rather than needing the smoker to itself. The wood choice matters more here than in most savory smoking, since the almonds and sugar coating are taking on smoke for a full hour with nothing to mask an overly aggressive flavor. Bulloch recommends “pretty much any wood… except for Mesquite,” and specifically points to maple, pecan, or alder as the milder options that won’t fight with the cinnamon, nutmeg, and ginger already in the coating.

    What the Egg White Is Doing

    The egg white whisked with vanilla isn’t there for flavor on its own — it’s the binder that makes the cinnamon-sugar mixture stick to the almonds’ smooth shells rather than falling off into a pile of loose sugar on the tray. Coating the almonds in the frothy egg white first, then adding the dry cinnamon-sugar mix on top, is what leaves each almond with an even, all-over shell once it dries out during the hour on the smoker.

    Judging Doneness Without a Thermometer

    Unlike most smoked recipes on this site, there’s no internal temperature target here — Bulloch’s method for knowing the almonds are done is entirely textural: pull one out and check whether the sugar coating is “no longer sticky.” A batch that’s still tacky after an hour just needs more time, checked in 15-20 minute increments, rather than pulled early and left to finish hardening off the heat, since the coating only fully sets once the moisture has cooked out of it on the smoker.

    Storage

    Hey Grill Hey is specific that these are “best enjoyed within a few days,” after which the sugar coating loses its crispness and can turn soggy. The recipe’s storage advice is to keep them in an airtight container, such as a glass jar, and to make sure they’re completely cool first — sealing warm almonds traps steam inside the container, which is exactly the moisture that softens the coating faster.

    Keep reading

    Sources