Author: Outdoor Cooking King

  • Huli Huli Chicken: Hawaii Magazine’s Recipe and Origin

    Huli Huli Chicken: Hawaii Magazine’s Recipe and Origin

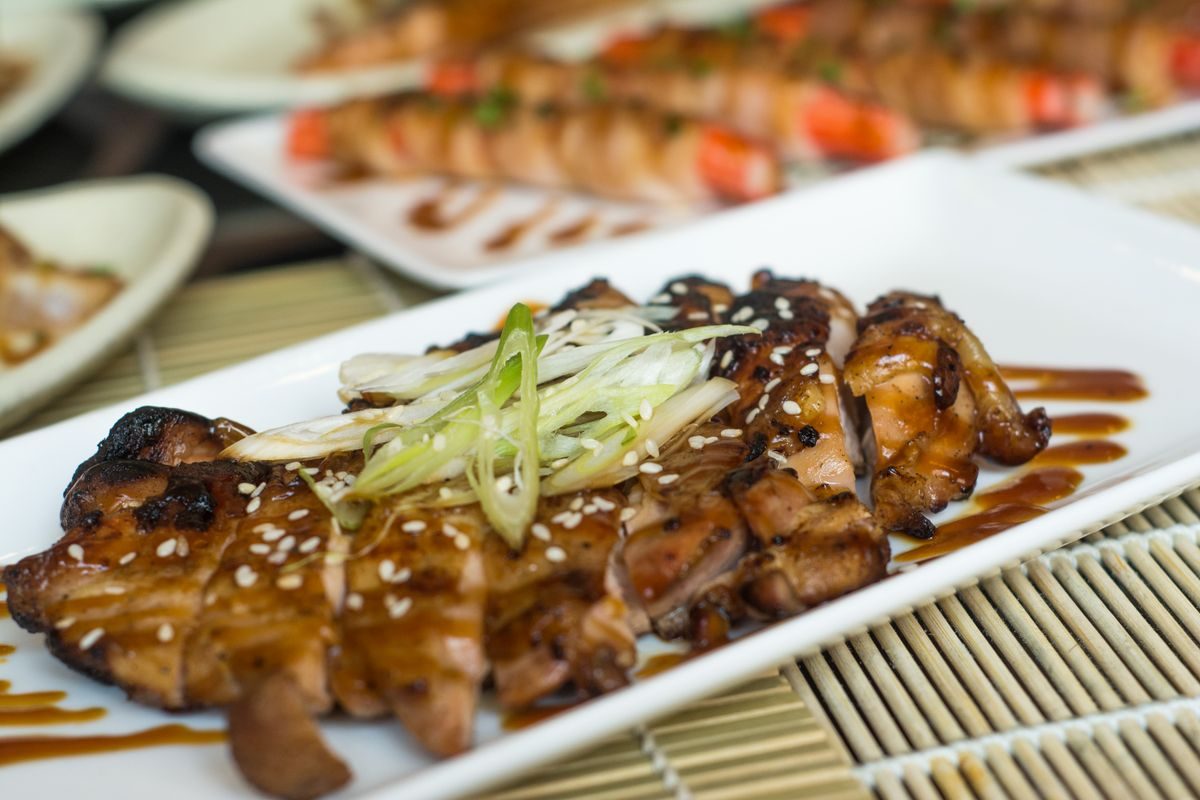
    This recipe is taken from HAWAIʻI Magazine — How to Make Hawai’i-Style Huli-Huli Chicken, written by John Heckathorn. The original Huli-Huli recipe was never published — its creator, Ernest Morgado, kept it a trade secret even after he later bottled and sold a version of the sauce — so what follows is Heckathorn’s own approximation, built in the same style and method, rather than Morgado’s exact formula.

    Where Huli-Huli Chicken Comes From

    In 1954, Ernest Morgado — a former naval intelligence officer — and chicken farmer Mike Asagi founded the Pacific Poultry Company in ʻEwa, Hawaiʻi. The following year, at a gathering of farmers, Morgado barbecued chicken in a teriyaki-like sauce based on his mother’s recipe, cooking it between two hinged wire grills that had to be flipped over by hand. “Huli” is the Hawaiian word for “turn,” and onlookers would call it out as the chickens needed flipping, which is how the reduplicated name was born. The dish became a fixture at Hawaii fundraisers for schools, softball teams, and hula hālau, reportedly raising millions of dollars over the following decades, and Morgado trademarked “Huli-Huli” in 1967.

    Ingredients

    This marinade, per Heckathorn, is enough for about three chickens split in half — scale it down proportionally for a smaller cookout, since it’s meant to be eyeballed rather than precisely measured.

    • 1/3 cup ketchup
    • 1/3 cup soy sauce
    • 1/4 cup brown sugar
    • 1/4 cup honey
    • 1/4 cup sherry
    • 1–2 tablespoons sesame oil
    • 1–2 pieces ginger root, crushed
    • 3 cloves garlic, crushed
    • Worcestershire sauce, to taste
    • Sriracha or Asian chili paste (or red pepper flakes), to taste
    • A squeeze of lemon, if you have one

    Method

    1. Combine the marinade ingredients. Marinate the chicken for at least 30 minutes — longer is fine.
    2. Set up your grill and cook the chicken over the fire, brushing it with the reserved marinade as it cooks.
    3. Turn — “huli” — the chicken regularly so both sides cook and baste evenly.
    4. Cook until the chicken reaches a safe internal temperature of 165°F (73.9°C) at the thickest part, checked with a thermometer rather than by time, since piece size and grill heat both vary.

    Spit, Rack, or Open Grill

    Traditionally, Huli-Huli chicken is barbecued on a revolving spit or in a hinged wire rack over mesquite (kiawe) wood, which is what gives roadside versions around Hawaii their smoky edge, according to the Wikipedia account of the dish, which draws on the same news reporting as Heckathorn’s article. A rotisserie attachment gets you closest to that effect at home; failing that, a covered grill with regular basting and turning — the whole point of the name — gets you most of the way there.

    A Recipe That Isn’t Really the Recipe

    Morgado never released his exact formula, and when a reader wrote in asking Hawaiʻi Magazine for “the original Ernie Morgado recipe,” the magazine could only offer its own version, built in the same spirit. According to the magazine, Huli-Huli chicken as a named dish largely disappeared from menus after Morgado began marketing his own bottled sauce under the trademark — but roadside grills across the islands still turn out what is, in the magazine’s words, “pretty much” the same chicken. It’s just not allowed to be called Huli-Huli Chicken unless it’s Morgado’s own product.

    A Note on Brining

    If you want extra insurance against dry chicken, Wikipedia’s summary of published Huli-Huli recipes notes that some cooks brine the chicken first — in a solution of kosher salt, sugar, bay leaves, garlic, sesame oil, or thyme — before marinating it in the sauce above. It’s an optional extra step on top of Heckathorn’s recipe, not part of it, but it’s a reasonable one if you’re working with lean breast meat rather than thighs or leg quarters.

    Keep reading

    Sources

  • Grilled Greek Chicken Gyro, Adapted from Mia Kouppa

    Grilled Greek Chicken Gyro, Adapted from Mia Kouppa

    This recipe is adapted from Mia Kouppa — Authentic Greek Chicken Gyros (Easy Homemade Recipe), written by Helen Bitzas, one of the two Greek-Canadian sisters behind the site. Their version is built for a home oven, but they confirm in the recipe’s own comments that the marinated, stacked chicken works on a barbecue too — so here it’s adapted for the grill, using the same marinade and stacking method as the original.

    Gyro, Not Souvlaki

    Mia Kouppa draws a clear line between the two dishes: souvlaki is cubes of marinated meat threaded onto skewers and grilled, while gyro is thin slices of seasoned meat stacked on a vertical spit, slow-roasted, and shaved off in ribbons as it cooks. This recipe rebuilds that stacked, shaved format at home — using a potato and two skewers as a makeshift vertical spit — rather than the cubed-and-skewered format already covered in this site’s souvlaki recipe.

    Ingredients

    For the Marinade

    • 2 lbs skinless, boneless chicken thighs (10–12 thighs)
    • 3 garlic cloves, minced
    • 1 tablespoon red wine vinegar
    • 1 tablespoon lemon zest
    • 3 tablespoons lemon juice
    • 1/4 cup Greek yogurt
    • 2 tablespoons olive oil
    • 1 1/2 tablespoons dried oregano
    • 1 teaspoon salt
    • 1/2 teaspoon pepper
    • 1 tablespoon sweet paprika

    For the Spit

    • 1 large potato, as a stable base
    • 2 sturdy wooden or metal skewers (soak wooden ones first)

    Method

    1. Whisk together the marinade ingredients, add the chicken thighs, and toss to coat. Refrigerate for at least 2 hours and up to 24 hours — the longer the better.
    2. If using wooden skewers, soak them in water for about 30 minutes.
    3. Cut about a third off one end of the potato to create a flat base. Set the potato cut-side down and push the two skewers into it, upright.
    4. Thread the first marinated thigh through both skewers, folding it over the top of the potato. Continue adding thighs one at a time, rotating each slightly and pressing them tightly against the last, building a stacked tower.
    5. Set up the grill for indirect medium heat and place a small drip pan with about a cup of water underneath where the tower will sit — this echoes the water the original recipe adds to its baking pan to stop the meat drying out.
    6. Stand the chicken tower over the indirect side, close the lid, and cook, turning the base occasionally, until the thickest part of the stack reaches 165°F (74°C). Mia Kouppa’s oven version takes 1 to 1 1/2 hours at 400°F (204°C); expect a broadly similar range on the grill, but go by the thermometer, not the clock, since every grill runs differently. Tent loosely with foil if the outside browns faster than the inside cooks through.
    7. Remove from the grill and rest 10–15 minutes before carving down from top to bottom, or sliding the stack off the skewers to slice on a board.

    No Grill? The Original Oven Method

    If you’d rather not fire up the grill, Mia Kouppa’s original method works the same way indoors: preheat the oven to 400°F (204°C), line a baking pan with foil, stand the potato-and-skewer base in the center, add the cup of water to the pan, and bake on the lower rack for 1 to 1 1/2 hours. After about 40 minutes, loosely cover the top with foil to stop it browning too fast before the center catches up. For a fan oven, the site’s own conversion is 180°C fan (roughly 350–360°F fan) instead of 400°F conventional, with cooking time staying about the same.

    Serving It the Greek Way

    Pile the shaved chicken into warm pita with tzatziki, sliced tomato, and onion — and if you want it the way it’s often served in Greece, tuck a handful of fries in with it. Mia Kouppa also serves the same meat over rice or on top of a Greek salad.

    Why This Counts as an Adaptation

    Mia Kouppa’s own readers have already tested a barbecue version: one commenter reported making it “amazing” in a Weber, and the site’s reply confirmed that barbecuing the chicken works, though “the end result will be different, but still delicious.” The oven method above is what’s actually been measured and tested by the source; treat the grill version as a faithful adaptation of a proven marinade and stacking technique rather than as a separately verified recipe, and always finish by temperature, not time.

    Keep reading

    Sources

  • Lebanese Shish Tawook: Mama’s Lebanese Kitchen Recipe
    Lebanese Shish Tawook: Mama’s Lebanese Kitchen Recipe

    This recipe is taken directly from Mama’s Lebanese Kitchen — Lebanese Shish Tawook Recipe – Chicken Shish Kabob, published by Edgard, whose family recipes come from his mother Esperance’s kitchen in the mountains of North Lebanon. The marinade itself was worked out with help from two family friends: Mohammed, a chef who worked in a Lebanese restaurant in Michigan, and Laba Nehmeh, who ran a restaurant in Hasroun, Lebanon.

    What Is Shish Tawook?

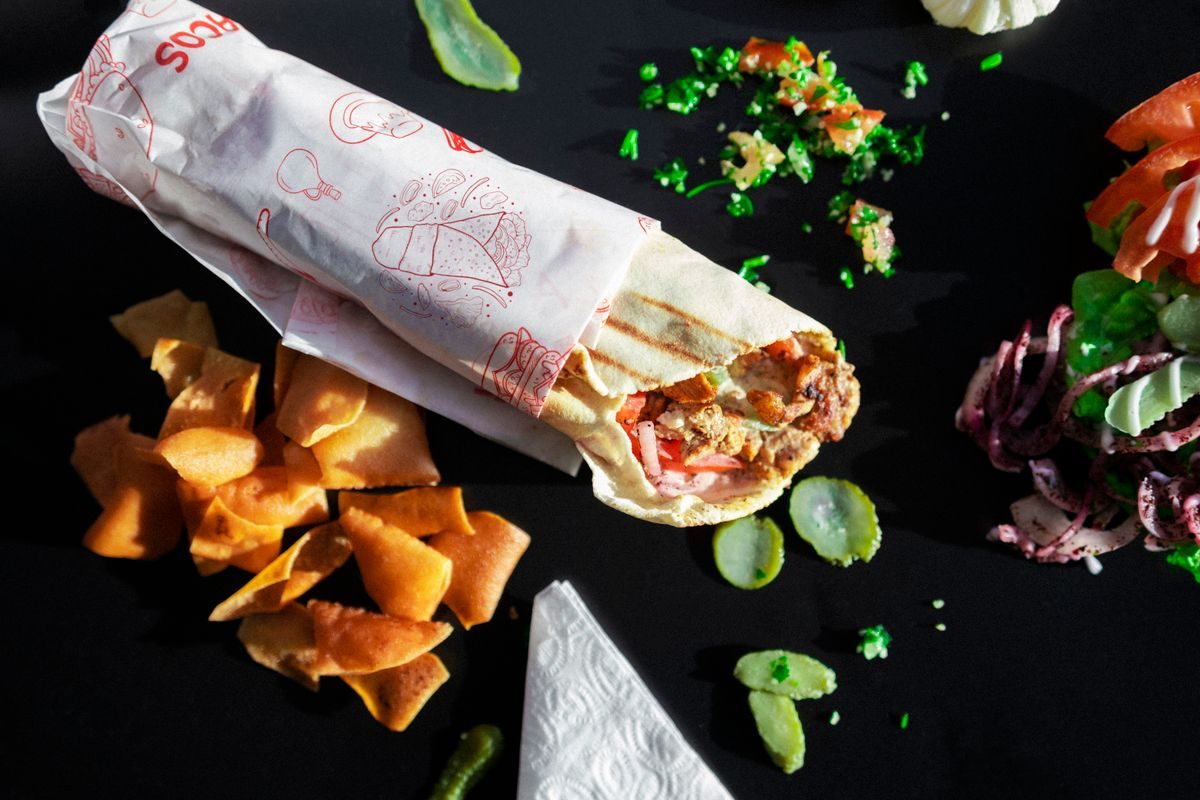
    Shish Tawook is grilled chicken skewers found in fast-food shops and restaurants across Lebanon, usually rolled into a pita with garlic sauce and pickles, or served plated with rice and grilled vegetables. According to Mama’s Lebanese Kitchen, the name points to Turkish origins — from “Tavuk şiş” — and versions of the same dish turn up across the Middle East, including a Persian counterpart called “Jujeh Kabob.” In its most basic form it’s just grilled chicken breast, but the marinade is where cooks make it their own.

    Mama’s Lebanese Kitchen notes that the flavors and spicing of Shish Tawook can vary a lot from cook to cook, even within Lebanon — everyone leans on the same core of garlic, lemon, and yogurt, but the exact spice mix is where families differ. This version came together after testing a few different marinades and settling on the balance that guests responded to best, which is as good a way as any to think about tweaking it further at home.

    Ingredients

    Chicken and Marinade

    • 2 lbs boneless chicken breast, cut into cubes
    • 1 cup lemon juice (plus a few lemon slices, optional)
    • 15 cloves garlic, crushed
    • 6 tablespoons plain yogurt
    • 6 tablespoons olive oil
    • 2 tablespoons red vinegar, or apple cider vinegar
    • 1 teaspoon ground white pepper
    • 1/3 teaspoon ground ginger
    • 1/2 teaspoon ground thyme, or ground oregano
    • 1/3 teaspoon paprika
    • 1 teaspoon salt, or to taste
    • 1 teaspoon tomato paste

    For Serving

    • 4 teaspoons Lebanese-style garlic paste (toum)
    • 4 pita loaves
    • 4 grilled tomatoes
    • 2 cups French fries
    • 8 salted Lebanese-style cucumber pickles

    Method

    1. Cut the chicken breasts into roughly 2-inch cubes — not too small, or they’ll dry out quickly on the grill.
    2. Place the chicken in a bowl, add all the marinade ingredients, and rub together by hand until everything is well combined.
    3. Cover and marinate in the fridge for at least 4 hours, preferably overnight.
    4. Thread the chicken onto skewers right before grilling.
    5. Grill on a barbecue over medium heat for 12–15 minutes maximum, turning frequently. Overcooking dries the chicken out fast. (An oven works too: lay the skewers across the edges of a deep dish and bake at 400°F/204°C for about 15 minutes.)
    6. Once cooked, tuck the skewers into an empty warm pot, cover tightly, and let them rest for 5 minutes off the heat.
    7. Spread a teaspoon of garlic paste down the center of a pita, add 4–5 pieces of chicken, and top with pickles, fries, and grilled tomato before rolling.

    The Steam-Rest Trick

    Mama’s Lebanese Kitchen credits a specific source for the softest chicken: Gharakia Nehmeh Restaurant in Hasroun, Lebanon, run by family friend Laba Nehmeh. Trapping the just-grilled chicken inside a closed pot for a few minutes lets the residual heat and moisture steam the meat gently, which keeps it from drying out while you finish assembling the wrap.

    Grilling Notes and Food Safety

    Flat stainless steel skewers conduct heat into the center of the meat faster than round wooden ones, so the source recommends them if you have them — less time over the fire, juicier result. Whatever skewer you use, chicken needs to reach a minimum internal temperature of 165°F (73.9°C) to be safe, per USDA guidance; check with an instant-read thermometer in the thickest piece rather than relying on the clock, since grill hot spots vary.

    Serving It Beyond the Wrap

    The pita wrap is the fast-food version you’ll find all over Lebanon, but Mama’s Lebanese Kitchen also serves the same skewers plated, alongside rice and grilled vegetables, which is worth doing if you’d rather skip the bread altogether. Either way, the toum is doing a lot of the work — it’s the standard dipping sauce for Shish Tawook in Lebanon, and it’s worth making a batch rather than substituting a generic garlic mayo.

    Keep reading

    Sources

  • RV and Camper Grilling: Propane Safety at the Site

    RV and Camper Grilling: Propane Safety at the Site

    This guide draws on four sources that each cover a different piece of RV propane safety: Go RVing’s “Propane 101” guide, produced with the RV Technical Institute; the New Jersey Department of Community Affairs’ Division of Fire Safety page on RV fire safety; a 2025 release from the Washington State Patrol’s State Fire Marshal’s Office; and Suburban Propane’s grilling safety tips, credited to the Propane Education & Research Council. This is a different question from home propane grill safety, covered elsewhere on this site — an RV brings a second, fixed propane system into the picture that a backyard grill never has to deal with.

    Two Separate Propane Systems, Not One

    Go RVing’s guide is explicit about what the RV’s own propane runs: the furnace, the stovetop, the water heater, and — when not on electric hookup — the refrigerator. That system is either a pair of vertical, removable cylinders mounted on a towable’s A-frame and run through a dual-tank automatic changeover regulator, or a horizontal tank built into a Class A or larger motorhome. Go RVing draws a firm line between the two: “Both types serve the same function, but only certified technicians should work on built-in tanks.” A portable propane grill brought along for cooking at the site is not part of either system — it has its own small cylinder and its own regulator, and treating it as an extension of the RV’s fixed system is exactly the mixing this guide is warning against.

    What the Fixed System Needs

    New Jersey’s Division of Fire Safety lists propane appliances as one of the three main RV fire risks, alongside electrical systems and cooking accidents, and its preventive advice is aimed at the built-in system specifically: “regular inspections of propane tanks and lines, proper storage of propane tanks when not in use, and using propane appliances correctly.” Its propane section adds that tanks should be stored upright, in a well-ventilated area, away from heat sources, and that the system should be inspected annually by a professional. It also states plainly that a fuel-burning appliance should never be run in an enclosed space, including the RV’s own bathroom or a storage compartment.

    Keeping a Portable Grill Separate and Ventilated

    Suburban Propane’s grilling tips — sourced from the Propane Education & Research Council rather than written specifically for RVs — still set the baseline for the portable grill itself: position it outdoors, at least five feet from the house (or, at a campsite, from the RV), on a level surface clear of furniture and overhead branches; check every connection with a soapy water solution before use, since expanding bubbles reveal a leak; and if the flame goes out, turn off the gas, open the lid, and wait at least 15 minutes before trying to relight it. None of that changes at a campsite, but the consequence of skipping it is worse in a confined camping area, next to an RV’s own fuel-burning appliances and a limited number of exits.

    Before You Drive

    Both Go RVing and the Washington State Patrol’s release agree on one point without qualification: the RV’s propane system should be off while the vehicle is moving. Go RVing’s advice is to “turn off the propane system when refueling your RV or tow vehicle” and to avoid running propane appliances while driving at all. Washington’s State Fire Marshal’s Office lists the same instruction among its RV fire-safety tips: “Always turn off gas appliances while driving or refueling.”

    What a State Fire Marshal’s Office Found

    The Washington release isn’t abstract about why this matters: in 2024, Washington fire agencies responded to 453 fires involving motorhomes, campers, and other RVs, resulting in seven fire fatalities and more than $6 million in property loss. Its recommendations beyond turning off gas before driving include checking electrical and propane systems for leaks or damage before every trip, keeping a charged, RV-rated fire extinguisher mounted near the exit and within reach of cooking equipment, and — specific to cooking — never leaving it unattended and using only designated, ventilated areas for it.

    Keep reading

    Sources

  • Dutch Oven Camp Biscuits: Lodge’s Recipe Over Coals

    Dutch Oven Camp Biscuits: Lodge’s Recipe Over Coals

    This recipe is Lodge Cast Iron’s own Campfire Buttermilk Biscuits, published on lodgecastiron.com and baked in a camp Dutch oven set over coals rather than a kitchen oven. Lodge rates it a beginner recipe, and it’s built around ingredients and a coal setup most car campers can put together without much extra gear.

    Ingredients

    • ½ cup butter
    • 2½ tablespoons granulated sugar
    • 1 beaten egg
    • ¾ cup buttermilk
    • ¼ cup club soda
    • 1 teaspoon salt
    • 5 cups Bisquick biscuit mix
    • ¼ cup melted butter, for the top of the biscuits

    Method

    1. Grease a Lodge Dutch oven and get it heating with 8 coals underneath and 17 coals on the lid.
    2. Combine all the ingredients and knead the dough by hand until it’s smooth. Pat it out to about ¾ inch thick on waxed paper, then cut biscuits with a biscuit cutter.
    3. Place the biscuits in the bottom of the hot Dutch oven and bake 12–15 minutes, until golden brown, rotating the oven and the lid periodically so heat doesn’t concentrate in one spot and scorch the bottom or top. Because most of the heat is coming from the coals on the lid, these bake mostly from the top down, so don’t be surprised if the tops brown before the bottoms feel fully set.
    4. Pull the biscuits off the heat and brush them with the remaining ¼ cup of melted butter while they’re still hot.

    Why 8 Coals Under, 17 on Top

    Lodge’s recipe calls for a specific, uneven coal split — roughly twice as many coals on the lid as underneath — rather than an even split top and bottom. For a baking recipe like this one, that’s normal: Dutch oven baking leans on top heat to brown and set food from above, closer to how a conventional oven’s broiler element sits above the food than below it. The exact coal counts here are specific to Lodge’s own camp Dutch oven and this recipe’s target temperature; for the general principles behind why coal count and top-versus-bottom placement change the internal temperature, and how to adjust for a different size Dutch oven or a hotter or cooler target, see this site’s Dutch Oven Coal Chart guide rather than re-deriving it here.

    A Few Practical Notes

    Rotating the oven and lid isn’t optional if the goal is even biscuits. Camp Dutch oven coals rarely burn evenly around the ring, so a hot spot under one edge of the lid will scorch whatever sits directly beneath it if the lid never moves. Turning the base a quarter turn and the lid a quarter turn in the opposite direction every few minutes spreads that unevenness out instead of concentrating it in one spot.

    Because Bisquick is a pre-mixed baking mix rather than flour, baking powder, and fat measured out separately, this recipe comes together fast — there’s no separate step for cutting cold butter into flour, which is normally where a biscuit recipe takes the most care. That trade-off is part of why Lodge rates this a beginner recipe: the technique that actually needs attention is coal management, not pastry work.

    Waxed paper for rolling out the dough matters more at a campsite than in a kitchen. It keeps the sticky dough off a picnic table or tailgate surface, and it means less cleanup when water on hand is limited. If waxed paper isn’t available, a large cutting board or a clean camp table works instead, though the dough is soft enough that it may need a little extra biscuit mix dusted on the surface to stop it sticking.

    Lodge markets these as a breakfast-by-the-campfire recipe and suggests serving them under gravy, topped with butter and jam, or alongside a bowl of chili — all of which lean on the biscuits being plain enough to pair with something savory or sweet. Because the recipe makes 12 to 16 biscuits from a single batch, it’s sized for a group rather than a couple of campers, so halving the ingredients (and adjusting down to a smaller Dutch oven and fewer coals, per the site’s coal chart) is worth doing for a smaller trip rather than baking a full batch and reheating leftovers over the next few days.

    Keep reading

    Sources

  • Tailgate Food Safety: Coolers, Timing, Reheating

    Tailgate Food Safety: Coolers, Timing, Reheating

    The numbers in this guide come from two federal food-safety agencies: the USDA Food Safety and Inspection Service’s Tailgating Food Safety Q & A, which addresses tailgating specifically, and the FDA’s guidance on handling food safely while eating outdoors. Both describe the same core timing rule in nearly identical terms, which is a useful check that it isn’t coming from just one source.

    Pack the Cooler Like the Fridge It’s Replacing

    USDA’s guidance is specific about how food should go into the cooler: carry cold perishable food such as “raw hamburger patties, sausages, and chicken in an insulated cooler packed with several inches of ice, frozen gel packs, or containers of ice.” It also recommends placing an actual appliance thermometer inside the cooler, not just trusting the ice, so you can confirm the food is staying at 40°F (4°C) or below — the top of the range where bacteria multiply fastest. Raw meat and poultry should go in wrapped securely enough that their juices can’t reach anything else in the cooler, including food that’s already cooked or will be eaten raw.

    The 2-Hour Rule, and the Shorter Version for Hot Days

    Both agencies converge on the same timing rule for food sitting in the “danger zone” between 40°F and 140°F (4°C–60°C). FDA’s outdoor-eating guidance puts it plainly: never let food remain in that zone “for more than 2 hours, or 1 hour if outdoor temperatures are above 90 °F.” USDA’s tailgating Q&A gives the identical number applied specifically to a tailgate lot: food should not be left “out of the cooler or off the grill more than 2 hours (1 hour when the outside temperature is above 90 °F).” For a tailgate, that clock starts the moment food leaves the cooler or comes off the grill, not when the game starts — so if setup, cooking, and the pregame stretch already add up to two hours (one hour on a 90°F-plus afternoon), anything still sitting out should be treated as unsafe rather than saved for kickoff.

    Keeping Hot Food Hot Once You’re at the Lot

    Food held hot needs to stay at or above 140°F (60°C). USDA suggests an insulated container pre-warmed with boiling water — fill it, let it sit a few minutes, empty it, then add the hot food — which it says can hold food above 140°F “for several hours” if the container stays closed. If hot food can’t realistically stay hot for the whole drive, USDA’s advice is to skip the middle ground entirely: chill it in the refrigerator before the drive, pack it cold in the cooler, and reheat it properly once you arrive, rather than letting it drift through the danger zone the whole way there.

    Reheating Food That Cooled Down in Transit

    If hot food did cool off during the drive, USDA’s instruction is to reheat it to 165°F (74°C) as measured with a food thermometer before serving — not just warm it back up. That number matters because it’s the same internal temperature USDA sets for cooking raw poultry from scratch; reheating is held to the same bar precisely because the food already sat through part of the danger-zone window once.

    Safe Cooking Temperatures at the Grill Itself

    For food going straight onto the grill rather than being reheated, USDA’s Q&A lists three separate minimum internal temperatures, all checked with a food thermometer rather than by color: whole cuts of beef, pork, lamb, and veal — steaks, chops, and roasts — to 145°F (63°C), followed by a 3-minute rest; ground beef, pork, lamb, and veal to 160°F (71°C); and all poultry to 165°F (74°C). Color is explicitly called out as unreliable for judging doneness on a grill, since the outside browns fast regardless of what’s happening inside.

    Cross-Contamination and Leftovers

    USDA’s cross-contamination advice for a tailgate is the same as for any grill: never put cooked food back on the platter that held it raw, since bacteria from raw juices can transfer to food that’s already safe to eat. After the game, the same 2-hour/1-hour rule applies to leftovers as to food during the party — anything that hasn’t stayed at 40°F or below the whole time should be discarded rather than taken home. USDA’s own advice is more direct: cook only as much food as will actually get eaten, which avoids the leftover-storage problem altogether.

    Keep reading

    Sources

  • Grilling on a Balcony or Patio: What’s Allowed

    Grilling on a Balcony or Patio: What’s Allowed

    The fire-code detail in this guide comes from the Cape Coral, Florida Fire Department’s published summary of NFPA 1, the model fire code most U.S. jurisdictions adopt in some form, and from balcony-grill manufacturer ElectriChef’s own guidance on grilling in small spaces. Because fire codes are adopted and amended locally, the specific numbers below are what NFPA 1 says and what one Florida city enforces — not a universal rule. Always check your own city’s code and your lease or condo association’s rules before buying a grill for a balcony.

    What NFPA 1 Actually Restricts

    The relevant section, quoted directly on Cape Coral’s fire department site, is NFPA 1:10.10.6.1: “For other than one- and two-family dwellings, no hibachi, grill, or other similar device used for cooking, heating, or any other purpose shall be used or kindled on any balcony, under any overhanging portion, or within 10 ft (3 m) of any structure.” That single sentence is doing most of the work behind apartment and condo grilling rules nationwide — it covers charcoal and gas alike, and it isn’t limited to lit grills; storing an unlit one on the balcony is restricted too.

    The code carves out one specific exception in that same section: “Listed electric portable, table top grills, not to exceed 200 sq. in. cooking surface, or other similar apparatus shall be permitted.” That’s the entire legal basis for why electric grills are the default option on multi-family balconies — not because the code declares them safer in some general sense, but because this one clause names them as the exception to an otherwise blanket ban.

    Why Propane Tanks Are a Separate, Stricter Problem

    Even setting the balcony-use ban aside, propane storage has its own restriction. Cape Coral’s summary cites NFPA 1:69.5.3.5, which limits cylinders stored inside a residential building — including common storage areas in multi-family buildings — to a maximum of 2.7 lb water capacity each, and 5.4 lb aggregate per living unit. A standard propane grill tank holds roughly 20 lb of propane, well over that limit. That’s why, in Cape Coral’s plain-language explanation, “L.P. gas grills use at least 20 lb tanks and therefore cannot be stored on a balcony,” and the cylinders “cannot be stored inside the residential unit or anywhere above the first floor” either. Small 1 lb camping-style canisters fall under a separate, more permissive allowance, but a full-size gas grill tank does not.

    What Small-Space Guidance Looks Like From an Actual Manufacturer

    ElectriChef, which builds electric grills marketed specifically for balconies, boats, and RVs, publishes its own sizing and placement advice for apartment use. Its guidance recommends a roughly 16- to 24-inch cooking surface for a balcony — large enough to cook for a few people, small enough to fit the space — and favors built-in or tabletop styles over larger closed-base or pedestal grills. The company also flags two practical placement constraints that have nothing to do with fire code: keeping the grill within reach of a power outlet, since its grills need dedicated wiring (220V, by ElectriChef’s own spec, for its larger models), and not blocking the balcony access door, since that both restricts movement and pushes smoke back into the apartment.

    Rules Still Vary by City, Building, and Insurer

    NFPA 1 is a model code, not federal law — a city or state has to formally adopt it, often with local amendments, before it’s enforceable there. Cape Coral’s page says as much in its own closing note: “Many condominiums or apartment complexes have regulations on the use of barbecue grills that exceed fire code requirements. Please check with your management staff to see what requirements or exceptions apply to use of grills at your complex.” In practice, three separate layers can restrict what’s allowed — the adopted fire code, any local amendments to it, and whatever a specific lease or HOA adds on top — and any one of them can be stricter than what’s described here.

    The Practical Takeaway

    If you live above the first floor of a multi-family building, the safe assumption is that propane and charcoal grills are off-limits on the balcony itself, and that a small electric grill — ideally one sized and built for exactly this use — is the option most likely to be permitted. But “most likely” isn’t “guaranteed.” Before buying anything, ask building management directly whether grilling is allowed at all, and if so, what size and fuel type they permit; the fire code sets a ceiling on what’s legally possible, not a guarantee of what a specific building allows.

    Keep reading

    Sources

  • Virginia Willis’ Georgia Peach BBQ Sauce

    Virginia Willis’ Georgia Peach BBQ Sauce

    This recipe is taken directly from Virginia Willis, the Georgia-born, James Beard Award-winning cookbook author — the sauce component of her Brown Sugar Pork Chops with Georgia Peach BBQ Sauce recipe published on Food Network. It’s a ketchup-and-fresh-peach sauce built for the grill, and distinct from the vinegar-forward mop sauce and mustard-based sauce already covered on this site — this one is sweet, jammy and thickened by a long simmer rather than served thin.

    Ingredients

    • 2 tablespoons canola oil
    • 1 sweet onion, finely chopped
    • 1 clove garlic, finely chopped
    • 1 one-inch piece fresh ginger, peeled and grated
    • 1 1/2 cups ketchup
    • 1/2 cup peach jam
    • 2 ripe peaches, pitted and cut into 3/4-inch chunks
    • 2 tablespoons apple cider vinegar
    • Coarse kosher salt and freshly ground black pepper, to taste

    Method

    1. Place a medium saute pan over medium heat and add the oil. Add the onion and cook until translucent, about 2 minutes.
    2. Add the garlic and ginger and cook until fragrant, 45 to 60 seconds.
    3. Add the ketchup, peach jam and peach chunks. Reduce the heat to low and simmer until the sauce thickens, about 30 minutes, stirring occasionally.
    4. Add the vinegar and season with salt and pepper. Remove from the heat and let cool.

    How Willis Uses It on the Grill

    In the source recipe, this sauce is built specifically as a basting and serving sauce for grilled bone-in pork loin chops. Willis pours half the finished sauce into a shallow dish, turns the chops to coat both sides, and reserves the rest. The chops go onto a medium-hot grill or grill pan for about 5 minutes per side, basted with the sauce as they cook, then rest for 5 minutes before serving with the remaining sauce on the side. Because the sauce is already thick from its own simmer, it clings to the meat and caramelizes at the edges rather than running off the way a thinner mop sauce would.

    Why Fresh Peaches and Jam Together

    The recipe leans on two forms of peach at once: peach jam for a smooth, already-sweetened base, and 2 ripe peaches cut into chunks for texture and fresher fruit flavor that survives the 30-minute simmer. Ketchup supplies the tomato backbone and most of the sauce’s body, while the grated ginger and finely chopped onion and garlic are sauteed first to build a savory base before the sweeter ingredients go in. The apple cider vinegar is added at the very end, off or near the end of the simmer, so its acidity stays bright rather than cooking off along with everything else.

    Regional Note

    Willis, a Georgia-born chef who has written extensively on Southern food, titles this a “Georgia Peach BBQ Sauce” specifically. Georgia designated the peach its official state fruit in 1995, and the recipe is built around fresh, ripe peach chunks alongside peach jam rather than a peach flavoring alone, which keeps the regional identity attached to a real ingredient rather than just the name.

    Storage and Yield

    The full published recipe, including the brined and grilled pork chops, yields 4 servings and takes about 1 hour 30 minutes total (15 minutes prep, 30 minutes inactive brining time for the chops, and 45 minutes of cook time). The sauce itself is meant to be made ahead and cooled before it goes anywhere near the grill, which also makes it easy to refrigerate and reheat gently before using on a future cook.

    About the Source

    Virginia Willis is a Georgia-born, French-trained, James Beard Award-winning cookbook author and Southern chef. She previously served as TV kitchen director for Martha Stewart, Bobby Flay and Southern cooking authority Nathalie Dupree, and her cookbooks include Secrets of the Southern Table, Lighten Up, Y’all, Basic to Brilliant, Y’all, Okra and Grits — a body of work anchored specifically in Southern and Georgia food.

    Nutrition, as Published

    Food Network lists the full plated dish — brined and grilled pork chops with the sauce, not the sauce alone — at 829 calories per serving, with 32 g total fat, 95 g carbohydrates (76 g of it sugar) and 42 g protein across the recipe’s 4 servings. Because that figure covers the pork chops and their sugar-and-salt brine as well as the sauce, it isn’t a per-serving number for the sauce in isolation.

    Keep reading

    Sources

  • Chimichurri Rojo: Argentina’s Red Sauce

    Chimichurri Rojo: Argentina’s Red Sauce

    This recipe is taken directly from the Hispanic Food Network, founded by Mike Gonzalez — the Chimichurri Rojo ~ Red Chimichurri Sauce recipe published on hispanicfoodnetwork.com, credited on the site as an Argentinian recipe. It’s a different sauce from the herb-and-garlic green chimichurri already on this site: red chimichurri swaps most of the fresh parsley volume for paprika, cumin and cayenne, and skips the oil-forward, herb-heavy balance that defines the green version.

    Ingredients

    • 1/4 cup red wine vinegar
    • 1/4 cup extra virgin olive oil
    • 3 tablespoons fresh parsley, minced
    • 3 cloves garlic, minced
    • 4 teaspoons paprika
    • 1 teaspoon ground cumin
    • 1/2 teaspoon salt
    • 1/2 teaspoon black pepper
    • 1/4 teaspoon cayenne pepper

    The source lists a 5-minute prep time, a 5-minute cook time (really just resting for the flavors to meld, since nothing is cooked), and a yield of about 1 cup.

    Method

    The instructions are as short as the ingredient list: whisk all the ingredients together in a bowl. There’s no cooking step and no waiting period required before it’s usable, though the source’s own notes point out it keeps well enough to make ahead.

    Ingredient by Ingredient

    The garlic and minced parsley go in raw, the same way they would in the green version, which keeps some fresh, herbaceous character even though the color and dominant flavor shift toward the spices. Paprika is the single largest seasoning by volume here — 4 teaspoons against just a teaspoon of cumin — and it’s what gives the sauce its red-orange color as much as its flavor. Cumin adds an earthy note that isn’t part of green chimichurri at all, and the quarter-teaspoon of cayenne is there for background heat rather than to make the sauce genuinely spicy. Red wine vinegar and olive oil, in equal quarter-cup measures, hold the whole thing together the same way they would in any chimichurri, giving it enough acidity and body to cling to grilled meat without being a paste.

    How Red Chimichurri Differs From Green

    Green chimichurri leans on fresh herbs — usually a heavy dose of parsley plus oregano — cut with garlic, vinegar and oil. This red version still starts from a parsley-and-garlic base, but the Hispanic Food Network’s recipe shifts the balance toward ground spices: 4 teaspoons of paprika and a teaspoon of cumin do most of the flavor work, with cayenne adding heat rather than fresh chile. The result is a sauce that’s more spice-forward and less herbaceous than the green original, with the red wine vinegar and olive oil holding the same supporting role in both.

    Where and How It’s Used

    According to the source, chimichurri rojo functions as “a sauce used as a cooking base, a marinating sauce or on top like any other condiment,” and the recipe is described as working with meat, fish, poultry, empanadas and roasted vegetables. The site also notes that cooks commonly baste it onto meat as it cooks, or spoon it over the cooked surface of meat as it rests — and that it’s often served as an accompaniment to asados, Argentina’s tradition of grilled meats.

    Storage

    The source’s own note says it may be refrigerated in an airtight container for up to 1 week.

    A Note on the Name

    The Hispanic Food Network credits this as an Argentinian recipe and lists its cuisine tag as “Argentinian.” As with chimichurri generally, exact recipes and their regional claims vary by household and by source — this particular red version, with its paprika-and-cumin backbone, is one specific published take rather than a single standardized formula.

    About the Source

    The Hispanic Food Network was started in 2010 near Seattle, Washington, by Mike Gonzalez, a journalist, food blogger and television news anchor who has worked at NBC affiliate stations in Phoenix and Washington state. It’s built out into a recipe site and video platform organized by country — its Latin American recipe section runs from Argentinian and Bolivian through Uruguayan and Venezuelan — which is the kind of regionally-organized publisher this recipe’s Argentinian attribution is worth weighing against: it’s not an Argentina-only specialist site, but this specific recipe is filed and tagged under its dedicated Argentinian category rather than a generic Latin American catch-all.

    Keep reading

    Sources

  • Just One Cookbook’s Japanese Teriyaki Sauce

    Just One Cookbook’s Japanese Teriyaki Sauce

    This recipe is taken directly from Just One Cookbook, the Japanese-cuisine site run by Namiko Hirasawa Chen — the Teriyaki Sauce recipe published on justonecookbook.com. Nami’s version sticks to the four ingredients Japanese home cooks actually use, which makes it a useful baseline before anyone reaches for a bottled, cornstarch-thickened version instead.

    Ingredients

    • 1/2 cup sake
    • 1/2 cup mirin
    • 1/2 cup soy sauce (Japanese soy sauce; a gluten-free soy sauce can be substituted)
    • 1/4 cup sugar

    That’s a 2:2:2:1 ratio of soy sauce to sake to mirin to sugar — the classic starting point in Japanese cooking, which Nami says can be adjusted sweeter, saltier or lighter depending on what it’s going on.

    Substitutions from the source recipe

    • No mirin: 1/4 cup sake + 1/4 cup water + 3 tablespoons sugar
    • No sake, with alcohol: 1/2 cup dry sherry or Chinese rice wine
    • No sake, without alcohol: 1/2 cup water

    Method

    1. Combine the sake, mirin, soy sauce and sugar in a medium saucepan.
    2. Bring the mixture to a boil over medium heat, whisking continuously until the sugar is fully dissolved.
    3. Lower the heat to medium-low and simmer for 10-15 minutes, until the sauce thickens. It’s ready when small bubbles rise and appear on the surface as you tilt the pan.
    4. Remove from the heat. The sauce keeps thickening as it cools, so don’t leave it on the stove longer than 10-15 minutes chasing a thicker result.

    Why Each Ingredient Matters

    Nami is specific about the role each of the four ingredients plays, and about not swapping in look-alikes. Soy sauce should be Japanese soy sauce specifically — she notes it has a different flavor profile from Chinese, Thai or Korean soy sauce, so the substitution isn’t neutral. Sake, the rice wine, is there mainly for the fermented depth it adds rather than as a flavor on its own; she notes it’s available at Japanese and many Asian grocery stores, or at any major liquor store, so it’s not a specialty item. Mirin, a Japanese sweet rice wine, is what gives the sauce both its delicate sweetness and the glossy shine (“teri”) that gives teriyaki its name — she calls it an essential ingredient in Japanese cooking generally, not just this sauce. Sugar’s job is narrower: it balances the saltiness of the soy sauce and adds straightforward sweetness on top of what the mirin already contributes.

    What Makes It Authentic

    Nami is specific about what does and doesn’t belong in a Japanese teriyaki sauce. The four ingredients above are it — she advises against rice vinegar, brown sugar, sesame oil, apple cider vinegar or sesame seeds, all of which show up in Americanized versions but aren’t part of the traditional flavor profile. The thickening comes entirely from reduction: simmering the liquid down concentrates the sugar until it turns glossy, rather than relying on a cornstarch slurry. She also notes that authentic Japanese teriyaki sauce is meant to run thinner than the thick, syrupy bottled sauces most people are used to.

    One optional finishing touch from the same source: stirring in a tablespoon of butter right before taking the pan off the heat, which softens the sauce’s edge and adds richness. Nami uses this trick in her teriyaki salmon recipe specifically.

    Using the Sauce on the Grill

    Because the sauce is already reduced and thickened before it ever touches a protein, the source recipe treats it as a finishing glaze rather than something to marinate raw meat in for hours: brush it onto already-cooked chicken, salmon, tofu, beef or meatballs and there’s no need to simmer it again. For a grill application, that means searing or grilling the protein first, then brushing on the teriyaki sauce during the last few minutes so it sets into a glaze rather than burning over direct heat, since the sugar content will scorch quickly if it’s on the grate too long. A tablespoon or more is enough to coat most cuts.

    A Short History

    According to Just One Cookbook, teriyaki sauce originated in Japan as part of a cooking method dating back to the 1600s. The name itself describes the technique: a glossy (“teri”) grilled or broiled (“yaki”) finish. Nami draws a clear line between the Japanese original — thin, lightly sweet, reduced by simmering — and the thicker, sweeter, starch-bound versions that became standard in American cooking as teriyaki spread internationally.

    Storage

    The source recipe doesn’t specify a fixed shelf life, but as a simmered, sugar-and-salt-heavy sauce it’s suited to being made ahead and kept refrigerated in a sealed container, then rewarmed gently or used cold as a finishing glaze.

    About the Source

    Just One Cookbook is run by Namiko Hirasawa Chen, who publishes recipes built around Japanese home cooking rather than restaurant-style dishes. This teriyaki sauce recipe is presented as a foundational seasoning on the site — the same base sauce is referenced across her other recipes, including a teriyaki salmon dish where she adds the optional butter finish described above, which is a useful signal that the ratio here is meant to be a starting template rather than a one-off.

    Keep reading

    Sources