Techniques

Practical guides to grilling, smoking, live-fire and camp cooking methods.

  • Water Pans in Smokers: Where the Experts Disagree

    Water Pans in Smokers: Where the Experts Disagree

    A pan of water in a smoker is one of barbecue’s most common habits and one of its most argued-over ones. Manufacturers, teachers and competition cooks give it different jobs, and some skip it entirely. This piece sets out what Weber’s Smokey Mountain owner’s guide, AmazingRibs.com, The Virtual Weber Bullet and MasterClass’s Aaron Franklin guide each claim, and where they part ways.

    Job One: Holding the Temperature Down

    This is the one job every source agrees on. Weber’s owner’s guide for the Smokey Mountain says the water in the smoker is used to keep the temperature low, and that you should check the level every 3 to 4 hours. Its troubleshooting table gives checking the water level as the cure when the temperature keeps climbing with the bottom vents closed.

    AmazingRibs.com’s Meathead explains the physics. In a vertical smoker like the Smokey Mountain, where the water sits directly above the coals, he says the water can never rise above the boiling point, 212 degrees F (100 degrees C). In cookers where the pan sits alongside the coals, like a kettle, he says the water will likely not exceed 180 degrees F (about 82 degrees C, our conversion) even with the air at 225 degrees F (107 degrees C, our conversion), because evaporation cools it. He adds that water is slower to heat and cool than air, which smooths out swings, and that a pan between fire and food can block direct flame and even out hot spots.

    Chris Allingham, who runs The Virtual Weber Bullet, puts it as “training wheels” for new owners: he says it is almost impossible to run that smoker above 275 degrees F (135 degrees C) while the pan is full of water. Weber Australia’s kettle guide likewise adds a drip pan of warm water to help regulate temperature.

    Job Two: Humidity, and Here the Sources Split

    MasterClass’s summary of Aaron Franklin’s advice says to put a pan with a few inches of warm water inside the smoker to add humidity, keeping the meat surface moist and tacky so smoke sticks better. Weber Australia also says its drip pan creates a humid environment, and Allingham says condensing vapor helps smoke stick.

    Meathead lists the same sticky-surface idea among his reasons, but qualifies it. In cookers with a fire, he writes, so much air moves through the chamber that water vapor has little effect on humidity, though it varies with the design. He cites a reader who measured airflow of 268 cubic feet per minute at the exhaust stacks of an offset smoker at 250 degrees F (121 degrees C, our conversion). In electric smokers, where there is little air movement, he says a pan can add humidity. He also notes that an oil slick of drippings on the water stops it evaporating.

    The Case Against the Pan

    Competition cook Harry Soo, quoted by AmazingRibs.com, does not use water. He covers the pan with foil top and bottom and says dry heat lets bark form faster; once it sets he sprays with water, and later wraps in foil. Allingham lists costs of using water: refilling, softer poultry skin, more charcoal used, disposal of leftover water and grease, and burn risk. He adds that competition teams have made championship barbecue in the Weber Bullet with an empty, foil-lined pan, and that an empty pan is required for cooker temperatures of 325 to 375 degrees F (163 to 191 degrees C, our conversion), such as high-heat chicken.

    Smaller Disagreements

    • Hot or cold water. Meathead says to use hot water, which absorbs less heat and helps the cooker reach temperature faster, keeping cold water for a cooker that is running hot. Weber’s owner’s guide says to always use hot water when replenishing. Weber’s support page for the same smoker suggests adding cold water if temperatures get too high, and Allingham says cold water is fine in most cases, with hot for the coldest days.
    • What goes in. Meathead and Allingham both advise plain water rather than beer, wine or juice, on the grounds that the flavor compounds make no noticeable impact.
    • Drip pan versus water pan. Meathead separates the two: drip pans go under the food to catch juices and prevent flare-ups, while water pans go over the heat source.

    Handling Hot Water Safely

    Weber’s owner’s guide warns not to spill water into hot coals, because steam and ash could rise and cause serious injury or death. Allingham makes the same point about boiling water and steam, and recommends seating the pan securely before adding water.

    So Should You Use One?

    The sources do not give one answer. If your smoker runs hot, or you are learning it, Weber and Allingham point to water. If bark, crisp skin or hotter temperatures matter more, Soo and Allingham describe running dry. Whichever you choose, AmazingRibs.com advises a good thermometer and a cooking log for the Smokey Mountain, at least until you understand how it runs.

    Keep reading

    Sources

  • Do You Need to Soak Wood Chips? Chips, Chunks and Logs

    Do You Need to Soak Wood Chips? Chips, Chunks and Logs

    Few grilling rules are repeated as confidently as “soak your wood chips”, and few are disputed as openly. Weber’s grilling guides say to soak chips; AmazingRibs.com published a weigh-and-measure test arguing that soaking does little. Below, the two positions are set side by side, along with what Weber, AmazingRibs.com and the Meatwave say about chips, chunks and logs.

    Chips, Chunks and Logs

    Weber’s guide says the main difference between chips and chunks is burn rate: chips burn faster. A handful or two of chips suits a light smoke over about 20 minutes, while for an hour or more Weber suggests chunks, which it says can burn that long or longer depending on size and airflow. Its New Zealand guide describes chunks as ranging from golf-ball size to a large fist, and calls them the best option for long cooks.

    AmazingRibs.com’s Meathead gives similar sizing. Chunks from golf-ball to fist size are, in his words, slow, steady sources of smoke, and often a chunk or two about the size of an egg, weighing 2 to 4 ounces (roughly 55 to 115 grams, our conversion), is all a load of food needs. Chips are about the size of coins, burn quickly and may need adding more than once, so he calls them fine for short cooks and chunks better for long ones. For long charcoal cooks he recommends chunks from golf-ball to baseball size, and for short cooks such as steak, chicken or fish, small chips and especially pellets, because they give a quick burst of smoke.

    Joshua Bousel of the Meatwave says chips ignite quickly but burn out fast, while fist-sized chunks take longer to ignite but burn for a good hour in a grill and hours in a smoker. He considers logs best reserved for pits and offset smokers, and says they are of little use for backyard grilling. Texas A&M’s Meat Science program notes that a wide variety of wood, wood chunks and wood chips can provide smoke flavor, and cautions that too little smoke is unsatisfying while too much overpowers the meat.

    Position One: Soak the Chips, Not the Chunks

    Weber’s US guide says that soaking chips in water for at least 30 minutes, then draining them so they do not extinguish the fire, prolongs their burn and makes them smolder more than flame. It says there is no need to soak chunks. Weber’s New Zealand page gives a shorter figure, at least 20 minutes for chips, and warns that unsoaked chips are likely to catch fire and leave an acrid taste. Weber’s gas-grill article repeats the 30-minute figure for chips going into a smoker box. Bousel takes the same line: chips get a soak, chunks burn dry, since water only delays their start.

    Position Two: Do Not Soak Anything

    Meathead ran his own test. He soaked apple chips and chunks in room-temperature water for 12 hours and weighed them: large chunks gained about 3 percent by weight and small chips about 6 percent. In a second test he soaked pieces in dyed water for 24 hours and cut them open; the dye only reached the interior through cracks and fissures.

    His explanation for why wet wood is a problem is temperature. Wet wood cannot climb much past water’s boiling point, 212 degrees F (100 degrees C), until the surface water has gone; he gives the combustion point of wood as about 575 degrees F (about 302 degrees C, our conversion). He also cites a test by AmazingRibs.com science advisor Prof. Greg Blonder, using two packets holding 50 grams of wood on a 600 degrees F (about 316 degrees C, our conversion) heat source. The dry packet went quickly to combustion temperature. The soaked packet rose to the boiling point and stalled there for almost 30 minutes before drying and then smoking. Meathead adds that what looks like smoke from wet wood is really steam, and that dripping wood also cools the coals.

    Where the Two Camps Actually Differ

    The sources are answering slightly different worries. Weber’s concern is that dry chips flare into flame and deliver less smolder. Meathead’s view is the reverse: he says the best-tasting smoke is thin, pale blue and practically invisible, that blue smoke needs dry wood and a hot fire with plenty of oxygen and flame, and that when chips catch fire the answer is to let the wood burn. He says foil pouches with holes are not worth the trouble.

    Practically, the two agree on more than the headlines suggest: both say chunks suit long cooks, and neither says to soak chunks.

    The Moisture That Matters: Seasoning

    Meathead says the water content of the wood itself matters more than a soak. Fresh-cut hardwood can hold up to 80 percent water by weight, he writes, and produces steam and off flavors when burned. He says pitmasters generally prefer air-dried wood at 25 to 30 percent water, and that kiln-dried wood can be as low as 5 percent. Six months of drying, he says, is usually enough.

    Logs Are a Different Job

    Meathead advises that log burners usually pre-burn logs to embers and add one at a time, and that logs need a hotter fire to burn clean, perhaps 275 degrees F (135 degrees C) rather than 225 degrees F (107 degrees C).

    Keep reading

    Sources

  • Snake Method vs Minion Method for Slow Charcoal Cooks

    Snake Method vs Minion Method for Slow Charcoal Cooks

    Charcoal has one awkward habit for anyone cooking low and slow: it lights, heats up quickly, peaks, and then fades. The Minion method and the snake method are two ways of lighting only part of the fuel so the rest ignites gradually. This guide compares how Weber’s support pages, Weber Australia’s kettle guide, AmazingRibs.com and Steven Raichlen’s Barbecue Bible describe each one, and where their numbers differ.

    The Idea Behind Both Methods

    AmazingRibs.com’s founder, Meathead, describes the problem plainly: charcoal starts cold, heats rapidly, hits a peak and then slowly cools as the fuel is consumed. The shared solution, he writes, is to put lit coals on top of unlit coals, or beside them, so the ignition of new coals synchronizes with the death of old ones. He flags one drawback: freshly lit coals put out thick white smoke rather than the thin blue smoke that gives the best flavor.

    The Minion Method

    AmazingRibs.com and Barbecue Bible both say the method is named after Jim Minion; AmazingRibs.com adds that he was a caterer. Weber’s support page gives a version for its Smokey Mountain smoker: fill the charcoal ring with around 2 kg (about 4.4 lb, our conversion) of unlit briquettes, leaving a well in the centre, then add a half or three-quarter chimney of lit briquettes to the well. Wood chunks or chips can go in at the same stage. Weber says this lets the Smokey Mountain smoke for around 8 to 12 hours, and that it also works on its other charcoal grills with shorter cooking times.

    AmazingRibs.com’s version uses a full Weber chimney of unlit coals (80 briquettes), buries about three wood chunks in the pile, and adds half a chimney (40 briquettes) of hot coals on top, plus a lump of wood. Meathead notes that exact counts vary with the charcoal brand, the smoker and the weather, and recommends a dry run without food to find your number. AmazingRibs.com also relays a “donut” variation from competition cook Harry Soo: hollow out the centre of a half-full basket of unlit briquettes and pour a half chimney of lit briquettes into the hole. Soo says this gives a slow burn of three to five hours on a 72°F (22°C, our conversion) day.

    The Snake Method

    Barbecue Bible’s test kitchen director, Steve Nestor, calls the snake a variation of the Minion method, usually run in a Weber kettle: briquettes laid around the edge in a large “C”, one end lit, the fire creeping around the perimeter. AmazingRibs.com files it under the “fuse” method, also known as the C or U method, and shows it in a kettle, a bullet smoker and a Backwoods smoker.

    The two Weber sources give slightly different layouts:

    • Weber’s support page describes a 2×2 stack of unlit briquettes along the outer edge, a few lit briquettes at the head of the snake, and smoking chips or small chunks along its first few inches.
    • Weber Australia’s kettle guide describes two rows of briquettes covering half the circumference of the charcoal grate, leaned at 45 degrees to help the snake keep burning. It says to light 8 to 10 briquettes separately, wait until they are completely ashed over, and place them touching the start of the snake. It also adds a drip pan of warm water, refilled after about 3 to 4 hours, with the meat above the pan.

    How Long Does Each Last?

    The sources do not agree, which is a good reason to test your own setup:

    • Weber’s support page says a snake can run about 12 to 15 hours depending on its length.
    • Weber Australia says its half-circle snake gives up to 8 to 12 hours, and that 110 to 135 degrees C (225 to 275 degrees F) suits low and slow cooking.
    • Barbecue Bible ran a 4-briquette configuration under a 5-pound pork butt and found it lasted about six hours. Nestor added unlit briquettes and reversed the snake to finish at 7 hours 45 minutes, and concluded a snake of that size was not long enough for a whole brisket. Temperatures across his cook ranged from 221 to 337 degrees F (105 to 169 degrees C, our conversion) depending on position and time.

    Nestor also concluded that briquette configuration and vents let him control temperature, and he placed the top vent opposite the snake to draw smoke over the pork. Weber Australia’s advice for a kettle running cool goes the other way: open the top vent, keep the bottom vent clear, and position the lid vent over the fire to draw more oxygen through it. Weber also recommends a digital probe at grill level rather than a lid thermometer sitting directly over the briquettes.

    Which Fits Which Cooker?

    AmazingRibs.com calls the Minion method the standard technique for the Weber Smokey Mountain. For the large Smokey Mountain, though, Meathead prefers the fuse because that unit tends to run hotter and the fuse helps keep the temperature down to 225 degrees F (107 degrees C, our conversion).

    Safety With Charcoal

    The Bellevue-Dayton Fire Department warns that burning charcoal produces carbon monoxide and should never be burned in an enclosed area such as a building or tent. It also says to use only starter fluid made for charcoal, and that pouring lighter fluid onto already hot coals makes it vaporize quickly into flammable vapors.

    Keep reading

    Sources

  • Wrapping Brisket: Butcher Paper vs Foil vs No Wrap

    Wrapping Brisket: Butcher Paper vs Foil vs No Wrap

    Wrapping a brisket partway through the cook is common, but the sources disagree about whether to use butcher paper or foil, and some skip the wrap altogether. This guide sets out what Meathead Goldwyn at AmazingRibs.com, MasterClass’s write-up of Aaron Franklin, Texas Monthly, a report from Texas A&M’s Camp Brisket and Smoked BBQ Source say about each approach, and why. Celsius conversions are ours.

    What Wrapping Is For

    Meathead credits wrapping with beating the stall, minimizing evaporative cooling, shortening the cook and keeping juices. Texas A&M’s Camp Brisket, as reported by The Virtual Weber Bullet, describes the stall as evaporative cooling at the meat surface that usually halts the internal temperature somewhere between 140 and 160°F (60 to 71°C). The reported advice was to wrap once the meat reaches about 160°F (71°C). Meathead wraps at 150 to 165°F (66 to 74°C), and Smoked BBQ Source at 165°F (74°C) or when the stall hits, after a dark bark forms.

    Butcher Paper

    Franklin wraps with uncoated butcher paper, according to MasterClass, because it is more breathable and traps less steam, keeping the meat moist without making the bark soggy. His method wraps in the fourth stage of a 12-hour, six-stage cook. Meathead says paper cuts about 1 hour off the cook and lets some moisture escape, but adds that it tastes very much like the foil version and that the differences are subtle. The Camp Brisket report says peach paper is not air- or water-tight like foil, which is said to avoid foil’s pot-roast flavor. A survey presented there by Jess Pryles found almost all the restaurants surveyed used butcher paper. Pitmaster John Brotherton said most restaurants wrap around 170°F (77°C); wrapping at 160°F (71°C) leaves more hot liquid in the paper, a burn hazard.

    Foil

    Meathead says foil gives moister meat with a slight pot-roast texture and softer bark, and can cut 2 hours off the cook. The Camp Brisket report says every competition team surveyed wrapped in foil, and that Snow’s BBQ foils about two-thirds of the way through the cook. Meathead’s numbers are a plan of 14 to 18 hours in foil including a 2-hour hold, with an extra 1 to 2 hours for paper.

    The Foil Boat

    Texas Monthly’s Daniel Vaughn describes a middle option from pitmaster Evan LeRoy: foil shaped around the bottom and sides, with the fat-cap top left open. LeRoy says it gives a crunchy bark while the meat sits in its own juices. In a blind panel tasting at Goldee’s Barbecue that also included paper-wrapped brisket, Vaughn preferred the foil-boat bark and says he was not alone. It was a tasting panel, not a controlled study. LeRoy’s caveat is storage, since boats cannot be stacked in a warmer like paper-wrapped briskets.

    No Wrap

    MasterClass says an unwrapped brisket gives a crunchier bark but needs care to avoid drying out. Smoked BBQ Source says it takes longer, with more smoke and a bark with real crunch. Meathead plans 16 to 20 hours of cooking plus the hold. Franklin’s 2011 Texas Monthly instructions for home cooks do not describe a wrap step.

    Does It Matter?

    Evidence is thin. The Virtual Weber Bullet’s Camp Brisket report says a final wrapped-versus-unwrapped tasting was held, and that the author had read that past classes found no significant difference in “overall like” scores; he did not see the scores himself. Smoked BBQ Source describes a single test cook by T-Roy Cooks at 225°F: 9 hours for foil, 10 for paper and 11 for unwrapped, with the foil brisket judged most tender and moist, and the unwrapped one judged to have the best bark and strongest smoke. That is one cook on one smoker, not a controlled trial.

    Holding Safely After a Wrap

    Wrapping makes holding easy. Meathead holds until the meat falls back to 150°F (66°C), about 2 to 4 hours. Brotherton holds at 145°F (63°C) for several hours, and Camp Brisket advised slicing at 140 to 150°F (60 to 66°C). USDA says hot food should stay at or above 140°F (60°C) and cooked food should not be left out over 2 hours, or 1 hour above 90°F (32°C). A cooler hold near those numbers is worth checking with a thermometer. Note that brisket’s 195 to 205°F finish is about tenderness: Meathead says these cuts are safe at 145°F, and USDA’s minimum for beef roasts and steaks is 145°F (63°C) with a 3-minute rest.

    Keep reading

    Sources

  • How to Trim a Brisket: Franklin, Meathead and A&M Compared

    How to Trim a Brisket: Franklin, Meathead and A&M Compared

    Sources agree that a packer brisket needs trimming, but they disagree on how much fat to leave, what to do about the seam between the two muscles, and even whether the meat should be cold when you cut it. This guide compares Aaron Franklin’s approach as written up by MasterClass and Texas Monthly, Meathead Goldwyn at AmazingRibs.com, a Texas A&M Camp Brisket demonstration, and Smoked BBQ Source. Inch and millimeter pairs come from the sources; other conversions are ours.

    Why Trim at All

    MasterClass’s write-up of Franklin gives two reasons. The first is removing excess fat, since a brisket usually carries more subcutaneous fat than you want to eat. The second is shape: he wants smooth, “aerodynamic” curves with no boxy corners, to help air move around the meat and to remove parts likely to dry out. He warns that trimming too much fat can threaten the brisket’s structure, and that it is better to leave a little extra.

    How Much Fat Cap to Leave

    • Franklin (MasterClass): shave the cap down to about a quarter inch (6 mm) of soft, “pillowy” fat, removing the waxy outer layer.
    • Franklin (Texas Monthly, 2011): between a quarter and a half inch (6 to 13 mm).
    • Meathead: about 1/4 inch (6.3 mm). He says a little fat adds some moisture and that a thin cap keeps the rub on the slice.
    • Texas A&M Camp Brisket: 1/4 inch in the demonstration, and a survey presented there by Jess Pryles found almost everyone, competition teams and restaurants alike, trimmed to 1/4 inch.
    • Smoked BBQ Source: trim as close to the meat as you like. The author says he sees no difference in finished quality from leaving fat, wants to season meat rather than fat, and trims aggressively. He notes that others leave 1/4 to 1/3 inch (6 to 8 mm) on top or bottom.

    The Seam Fat and the Edges

    This is where the sources split. Franklin, per MasterClass, leaves the thick pocket of seam fat under the point in place, because removing it before the cook could make the point collapse, and trims it while slicing. Meathead says you may trim fat between flat and point, but not cut all the way through if you want them attached. Camp Brisket’s demonstration by Dr. Davey Griffin and pitmaster John Brotherton trimmed the hard seam flush with the meat rather than digging it out. Smoked BBQ Source says the hard fat will not render and should go, while soft fat melts away.

    On edges, several sources match. MasterClass has Franklin remove about half an inch (13 mm) from the gray, processed edge, since that part will not take smoke, and trim the thin end of the flat if needed. Camp Brisket removed the gray edge and thin flat end but left thin fat and silverskin on the flat. Meathead cleans silverskin from the meaty side. Smoked BBQ Source rounds off thin corners that will dry out.

    Cold or Room Temperature?

    MasterClass and Smoked BBQ Source both say trim while the brisket is cold, because fat turns sticky and soft as it warms. They differ on what happens next. Texas Monthly’s Franklin instructions let the meat come to room temperature while the fire is lit, but Meathead says to keep it chilled until just before cooking, because chilled meat attracts more smoke. USDA is firm on one point: perishable food should not be left out of refrigeration over 2 hours, or 1 hour above 90°F (32°C).

    Home, Restaurant and Competition Trims

    Smoked BBQ Source says competition trimming is the most aggressive, with muscles separated and cut to fit a 9-inch hand-in box. Restaurants aim for consistency. Brotherton said his pitmasters spend only 2 to 3 minutes per brisket, and suggested pre-trimmed briskets for restaurants.

    Using the Trimmings

    Meathead renders trimmed fat into beef tallow, and Smoked BBQ Source recommends freezing meat and fat trimmings to grind for burgers. If you grind your own, USDA’s minimum for ground meats is 160°F (71°C), well above the 145°F (63°C) it sets for whole beef roasts and steaks.

    Keep reading

    Sources

  • Hot-and-Fast Brisket: What the Test Cooks Found

    Hot-and-Fast Brisket: What the Test Cooks Found

    “Hot and fast” brisket promises a finished brisket in hours instead of a day, and the people who have tested it disagree about what you get. This article compares Daniel Vaughn’s experiments for Texas Monthly, two test-kitchen write-ups from Steven Raichlen’s Barbecue Bible, and Chris Young’s method on AmazingRibs.com. Celsius conversions are ours.

    Where “Hot and Fast” Starts

    The label is fuzzy. Vaughn writes that the line between low-and-slow and hot-and-fast “isn’t clear,” and that Aaron Franklin’s running temperature of 275°F (135°C) sits at the upper end of low and slow. He adds that Kreuz Market finishes briskets in about five hours. The Barbecue Bible’s FAQ puts low and slow at roughly 225-275°F (107-135°C) and hot and fast at about 325-400°F (163-204°C). Its own tests ran at 400°F (204°C), and Young’s smoking phase runs around 300°F (149°C). On these definitions, 275-300°F is the borderline between the two camps.

    Vaughn’s Tests: Tough Flats, a Workable Point

    Vaughn began with Texas pitmaster Roland Lindsey, who claimed a three-hour brisket. The crisped fat had a salty crunch, he reported, but the meat was tough, dried out quickly after slicing, and the fat between point and flat had barely rendered.

    At home he separated the two muscles first and cooked them at 400°F (204°C) in a Pit Barrel Cooker. The point took three and a half hours to reach 200°F (93°C) and the flat three hours. After about an hour’s rest down to 140°F (60°C), both were tough, and the flat was dry.

    What worked was the point alone: 400°F until 165°F (74°C), about two and a half hours, then uncovered in a 250°F (121°C) oven until 205°F (96°C), another two and a half to three hours, then a rest to 140°F. He never got a flat he liked; thinly sliced it was decent eating, but not a replacement for slow-smoked.

    The Barbecue Bible Tests: Respectable, Not Top Tier

    Test Kitchen Director Steve Nestor cooked a full packer on a Weber kettle at 400°F, unwrapped to 160°F (71°C), then in butcher paper to 205°F (96°C), a little over four hours in all. The brisket failed the bend and jiggle tests, but after a two-hour cooler rest the meat softened. The write-up rates it a respectable second-flight brisket: flat tougher than low and slow, point moist with visible unrendered fat, and a smoke ring on both.

    In a second trial, Nestor wrapped one brisket in paper and one in foil at 165°F (74°C). After roughly four hours the meat probed at 203°F (95°C) but still felt tight. An hour and a half of rest followed. He found the bark crusty and the flat best thinly sliced for sandwiches, with some fat left unrendered.

    Young’s Steam-Then-Smoke Method

    Young’s version departs from the others. His full packer goes on a rack over water in a foil-wrapped tray in a 500-600°F (260-316°C) grill, which he says skips the stall and reaches 205°F in about two and a half hours. It then moves to a smoker at about 300°F to dry the surface and build bark, and is wrapped and rested to about 155°F (68°C) before slicing. His premise, from his own collagen measurements, is that in a 13-hour cook the first eight hours contribute under 20 percent of the tenderizing. He rates the result about 90 percent as good as the best brisket he has eaten.

    What They Agree On, and What They Don’t

    • Rest is essential: roughly one hour (Vaughn), 1.5 hours (Nestor), 2 hours (Raichlen’s test), and one to two hours (Young).
    • Nobody claims parity with slow smoking: Vaughn’s flats failed, Raichlen’s test kitchen calls the result a second-flight brisket, and Young claims 90 percent, using a steam phase rather than plain smoke.
    • Flat versus point: Vaughn split the muscles and found the flat the problem. The Barbecue Bible tests kept the packer whole and found the flat tougher but usable sliced thin.
    • Doneness: probe reading and feel disagreed in Nestor’s tests, where 203°F still felt tight.

    Meathead, AmazingRibs’ founder, holds the traditional line in his article on cooking temperatures: brisket needs to reach about 203°F, which can take 12 hours or more at 225°F. His supporting experiment used pork loin, not brisket. At 325°F the outer layer was a parched 170°F when the centre hit 145°F, against about 160°F at 225°F.

    Food Safety Note

    Targets like 200-205°F are about tenderness, not safety. USDA lists 145°F (63°C) with a 3-minute rest as the safe minimum for beef steaks, chops and roasts. For holding, the USDA says hot food should stay at or above 140°F, and leftovers should be refrigerated within two hours. In one of Vaughn’s trials, a smoked point was chilled to 40°F (4°C) before finishing in the oven.

    Keep reading

    Sources

  • Resting, Holding and Slicing Brisket: What Sources Say

    Resting, Holding and Slicing Brisket: What Sources Say

    How long a brisket should rest, whether to keep it warm, and which way to cut it are answered differently depending on who you ask. This piece compares Meathead Goldwyn’s Texas-style brisket guide on AmazingRibs.com, Jim Shahin’s NPR report quoting Aaron Franklin and Texas A&M’s Jeff Savell, Daniel Vaughn in Texas Monthly, and Steven Raichlen’s brisket slicing guide, then adds the USDA’s hot-holding numbers. Celsius conversions are ours.

    Why Hold a Brisket at All?

    Savell told NPR that raw meat is about 70 percent water and cooked meat about 55 percent, and that resting lets moisture regroup around the proteins so it does not rush out when the meat is cut. Meathead makes a tenderness argument instead: holding the wrapped meat for one to four hours lets carryover cooking convert more collagen into gelatin. Vaughn offers a third idea, which he flags as his own theory: melted collagen turns sticky again as the brisket cools, and that stickiness is what makes it feel juicy.

    How Long? The Sources Disagree

    • Meathead: at 195-205°F (91-96°C), when the brisket wobbles, hold it wrapped in a cooler for 2 to 4 hours, until the meat drops to 150°F (66°C), then slice.
    • Aaron Franklin (via NPR): a custom warmer set to 140°F (60°C) for two to three hours after the meat leaves the pit. He told a Camp Brisket audience that a long rest is “really important.”
    • Wayne Mueller, Louie Mueller Barbecue (via NPR): pulls briskets at about 98 percent done, wraps them in butcher paper and holds them two to four hours in a Cambro warmer.
    • Jeff Savell (via NPR): two to four hours or more, with bigger cuts held longer.
    • Daniel Vaughn: rests until the meat falls to 140°F (60°C), about an hour in his tests, and slices there.
    • Barbecue Bible FAQ: 30 to 60 minutes.

    So the range runs from half an hour to four hours or more. The longest figures come from cooks who hold meat for service or as a scheduling buffer; the shortest comes from a general FAQ. None of these sources tests the alternatives head to head, so treat the numbers as each cook’s practice rather than a proven optimum. Slicing temperatures differ too: 150°F for Meathead, 140°F for Vaughn.

    Cooler, Warmer or Oven

    NPR’s home version needs no equipment beyond a cooler: wrap the finished meat in foil (or, better, unwaxed butcher paper, which lets a little air through and helps keep the crust), swaddle it in towels, close the cooler and leave it. Meathead calls this a “faux Cambro” and uses a plastic cooler. Restaurants use warmers such as Alto-Shaam and Cambro units at 140°F. For an oven, the only source here is Smoked BBQ Source’s chuck roast recipe, which suggests holding at 165-180°F (74-82°C) for up to three hours or using an oven’s warming setting; it is written for chuck, not brisket, so consider it a starting idea.

    The Food Safety Numbers

    The USDA’s Food Safety and Inspection Service says bacteria grow fastest between 40°F and 140°F (4-60°C), and can double in as little as 20 minutes. Hot food should be kept at or above 140°F. Food should not sit out of refrigeration for more than 2 hours, or 1 hour when it is above 90°F (32°C), and leftovers should be refrigerated within 2 hours of cooking or of leaving a warming appliance. Separately, USDA’s temperature chart lists 145°F (63°C) with a 3-minute rest for beef steaks, chops and roasts.

    The 195-205°F figure that pitmasters cite is a tenderness target, not a safety threshold. What matters for holding is the low end: Meathead’s cooler hold ends at 150°F and Vaughn slices at 140°F, right on the USDA line, so if you slice at that temperature, serve promptly.

    Slicing the Flat and the Point

    Meathead advises waiting until the last moment, because brisket dries quickly once cut. Trim about an inch off the thick end and two inches off the tip of the flat, slide a knife along the fat between the two muscles, separate them, and slice each across its own grain, 1/8 to 1/4 inch (3-6 mm) thick, roughly the width of a pencil. He notes that the grain runs in different directions in the two muscles.

    Franklin, as described by MasterClass, starts the flat at the corner opposite the point, cutting at an angle across the grain, about a No. 2 pencil wide and tapering as he goes. He slices the point a little thicker, about 3/8 inch (roughly 1 cm), after trimming off the seam fat.

    Raichlen says he uses Franklin’s approach: halve the brisket crosswise where the point’s bulge begins, slice the flat on the diagonal and the point perpendicular to its edge. He also describes an alternative from Ohio pitmaster Jim Budros: separate the muscles, remove the fat between them, and realign the point with a 60-degree turn so all the fibres run the same way and one pass slices both. Raichlen’s FAQ gives a simpler rule: start with the flat and rotate the meat about 90 degrees at the point.

    Keep reading

    Sources

  • How to Grill Sausages and Brats Without Splitting

    How to Grill Sausages and Brats Without Splitting

    Split casings are the most common complaint about grilled bratwurst, and the fix is mostly about heat control rather than any special gadget. This guide draws on two of Weber’s published brat recipes, Beer-Simmered Brats with Cheese Sauce and Brats with Spicy Stewed Peppers (Jamie Purviance), plus the safe-temperature guidance from the USDA Food Safety and Inspection Service (FSIS). We have not cooked these ourselves; the steps below are Weber’s methods, put into our own words.

    Why Sausages Split

    Weber’s recipes do not go into casing science, but the approach is clear. In the simmer-first recipe, the brats sit in a pan of beer and onions over the grill, and the instruction is blunt: if the liquid starts to boil, move the pan to indirect heat to prevent splitting. Read plainly, a gentle simmer is fine and a hard boil is what Weber is guarding against. Weber’s second recipe takes the other route, searing the brats over moderate rather than fierce heat and finishing them in a pan on the cooler side of the grill.

    Method One: Simmer First, Then Brown

    This is the gentler of Weber’s two approaches and the one aimed squarely at avoiding splits.

    1. Set up for direct high heat. Weber starts at 450–550°F (roughly 230–290°C, our conversion). On a charcoal grill, it says to keep a small area free of briquettes as an indirect-heat safe zone.
    2. Build the simmering bath. In a large disposable foil pan, Weber combines two 12-ounce bottles of Belgian-style wheat beer or ale, two sliced red onions, a tablespoon of country-style Dijon mustard and a tablespoon of sugar, then adds six fresh bratwurst. Weber’s ingredient list specifies brats pierced several times with a fork, so that is what this version does; its other brat recipe above does not mention piercing.
    3. Simmer with the lid closed. Bring the pan to a simmer over direct high heat and cook about 20 minutes, turning the brats now and then, until they look evenly coloured and no longer raw. If the liquid boils, slide the pan to the indirect zone.
    4. Drop the heat and brown. Weber lowers the grill to medium (350–450°F, about 175–230°C) and lifts the brats out of the liquid, discarding it. The brats then go over direct medium heat for about 6 minutes, turning occasionally, until browned.

    Method Two: Sear, Then Finish in a Pan

    The second recipe skips the simmer and uses a two-zone medium fire (350–450°F).

    1. Grill six bratwurst over direct medium heat with the lid closed for about 15 minutes, turning occasionally, until lightly charred all over.
    2. Move them into a foil pan of softened peppers, onion and beer (Weber’s mix uses a cup of beer and two tablespoons of spicy brown mustard) and cook over indirect medium heat, lid closed, for 10 to 15 minutes.
    3. Weber marks the brats as fully cooked at 160°F (71°C). If the pan starts to dry out, it suggests adding a little more beer.

    A separate Weber recipe using the same idea, Brats with Stewed Spicy Peppers, adds a useful turning detail: turn the brats every few minutes and swap their positions as needed for even cooking.

    Safe Internal Temperatures

    Whichever method you use, a food thermometer is the only reliable way to know a sausage is done. FSIS states that food should be cooked to the listed minimum internal temperature, measured with a food thermometer, before it is removed from the heat source.

    • Uncooked sausages made with ground beef, pork, lamb or veal: 160°F (71°C). FSIS’s chart gives the same figure for ground meats, 160°F (71.1°C).
    • Uncooked sausages made with ground turkey or chicken: 165°F (74°C, our conversion).

    Check the package first. FSIS explains that sausages are either uncooked or ready-to-eat, and that cooked bratwurst sits in the cooked-sausage category alongside hot dogs. Sausages that are not ready to eat must carry safe handling instructions, and FSIS says the product should display cooking directions suited to the consumer.

    What About Hot Dogs?

    Hot dogs are a different case because they are already cooked. FSIS classes frankfurters as cooked and/or smoked sausages, so the goal on the grill is reheating rather than cooking through. Its hot dog guidance says people at increased risk of foodborne illness should reheat hot dogs until steaming hot before eating, because of the risk of listeriosis. The Weber recipes above cover fresh bratwurst, so we are not offering a tested hot dog method here; the safety guidance above is what we can source.

    FSIS also notes that hot dogs should not sit at room temperature for more than 2 hours, or 1 hour once the temperature goes above 90°F (32°C, our conversion). That matters at a summer cookout.

    Quick Checklist

    • Keep the heat moderate, and slide sausages or the simmering pan to the cooler zone if the liquid boils.
    • Turn regularly and move brats around so they cook evenly.
    • Confirm 160°F (71°C) for beef, pork, lamb or veal sausages, and 165°F (74°C) for poultry sausages.
    • Store raw sausage in the refrigerator; FSIS gives 1 to 2 days for uncooked fresh sausage.

    Keep reading

    Sources

  • How to Choose a Steak: Cuts, Marbling and USDA Grades

    How to Choose a Steak: Cuts, Marbling and USDA Grades

    A steak label can feel like a code: ribeye, strip, filet, T-bone, and then a grade stamp on top. This guide draws on university extension material and USDA sources to explain what each cut is, where it comes from, what marbling means, and what Prime, Choice and Select tell you. It ends with the USDA’s safe minimum temperature for steaks.

    Where Steaks Come From

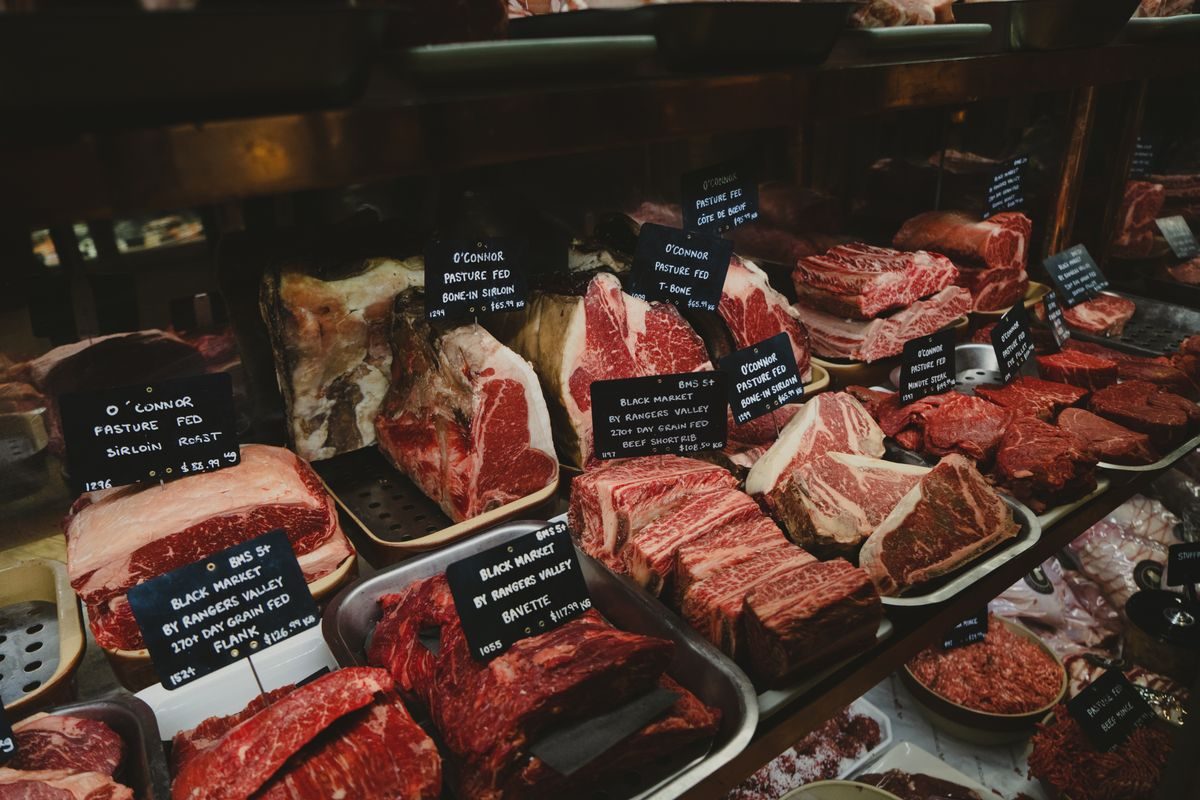
    A beef carcass is divided into large sections called primals. Kansas State University’s consumer guide to processing beef lists them as chuck, rib, short loin, sirloin, round, flank, short plate and brisket. The University of Kentucky’s retail-cut identification pages then describe what each steak looks like once it is sliced, including which muscles show on the cut face.

    The Main Steak Cuts

    Ribeye

    Kansas State notes that the rib is normally cut into bone-in or boneless ribeye steaks. Kentucky describes the boneless steak as cut across the grain from a ribeye roast, with the oval-shaped ribeye muscle as the main muscle, visible on both faces of the steak.

    Strip steak (New York strip, top loin)

    Kansas State lists boneless New York strip steaks among the options from the short loin. Kentucky’s name for the same idea is the top loin steak: a cut taken from one main muscle, the top loin, with some fat along the edge. The bone-in version carries a piece of the vertebra, part of the “T” in T-bone, along one side.

    Tenderloin (filet)

    Tenderloin steaks, sold as filets, also come from the short loin according to Kansas State. Kentucky describes the lean as very fine-textured, with only a small amount of fat around the outside edges.

    T-bone and porterhouse

    These are the two-in-one steaks: strip on one side of the bone and tenderloin on the other. Kansas State points out that they are larger cuts than the boneless options, which is why people wanting smaller portions tend to choose a boneless strip or a filet instead. Kentucky separates the two by the size of the tenderloin. On a T-bone, measured across its centre, the tenderloin is between 1/2 and 1 1/4 inches wide (about 13 to 32 mm; that conversion is ours). A porterhouse has a tenderloin at least 1 1/4 inches wide, and Kentucky also mentions a small extra muscle attached to the outside edge of the strip.

    Sirloin

    Kansas State treats the sirloin as its own primal and says it can be cut into bone-in or boneless steaks, noting that bone-in ones are large. The two sources organise this differently: Kentucky files its sirloin steaks under “Cuts Taken from the Loin” rather than giving the sirloin a heading of its own.

    Flank and skirt

    These are the long, thin steaks. Kentucky describes flank steak as a flat, oval, boneless steak from the flank, with muscle fibres running the length of the cut and very little fat. Skirt steak comes from the plate and is described as a long, thin steak made from the diaphragm muscle, with a good deal of fat on the outside. Kansas State adds that each carcass half has one flank steak and two skirt steaks.

    What Marbling Is

    Marbling is the amount and distribution of intramuscular fat, the flecks of fat inside the muscle itself, as opposed to the fat cap on the edge. A Colorado State University fact sheet published through the Beef Checkoff’s Beef Research site says cuts with high levels of marbling are more likely to be tender, juicy and flavourful than cuts with low levels.

    What the USDA Grades Mean

    Grading is not compulsory. The Colorado State fact sheet describes USDA beef carcass grading as a voluntary service that the packer pays a fee for, carried out by a USDA employee independent of both producer and packer. There are eight quality grades in total, running from Prime down to Canner, and the top three are the ones you meet in shops: Prime, Choice and Select.

    According to the fact sheet, the quality grade combines two things: physiological maturity (a stand-in for age) and marbling, with marbling in the ribeye at the 12th rib the main determinant within a maturity group. Prime, Choice, Select and Standard are limited to beef from young cattle. The youngest group covers roughly 9 to 30 months, and the next group, 30 to 42 months, is not eligible for Select.

    The USDA Agricultural Marketing Service’s grade standards set a minimum amount of marbling for each grade. For the youngest cattle, that minimum is a “slightly abundant” amount for Prime, a “small” amount for Choice and a “slight” amount for Select. Put simply, the difference between the grades is mostly a difference in how much intramuscular fat the grader saw. The same fact sheet notes that studies suggest beef graded at least Select is likely to be acceptable in eating quality for most consumers, so a lower grade is not a warning sign.

    Separately, yield grades from 1 to 5 estimate how much closely trimmed, boneless retail meat a carcass will produce, with 1 the leanest. They are a different measure from quality grades.

    Cooking Safely: The USDA Minimum

    The USDA Food Safety and Inspection Service lists 145 °F (62.8 °C) as the minimum internal temperature for beef, pork, veal and lamb steaks, chops and roasts, followed by a rest of at least 3 minutes. It says to measure with a food thermometer before taking the food off the heat, and adds that people may choose higher temperatures for personal preference. Ground meats, including burgers, are treated differently: the same chart gives 160 °F (71.1 °C).

    We have not cooked or graded any steaks for this piece; it summarises the sources below.

    Keep reading

    Sources

  • What the Official Neapolitan Pizza Standard Specifies

    What the Official Neapolitan Pizza Standard Specifies

    Pizza oven marketing leans on the word “Neapolitan”, so it helps to read what the official documents actually say. Two matter: the European Union’s Traditional Speciality Guaranteed (TSG) specification for “Pizza Napoletana”, and the International Regulations of the Associazione Verace Pizza Napoletana (AVPN), the Naples-based association that certifies pizzerias. Below is what each says about dough, fermentation, shaping and baking, and where a home pizza oven fits. It is the first article in our Pizza Ovens series.

    Two Documents, Two Purposes

    The EU specification was entered in the register by Commission Regulation (EU) No 97/2010, with the AVPN and the Associazione Pizzaiuoli Napoletani as applicant groups. The regulation records that the name was registered without reservation of the name, and a 2016 Official Journal notice republishes the same specification. The AVPN’s document is different in kind: the association describes its regulations as the rules for obtaining its collective trade mark, “Verace Pizza Napoletana”, and it checks members against them. Both address professional producers; the EU text describes work done in a continuous cycle on the same commercial premises. Neither is a home recipe.

    Dough Ingredients

    The EU specification lists the basic raw materials as common wheat flour, brewer’s yeast, drinkable natural water and sea or kitchen salt for the dough. Its worked dough example uses 1 litre of water, 50 to 55 g of sea salt, 3 g of brewer’s yeast and 1.8 kg of flour, with a flour W value of 220 to 380.

    The AVPN’s 2024 regulations use the same basic recipe per litre of water with wider ranges: 40 to 60 g of salt, 0.1 to 3 g of fresh brewer’s yeast (dry yeast at one third of that, or sourdough under 10% of the flour), and flour listed as 1,600 to 1,800 depending on absorption. It specifies type 00 or 0 flour with a W value of 250 to 320, says to start with the water, and states that no fat or sugar should ever be added.

    Mixing and Fermentation

    The EU text describes about 10 minutes adding flour in a mixer plus 20 minutes at low speed, a dough fermentation temperature of 25°C (77°F), a two-hour rest under a damp cloth, hand-shaped balls of 180 to 250 g, and a second rise of four to six hours in containers at room temperature.

    The AVPN 2024 document takes a different route: balls of 200 to 280 g, scaled to pizza size, and an overall fermentation of 12 to 24 hours in a proofing box. If a controlled chamber is used, its ideal parameters are 18 to 20°C (64 to 68°F) and 60 to 70% humidity. The summary page on the AVPN website gives a shorter minimum of 8 hours, so its own PDF and web page do not match exactly.

    Shaping

    Both documents require shaping by hand from the centre outwards, and both prohibit a rolling pin or a mechanical press-type disc machine. The EU text gives a centre thickness of no more than 0.4 cm (about 0.16 in), a 1 to 2 cm rim and a diameter not exceeding 35 cm (about 14 in). The AVPN gives a centre of 0.25 cm (about 0.1 in) with the same 1 to 2 cm rim.

    Oven Type, Temperature and Bake Time

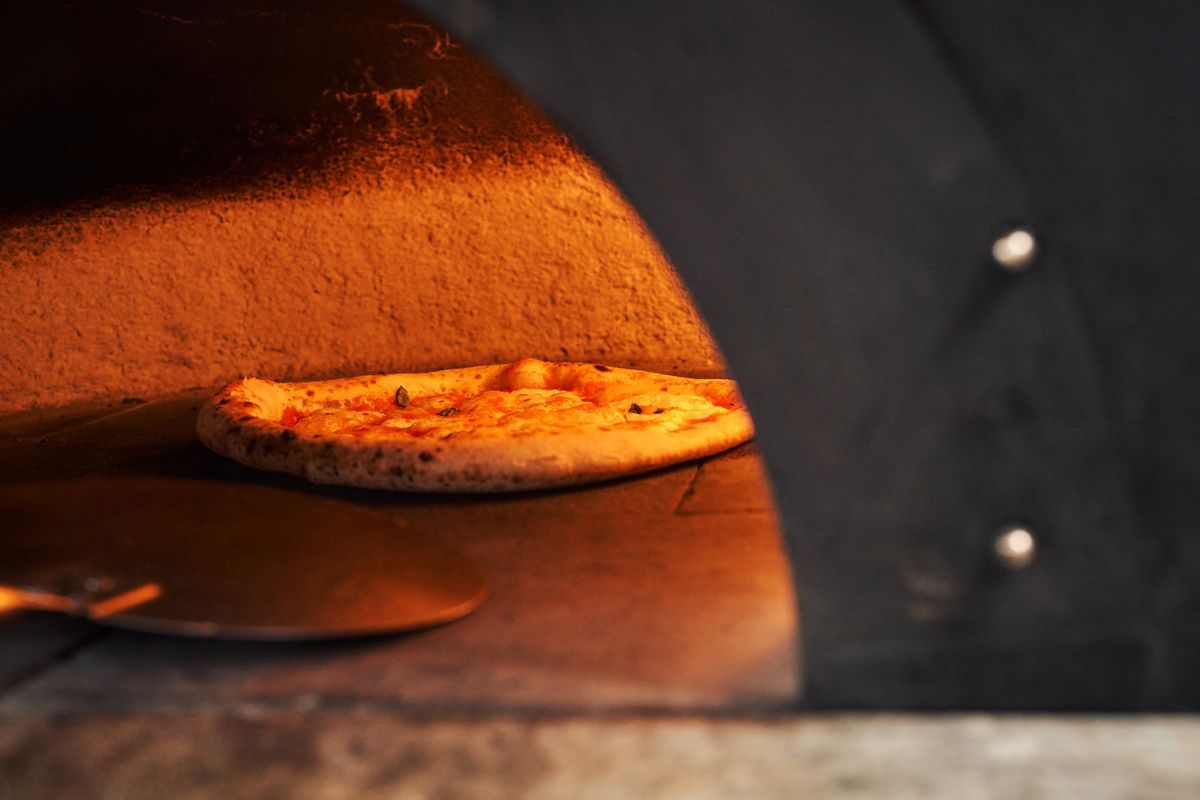
    The EU specification says the pizza is baked exclusively in wood-fired ovens at a baking temperature of 485°C (905°F), and its summary lists about 485°C on the cooking floor, about 430°C (806°F) at the dome and a 60 to 90 second bake. The AVPN 2024 regulations give the same time but put the figures the other way round: a base of about 380 to 430°C (716 to 806°F) and a dome of about 485°C (905°F).

    The AVPN says the pizza must cook directly on the oven surface, not on a tray. It says cooking was traditionally in wood-fired ovens only, and that gas or electric ovens are now possible if they meet certification parameters approved by the association, with the certification and brand modified to show the difference. It describes a traditional oven floor of 105 to 140 cm (roughly 41 to 55 in) across.

    What This Means for a Home Pizza Oven

    These documents describe professional production in a particular kind of oven. For a home oven, whatever its fuel, that means a few things.

    • The standard is a label, not a benchmark. The EU text requires wood firing, and the AVPN accepts gas or electric ovens only when it has certified them. Neither document certifies home cooking, so “Neapolitan-style” is the accurate description of a pizza from your own oven.
    • Heat and time are the hard part. The standards pair a 60 to 90 second bake with floor temperatures from roughly 380°C upward. How close a given oven gets is a question for its manual, not these documents.
    • Kitchen ovens work differently. America’s Test Kitchen’s Neapolitan-style recipe (Lan Lam, 2025) heats a baking steel or stone in a home oven to 550°F (288°C), then broils for 4 to 5 minutes. For a pizza oven the same recipe says to heat to 650 to 700°F (343 to 371°C) and bake for 4½ to 5 minutes. Those are that test kitchen’s settings, not the AVPN or EU figures.
    • Some habits transfer. Hand shaping without a rolling pin, baking on a hot surface rather than a tray, turning the pizza for an even bake and a long, controlled fermentation all appear in the AVPN text.

    Cooking Safely

    Fuel-burning ovens produce carbon monoxide. The NHS says carbon monoxide can be made by fires and appliances that burn gas, wood, oil or coal, advises against using a barbecue or camping stove indoors or inside a tent, and recommends a carbon monoxide alarm in rooms with such appliances. It names barbecues and camping stoves specifically; a wood or gas pizza oven burns the same fuels, so treat it the same way and follow the manufacturer’s placement and ventilation instructions.

    Keep reading

    Sources