Techniques

Practical guides to grilling, smoking, live-fire and camp cooking methods.

  • Thin Blue Smoke vs White Smoke: The Chemistry of Good and Bad Barbecue Smoke

    Thin Blue Smoke vs White Smoke: The Chemistry of Good and Bad Barbecue Smoke

    “Thin blue smoke” is repeated constantly in barbecue circles as the goal, while thick white smoke gets treated as a warning sign. The distinction isn’t superstition; it reflects a real difference in how completely the wood is combusting, and that difference shows up directly in flavor.

    Where Smoke Flavor Actually Comes From

    Wood smoke flavor is driven primarily by phenolic compounds released when lignin, a structural polymer that makes up a large part of wood’s cell walls, breaks down under heat. Peer-reviewed food science research on wood pyrolysis has identified specific compounds, guaiacol and syringol among the most significant, as the dominant contributors to smoked-food flavor, arising from lignin decomposition roughly in the 310–500°C (590–930°F) range inside burning wood. Research published in food science journals, including work compiled in ACS Symposium Series publications on smoke flavor formation, describes this lignin breakdown as the mechanism producing both the flavor compounds and, separately, some of the antimicrobial and antioxidant properties traditionally associated with smoking as a preservation method.

    What Makes Smoke “Thin and Blue” vs Thick and White

    The difference between thin blue smoke and thick white or gray smoke comes down to combustion completeness, which depends on heat, oxygen supply and fuel moisture together. When wood burns hot enough with sufficient airflow and reasonably dry fuel, combustion is more complete, and the resulting smoke, mostly fine particles and gases, appears thin and takes on a bluish tint. When fuel is too cool, starved of oxygen, or too damp, combustion is incomplete, producing thicker smoke made of larger, less fully combusted particles and condensates that appear white or gray and carry a harsher, more acrid character.

    Creosote: What Bad Combustion Actually Produces

    Creosote is the practical downside of that incomplete combustion: a thick, carbon-rich residue and condensate that forms when wood doesn’t burn cleanly. It’s what’s responsible for the bitter, oily, occasionally turpentine-like off-flavor sometimes described as “oversmoked” barbecue. Unlike the phenolic compounds that come from clean, complete combustion and contribute pleasant smoke flavor, creosote’s larger, less-combusted particles deposit unevenly on food and carry flavors that read as acrid or chemical rather than smoky.

    Why More Smoke Doesn’t Mean More Flavor

    A common misconception is that billowing white smoke means more smoke flavor is being delivered to the meat. The opposite is closer to true: thick white smoke generally indicates a fire that isn’t burning efficiently, and the flavor compounds it’s depositing are more likely to include creosote-associated bitterness alongside, or instead of, the cleaner phenolic flavor compounds that come from complete combustion. A fire producing thin blue smoke is depositing less total smoke by volume, but a higher proportion of what’s landing on the meat is the desirable guaiacol- and syringol-driven flavor rather than harsh combustion byproducts.

    Getting There in Practice

    Since combustion completeness depends on heat, airflow and fuel dryness together, the practical fix for thick white smoke is rarely just “add less wood.” It’s usually some combination of ensuring your fire has established a hot, stable coal bed before adding fresh wood, using dry, well-seasoned wood rather than green or damp splits, and keeping intake and exhaust vents open enough to supply adequate oxygen. Adding a large piece of cold, damp wood directly onto a bed of hot coals is one of the most common ways home cooks accidentally produce a burst of thick white smoke, since the wood’s surface moisture has to evaporate before it can combust cleanly.

    Keep reading

    Sources

  • The Actual Science of Fat Rendering (And Why Different Fats Melt at Different Temps)

    The Actual Science of Fat Rendering (And Why Different Fats Melt at Different Temps)

    “Render the fat” is common advice in barbecue and grilling, but the process behind it, and the temperature it actually happens at, varies a lot more between different fats and cuts than most cooking advice acknowledges.

    What Rendering Actually Is

    Fat in meat is stored inside cells with their own membranes. Rendering is the process of heating that fat past the point where those cell membranes rupture and release the liquid fat inside them. According to Harold McGee’s “On Food and Cooking,” widely regarded as the standard reference on food chemistry for both professional and home cooks, this membrane rupture generally begins once temperatures climb past the boiling point of water, 212°F (100°C), as the water content inside the fat cells evaporates and the resulting pressure and heat cause the cell walls to break down.

    Why Different Fats Behave Differently

    Not all animal fats render at the same temperature, which is part of why the same cooking method doesn’t produce equally good results across different meats. McGee documents that duck fat begins melting at a comparatively low temperature, around 100°F (38°C), which is one reason duck fat is prized as a finishing fat and cooking medium: it’s liquid at temperatures where other animal fats are still solid. Chicken fat starts rendering at a notably higher point, around 265°F (130°C), and pork fat requires even more heat to fully render, up to around 370°F (188°C). That spread explains why a low-and-slow cook that fully renders pork fat in a shoulder would badly overcook a duck breast, whose fat is already liquid at a fraction of that temperature.

    Collagen Is a Separate but Related Process

    Fat rendering often gets conflated with a related but distinct process: collagen breakdown. McGee’s research documents that connective-tissue collagen, the tough protein found in tendons, cartilage and well-worked muscles, begins dissolving into gelatin around 160°F (70°C), and with continued time at temperature, that connective tissue progressively softens into a jelly-like consistency that lets muscle fibers pull apart easily. This is the mechanism behind “fall apart tender” barbecue, and it’s a different chemical process from fat rendering, even though both happen simultaneously in a slow-cooked pork shoulder or brisket, and both benefit from extended time at moderate heat rather than a fast cook at high heat.

    Why Low and Slow Actually Works

    Put together, these two mechanisms explain why traditional barbecue cuts, pork shoulder, brisket, short ribs, are cooked low and slow rather than hot and fast. Both fat rendering and collagen-to-gelatin conversion are time-and-temperature processes, not instant reactions; they need sustained exposure to moderate heat (roughly 200–250°F smoker temperatures, well above the 160°F collagen threshold but well below the point that would scorch the surface) over multiple hours to fully convert. Cooking those same cuts hot and fast would char the surface before the interior connective tissue and fat had time to break down, leaving a tough, chewy result despite a well-browned crust.

    Applying This to Cut Selection

    The practical implication is to match your cooking method to a cut’s actual fat and collagen content, rather than applying one approach to everything. Heavily marbled, connective-tissue-rich cuts like brisket point, pork shoulder and short ribs benefit from long, low exposure that lets both processes complete. Leaner cuts with less collagen, like a pork loin or chicken breast, don’t have the same connective tissue to break down, so extending their cook time past the point of doneness just dries them out without the same tenderizing payoff a fattier cut gets from the same treatment.

    Keep reading

    Sources

  • Dry Brine vs Wet Brine: What Actually Happens to the Meat

    Dry Brine vs Wet Brine: What Actually Happens to the Meat

    Both brining methods use the same basic tool, salt, but they produce meaningfully different results, and the difference comes down to whether water is added to the process or not.

    How Wet Brining Works

    A wet brine submerges meat in a saltwater solution, sometimes with sugar and aromatics added, for several hours to overnight. Through osmosis, salt moves into the meat while water moves in alongside it, and the meat’s muscle proteins are altered by the salt in a way that helps them retain more moisture during cooking. The result is a bird or roast that weighs more coming out of the brine than it did going in, and that’s noticeably juicier straight out of the oven or smoker.

    How Dry Brining Works Instead

    A dry brine skips the water. Salt (sometimes combined with other seasoning) is applied directly to the meat’s surface, which is then left uncovered in the refrigerator, typically for 24 to 48 hours for a whole turkey. Food writer and Serious Eats contributor J. Kenji López-Alt, whose brining comparisons are among the most widely cited in food media, describes the mechanism this way: salt initially draws moisture out of the meat to the surface, then dissolves into that surface moisture, forming a concentrated brine that gradually gets reabsorbed back into the meat over the following hours. The net effect seasons the meat throughout and helps it retain moisture during cooking, without adding the extra water a wet brine introduces.

    Why López-Alt and Others Now Favor Dry Brining

    The core critique of wet brining is that the water a wet brine adds doesn’t just plump the meat, it also dilutes it. As López-Alt puts it, a wet-brined turkey “tastes watered down” because the added moisture is mainly water, not concentrated flavor. A dry brine, by contrast, helps meat hold onto its own natural moisture rather than diluting it with an external liquid, which tends to produce a more intensely flavored result. Dry brining also has practical advantages: there’s no need to find fridge space for a bucket or bag of brine large enough to submerge a whole turkey, and a dry-brined bird’s skin, having spent time uncovered and air-drying in the fridge, tends to crisp better than a wet-brined one, which starts the cook with a wetter surface.

    Where It Matters Most

    The difference is most noticeable on large cuts and whole poultry, where cook time is long enough for either method to fully take effect, and where skin texture (on a turkey or whole chicken) is part of what you’re judging the final result on. For chicken specifically, López-Alt’s technique in “The Food Lab” recommends working a dry brine directly under the skin as well as over it, which seasons the meat more directly than a surface-only application and produces a noticeably juicier result than either an unseasoned bird or a wet-brined one with diluted flavor.

    Practical Timing

    For a whole turkey, apply roughly one tablespoon of kosher salt per five pounds of bird, spread evenly over the skin and, where accessible, under it, then refrigerate uncovered for at least 24 hours and up to 48 for the most pronounced effect. For smaller cuts like chicken thighs or a pork shoulder headed for the smoker, a shorter window, several hours to overnight, still produces a meaningful improvement over salting immediately before cooking. Either way, the meat doesn’t need rinsing before it goes on the heat; the salt that hasn’t been reabsorbed will simply dissolve into the cooking process.

    Keep reading

    Sources

  • What Bark Actually Is: The Chemistry Behind Barbecue’s Best Crust

    What Bark Actually Is: The Chemistry Behind Barbecue’s Best Crust

    Ask most pitmasters what makes good bark, and you’ll get an answer about rub ingredients or wood type. The actual chemistry, according to the physicist who’s studied it most closely for the barbecue science site AmazingRibs.com, comes down to something else: what happens to meat proteins at the surface during a long, slow cook.

    Who’s Behind the Research

    Greg Blonder is a professor of product design and engineering at Boston University, holds a physics degree from MIT and a physics PhD from Harvard, and serves as AmazingRibs.com’s science advisor and co-author of the site’s book, “Meathead, The Science of Great Barbecue and Grilling.” His explanation of bark formation is one of the more detailed technical breakdowns available outside academic food-science literature.

    The Process Behind the Crust

    Blonder describes the technical mechanism behind bark as “Diffusion Restricted Irreversible Polymerization,” abbreviated DRIP. In plain terms, proteins at the meat’s surface undergo a diffusion-limited, irreversible chemical change that essentially forms a permanent, hardened skin, one that locks in place whatever spices and smoke particles have settled on the surface during the cook. Two chemical processes drive this: the Maillard reaction, the same browning reaction responsible for a seared steak’s crust, and polymerization, a separate process where smaller molecules link together into larger, more rigid structures.

    A Common Misconception Blonder Corrects

    Most pitmasters attribute bark formation primarily to the rub or seasoning sitting on the meat’s surface. According to Blonder’s research, that’s not accurate: seasoning has essentially nothing to do with pellicle formation, the initial tacky surface layer that develops before bark forms. The pellicle forms from proteins and moisture at the meat’s surface reacting to air exposure, independent of whatever spice mix is on top of it. The rub contributes flavor and color to the bark once it forms, but it’s not the mechanism causing the bark to form in the first place.

    Why Bark Color Varies

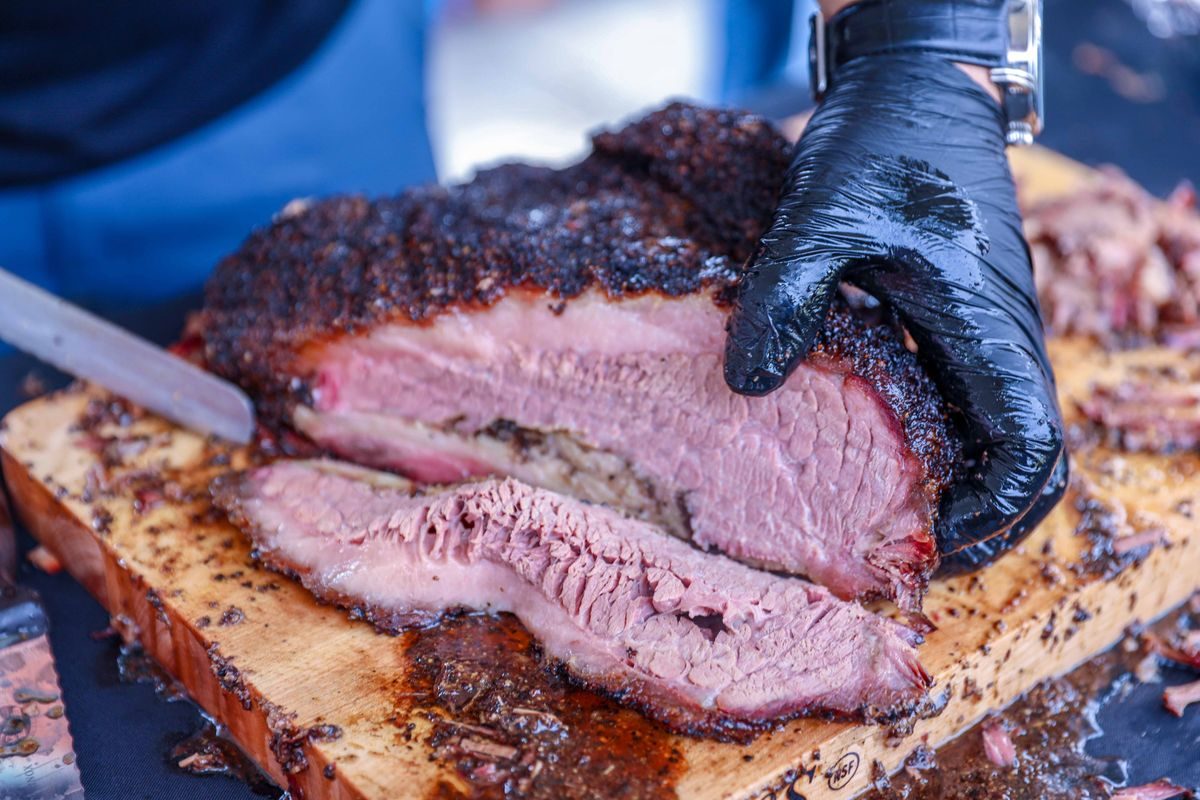
    Blonder’s research also explains why bark color varies so much between cooks. Without smoke exposure, bark typically develops into a dark mahogany-red color, with the exact shade depending on what’s in the rub. With extended smoke exposure and enough time, that same bark can darken further into a near-black, glossy finish. That range explains why two briskets cooked with an identical rub can look meaningfully different depending on smoker type, wood used and total cook time, since it’s the combination of Maillard browning, polymerization and smoke deposition together that determines the final color, not the rub alone.

    What This Means for How You Cook

    If bark formation is primarily a protein reaction rather than a seasoning effect, the practical takeaway is that time and consistent, moderate heat matter more to bark quality than how thick a layer of rub you apply. A heavier rub gives you more surface flavor and color contribution, but it won’t substitute for the extended low-temperature exposure that actually drives the DRIP process. That’s also why briskets and pork shoulders, both long, low-and-slow cooks, develop much more pronounced bark than a quickly grilled steak or burger: it’s the duration of surface protein exposure to heat, not the seasoning applied, that’s doing most of the structural work.

    Keep reading

    Sources

  • Baby Back, Spare, or St. Louis-Cut: What’s Actually Different About Each Rib

    Baby Back, Spare, or St. Louis-Cut: What’s Actually Different About Each Rib

    Rib names get thrown around as if they’re interchangeable marketing terms, but they refer to specific, different sections of a hog’s rib cage, with real differences in fat content, bone structure and how they cook.

    Baby Back Ribs: Not About the Pig’s Age

    Baby back ribs come from the top of the rib cage, where the ribs meet the spine, directly below the loin muscle. The “baby” in the name refers to size, not age: they’re shorter and more curved than spare ribs, typically running three to six inches long. Because they sit next to the loin, a naturally lean cut, baby backs carry less fat and connective tissue than ribs from lower on the animal, which makes them more tender out of the gate but also less forgiving of overcooking, since there’s less rendered fat to keep them moist if you push past done.

    Spare Ribs: More Fat, More Cartilage, More Payoff

    Spare ribs come from further down the rib cage, closer to the belly. They’re larger, flatter and contain more cartilage, particularly around the sternum end, along with noticeably more fat and connective tissue than baby backs. That extra fat and collagen is an advantage for low-and-slow cooking: it renders and breaks down over a longer cook, basting the meat from the inside and producing a richer result than a leaner cut can. The tradeoff is a longer cook time and a rack that’s genuinely harder to trim and portion evenly, since it includes cartilage and bone structure baby backs don’t have.

    St. Louis-Cut: A Trim, Not a Different Animal

    St. Louis-style ribs aren’t a separate cut from a different part of the hog. They’re spare ribs that have been trimmed down: the sternum bone, the rib tips (mostly cartilage) and the flap of breastbone meat are removed, leaving a flatter, more rectangular, uniformly shaped rack. This trim is common enough, and standardized enough, that the USDA has an official designation for it: “Pork Ribs, St. Louis Style.” The uniform shape makes St. Louis-cut ribs easier to brown evenly and easier to fit consistently on a grill grate, while keeping most of the fat content that makes spare ribs forgiving to cook.

    Why the Trim Became Standard

    The style is generally traced to mid-20th-century Midwestern meat-packing operations, where trimming spare ribs into a squared-off rack let packers sell the tips and cartilage separately while marketing the trimmed racks as a more presentable, premium product. That commercial motivation, not a regional flavor preference, is why the “St. Louis” name refers to a butchering pattern rather than a seasoning style or sauce tradition the way “Kansas City” or “Memphis” often do.

    Choosing Between Them for Your Next Cook

    If you want the fastest cook and the most tender result without much trimming work, baby backs are the easier choice, but keep a closer eye on internal temperature since there’s less fat margin for error. If you want a richer, more forgiving cook and don’t mind the extra time, go with spare ribs, and consider trimming them St. Louis-style yourself before they go on the smoker; it takes ten minutes with a sharp knife and a boning motion along the cartilage line, and it makes the rack easier to cook evenly and easier to slice into clean portions afterward. Either way, matching your cook time and fat expectations to the actual cut, rather than assuming all “pork ribs” behave the same, is what separates a rack that turns out right from one that doesn’t.

    Keep reading

    Sources

  • Tuffy Stone’s Competition BBQ Approach: What ‘The Professor’ Actually Does Differently

    Tuffy Stone’s Competition BBQ Approach: What ‘The Professor’ Actually Does Differently

    Competition barbecue circuits reward consistency more than raw flavor intuition. Judges taste dozens of entries in a single day, and the cooks who win repeatedly tend to be the ones who can produce the same result on command, contest after contest. Few competitors are more associated with that mindset than Tuffy Stone, a six-time World Barbecue Champion known on the circuit as “The Professor.”

    An Unusual Background for a Pitmaster

    Stone’s path to competition barbecue runs through the Marines and a classical French kitchen, not a backyard smoker. According to AmazingRibs.com’s biography of Stone, he trained as a French chef at La Maisonette and has worked in Richmond, Virginia’s culinary scene since 1986, after earlier service as a Marine working on fighter jets as an aviation engineer. He founded his competition team, Cool Smoke, in 2004 with his father, George Stone, starting from a modest result, second place in Pork and seventh in Brisket, at their first contest.

    The Record Behind the Nickname

    What followed was one of competition barbecue’s more consistent runs. Per AmazingRibs.com’s documented record, Cool Smoke has entered 174 contests, taking 41 Grand Championships and 21 Reserve Grand Championships, along with five overall World Championships (a sixth World title, at the 2019 Memphis in May World Championship Barbecue Cooking Contest, is separately confirmed by MEAT+POULTRY trade press coverage). Stone was inducted into the Barbecue Hall of Fame, and has judged multiple seasons of Destination America’s “BBQ Pitmasters.”

    Why “Precision” Is the Right Word

    Stone’s nickname reflects a specific approach rather than just a personality trait. Cooks and outlets who’ve covered him consistently describe a methodical, almost engineering-style process: treating each protein category as its own separate technical problem, controlling variables tightly, and aiming for reproducibility over improvisation. That mindset is a meaningful contrast to backyard barbecue culture, where “feel” and intuition are often treated as more important than process discipline. On the competition circuit, where a single off day can cost a placing, that discipline is arguably the bigger differentiator than any specific rub or sauce recipe.

    Applying the Mindset to Competition Chicken

    Chicken is widely considered one of the hardest categories in KCBS-sanctioned competition barbecue, precisely because it’s judged on uniform, bite-sized pieces where any inconsistency in seasoning, moisture or skin texture is easy for a judge to spot. The general competition-circuit approach documented by AmazingRibs and other barbecue technique resources involves using skin-on thighs (rather than breast, which dries out faster and is less forgiving), trimming each piece to a uniform size and shape so cook times match, brining or injecting for consistent seasoning and moisture, and rendering the skin separately, often with a period of higher, more direct heat, so every piece has the same bite-through texture. That standardization-first logic, treat every piece as identically as possible so the outcome is repeatable, is the same underlying principle that’s made Stone’s broader competition record so consistent.

    What This Means for a Backyard Cook

    You don’t need six world championships to use the same logic. If you’re cooking chicken thighs for a crowd, trim them to similar sizes before they go on the grill, season by weight rather than by eye, and check more than one piece with a thermometer instead of assuming they’ll all finish together. It’s a less romantic way to think about barbecue than “cook by feel,” but it’s the actual mechanism behind why disciplined competitors post more consistent results than talented cooks who don’t standardize their process.

    Keep reading

    Sources

  • Rodney Scott’s Whole Hog Method: What the James Beard Winner Actually Does Differently

    Rodney Scott’s Whole Hog Method: What the James Beard Winner Actually Does Differently

    Whole hog barbecue is the hardest style to fake. There’s no cut to trim toward tenderness and no single muscle to focus heat on; the whole animal has to cook evenly over hours on an open pit. Few people alive are more associated with doing it well than Rodney Scott, whose whole hog cooking earned him the James Beard Foundation’s Best Chef: Southeast award in 2018, making him only the second pitmaster ever to win a James Beard chef award.

    Where the Technique Comes From

    Scott didn’t learn whole hog cooking in a professional kitchen. According to his own account and reporting from Food Republic and other outlets, he started cooking whole hogs around age eleven at his family’s business, Scott’s Variety Store and Bar-B-Q in Hemingway, South Carolina, a small town in the Pee Dee region. His parents had relocated from Philadelphia in 1972 and built the barbecue side of the business from a single hog cooked weekly into a daily operation cooking seven or eight hogs a day as demand grew. Scott worked the pits through his teens and took over the family operation in 2011.

    From Family Pit to Charleston

    In 2016, Scott left the family restaurant and partnered with restaurateur Nick Pihakis to open the first Rodney Scott’s Whole Hog BBQ in Charleston in 2017, later expanding to Birmingham (2019) and beyond. The restaurants center on the same core dish: a whole hog, slow-smoked over hardwood coals, then hand-pulled and dressed with a thin, vinegar-based South Carolina-style sauce. Texas Monthly’s barbecue editor Daniel Vaughn has called Scott “an undeniable master of the pit,” a description that reflects both the technical skill involved and Scott’s decades of hands-on repetition, rather than formal culinary training.

    Why Whole Hog Is Different From Cooking a Shoulder

    Most backyard and competition pulled pork starts with a single pork shoulder or Boston butt, a manageable, uniformly shaped cut that’s forgiving of minor timing errors. A whole hog is not uniform. The shoulders, belly, loin and hams all have different thicknesses, fat content and cooking speeds, which means an open-pit whole hog cook has to manage heat zone by zone, often by physically moving coals under different parts of the animal, rather than simply setting one temperature and waiting. That’s part of why whole hog cooking, historically the dominant style across the Eastern Carolinas, has become rarer commercially: it takes more space, more labor and more skill per plate than shoulder-only pulled pork, and fewer restaurants are set up to do it at volume. Scott’s restaurants, and the recognition they’ve received, are frequently cited by barbecue writers as part of an effort to keep that specific, labor-intensive tradition from disappearing.

    The Sauce Matters Too

    Whole hog in the Carolinas isn’t usually served with a thick, tomato-based sauce. Scott’s version follows the regional pattern of a thin vinegar-and-pepper sauce, which is designed to cut through the fattiness of pulled pork rather than mask it with sweetness. It’s applied sparingly and tossed through the meat rather than poured over the top at the table, a detail that matters more with whole hog than with leaner cuts because there’s simply more rendered fat in the mix.

    What a Home Cook Can Actually Take From This

    Very few backyard cooks have the space or fuel access to smoke a whole hog. What’s transferable is the underlying principle: treat different parts of a large piece of meat differently rather than assuming one temperature setting will suit the whole thing evenly. On a smaller scale, that means separating a shoulder from anything leaner you’re cooking alongside it, checking internal temperature at multiple points rather than one, and thinking about sauce as a way to balance fat content rather than just add sweetness. Scott’s specific method was built for a whole animal, but the logic behind it holds at any scale.

    Keep reading

    Sources

  • Two-Zone Fires Explained: America’s Test Kitchen’s Two Different Setups, and When to Use Each

    Two-Zone Fires Explained: America’s Test Kitchen’s Two Different Setups, and When to Use Each

    “Two-zone fire” is treated as a single, generic piece of grilling advice online, but America’s Test Kitchen’s own testing actually distinguishes between two meaningfully different configurations, built for two different jobs. Using the wrong one for a given cook — or not realising there is a choice at all — is a common reason a “two-zone setup” does not produce the result a recipe is expecting.

    Setup One: The Two-Level Fire

    The two-level fire is the gentler of the two configurations. For charcoal, it means evenly distributing two-thirds of your lit coals over half the grill, then spreading the remaining third in an even layer over the other half. For gas, it means leaving the primary burner on high while turning the other burner or burners down to medium, rather than off. The result is two zones that are both actively hot, just to different degrees — a hotter area for searing, and a noticeably cooler, but still directly-heated, area to finish cooking more gently. This setup is commonly used for foods like thick chops and bone-in chicken pieces, where you want a real but more moderate difference between the two sides, not a fully off zone.

    Setup Two: The Modified Two-Level (Half-Grill) Fire

    The half-grill fire is a more extreme version of the same basic idea. For charcoal, all the lit coals go on one half of the grill in an even layer, leaving the other half completely free of coals — not banked down, empty. For gas, the primary burner is set as a recipe directs while the other burner or burners are turned off entirely, not just down. This produces one genuinely hot zone and one indirect zone with no direct heat source underneath it at all, which is a fundamentally different setup from the two-level fire’s “hot and less hot” arrangement.

    Why the Difference Actually Matters

    The half-grill fire’s fully indirect cool zone is specifically what makes it useful for fatty foods and flare-up-prone cuts: when fat dripping onto hot coals causes a flare-up, having a genuinely coal-free zone gives you somewhere to move the food immediately, rather than a “cooler” zone that is still sitting over active coals and could flare up itself. It is also the setup behind the classic sear-then-finish approach for thicker cuts: brown the food hard on the fully hot side first for a proper crust, then move it to the completely indirect side to finish cooking through without burning the exterior further. For something like chicken breasts, the same logic runs in the other direction — cook gently on the cool, coal-free side first, then finish with a quick, hard sear on the hot side right at the end.

    Choosing the Right One for Your Cook

    As a practical rule: if a recipe or technique calls for a real off-zone — somewhere to escape flare-ups entirely, or to finish a seared piece of meat with genuinely indirect heat — the half-grill fire, with one side completely free of coals or one burner fully off, is the correct setup, not a two-level fire with coals or medium heat still under the “cool” side. If instead you want two zones that are both usably hot but at different intensities, for something like bone-in chicken pieces or thick chops that need real heat on both sides just at different levels, the two-level fire, with coals or burner heat maintained on both sides, is the better match.

    Setting Either One Up Correctly

    For charcoal, the key practical difference to get right is whether coals go on both halves at different depths (two-level) or entirely on one half with the other genuinely bare (half-grill). For gas, the equivalent distinction is turning unused burners down to medium (two-level) versus switching them off completely (half-grill). Treating “turn the other burner down” and “turn the other burner off” as interchangeable is the single most common way this setup gets done incorrectly, and it produces a noticeably different, and often disappointing, result compared with what a specific recipe was actually designed around.

    Keep reading

    Sources

  • Choosing Smoking Wood: What Texas A&M Forest Service Actually Says About Hickory, Oak, Pecan and Mesquite

    Choosing Smoking Wood: What Texas A&M Forest Service Actually Says About Hickory, Oak, Pecan and Mesquite

    Wood choice is one of the most talked-about, and most inconsistently explained, variables in smoking. The Texas A&M Forest Service, which has a direct interest in the state’s timber and the barbecue industry that draws on it, has documented the practical characteristics of the four most commonly used domestic smoking woods: hickory, oak, pecan and mesquite. The differences between them are specific and predictable enough to plan around, rather than being purely a matter of personal preference.

    Hickory

    Hickory produces a sweet, powerful smoke flavour and is one of the hardest domestic hardwoods used for smoking. Because it is so dense, it burns at a lower temperature and lasts longer than softer woods, which makes it a practical choice for longer cooks. Its flavour is strong enough that many smokers deliberately combine it with a milder wood, such as oak, specifically to tame the hickory flavour down to something less overpowering across a long smoke. Hickory is particularly well suited to pork, especially ribs and pork belly, where its assertive flavour holds up well against the fattiness of the cut.

    Oak

    Oak is the more versatile, milder option of the four. Its smoke flavour is noticeably gentler than hickory’s, which is exactly why it pairs well with fruit woods like apple or cherry without one overpowering the other. Oak is also a long-lived, abundant tree in Central Texas specifically, which is part of why it has become a default base wood in Texas barbecue traditions — not simply a flavour choice but a practical, regionally available one. As a base or blending wood, oak’s mildness makes it a safer default for a first attempt at a longer smoke than a more assertive wood like hickory or mesquite used alone.

    Pecan

    Pecan — notably Texas’s state tree, with real economic significance to the state’s forestry industry beyond barbecue use — produces a mild, sweet and nutty flavour, along with a reddish tint on the surface of the meat it smokes. This combination of a subtle flavour and a visually appealing colour is why pecan is most widely used specifically for poultry, where a stronger wood like mesquite or hickory alone can easily overwhelm the milder flavour of chicken or turkey.

    Mesquite

    Mesquite is the most intense of the four: a strong, earthy flavour that pairs specifically well with beef, and one of the highest smoke volumes of any hardwood commonly used for smoking. That intensity is also mesquite’s main limitation — used on its own for an extended cook, it can produce a noticeably more bitter result than the other three woods. Because of this, mesquite is most often used as a supporting heat and flavour source alongside another wood, rather than as the sole fuel for a long smoke, particularly for anything beyond a shorter, hotter cook.

    Matching Wood to What You’re Cooking

    Based on the documented flavour and burn characteristics above, a reasonable starting framework is: pecan or a milder wood for poultry, where a subtle flavour and appealing colour matter more than intensity; hickory for pork, particularly ribs, where a strong, sweet smoke flavour complements the fat; mesquite, used in combination with a milder wood rather than alone, for beef, where its earthy intensity suits the meat but benefits from being balanced; and oak as a flexible base wood for long cooks generally, or blended with a stronger wood specifically to soften it.

    Why the Distinction Between “Wood” and “Pellets” Matters

    It is worth noting that wood pellets, commonly used in pellet smokers, are a manufactured product — made from chipped logs, branches and excess lumber processed into compressed wood fibre — rather than raw chunks or logs of a single species burned directly. Pellet blends can combine multiple wood types in a single product, which changes how directly the flavour characteristics above translate compared with using raw chunks or splits of a single wood species in a stick burner or offset smoker.

    Keep reading

    Sources

  • The Maillard Reaction: The Actual Chemistry Behind Grill Marks and Browning

    The Maillard Reaction: The Actual Chemistry Behind Grill Marks and Browning

    The dark, flavourful crust on a well-grilled steak and the char marks running across it are not just “heat doing its job” in a general sense — they are the visible result of a specific chemical reaction with a name: the Maillard reaction. Gabriel Keith Harris, a food science professor at North Carolina State University, has explained the actual mechanism behind it in terms that make clear why some grilling habits produce great results and others just produce char.

    What the Maillard Reaction Actually Is

    The Maillard reaction is a chemical reaction between proteins and sugars that produces the browning, aroma and flavour compounds associated with seared, roasted and grilled food. According to Harris, the sugar involved in a steak comes from glycogen in the muscle tissue — glycogen being a form of stored energy in the animal that is, chemically, long chains of sugar. Under heat, those long chains break down into individual sugar molecules, which then react with amine groups on the meat’s protein chains. That reaction causes amino acids to separate and recombine into new compounds, and it is those new compounds that produce the flavour and aroma associated with a well-seared piece of meat. This is the same underlying reaction responsible for the browning of bread crust, toast and roasted coffee — it is a general phenomenon of dry heat acting on proteins and sugars, not something unique to meat.

    Why the Surface Has to Dry Out First

    Before any of that browning chemistry can happen, water sitting on the meat’s surface has to evaporate. This is the actual reason a steak sizzles the moment it hits a hot grill grate — that sound is surface moisture flashing off. Until that moisture is gone, the surface temperature cannot rise high enough for the Maillard reaction to proceed efficiently, because the energy from the grill is being used to evaporate water rather than to heat the meat’s surface further. Once the surface has dried, temperatures can climb toward the roughly 350°F range that Harris identifies as where the reaction runs efficiently, and browning begins in earnest.

    The Practical Implication: Wet Meat Doesn’t Sear Well

    This is why a steak pulled straight from the fridge and placed on the grill while still visibly wet, or a piece of meat crowded onto a grill with other pieces releasing steam nearby, browns more slowly and less evenly than one with a dry surface. Patting meat dry with paper towels before it goes on the grill removes surface moisture that would otherwise have to evaporate first, shortening the time before the actual browning reaction can start, and giving you more control over how far the reaction goes before the meat is fully cooked through.

    Where Grill Marks Turn Into a Problem

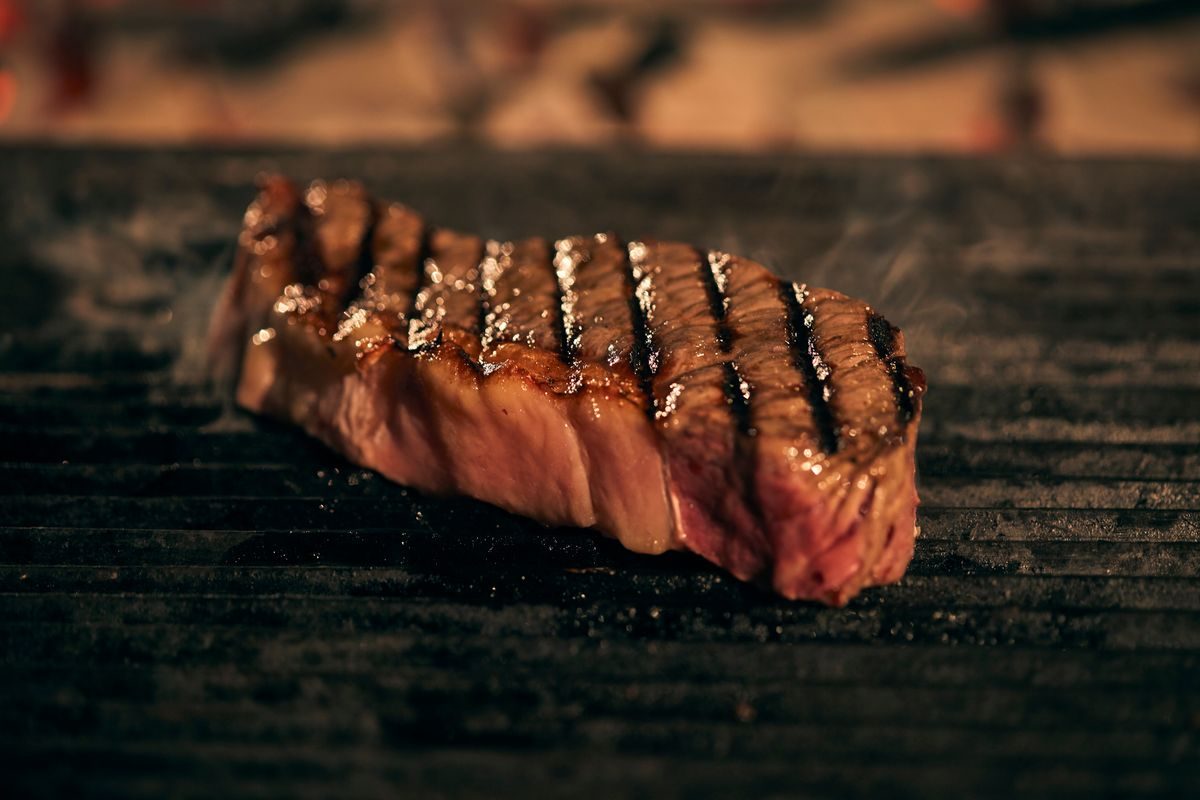
    Grill marks themselves are simply the visible result of the Maillard reaction happening on the ridges of a grill grate that make direct contact with the meat. But Harris is specific about the risk of taking this too far: grill marks can move from an appealing brown colour to a black, charcoal-like appearance once the meat has cooked past the point where the Maillard reaction is producing flavour compounds, and into a different process — pyrolysis, or outright charring — which does not add the same flavour and instead produces bitter, burnt compounds. The visual jump from “well-browned” to “overly charred” on a grill can happen quickly once meat passes the ideal browning window, which is part of why constant attention during the searing stage of a cook matters more than during the slower stages.

    What This Means in Practice

    Three practical points fall directly out of the actual chemistry: dry the meat’s surface before it goes on the grill, so the Maillard reaction can start sooner rather than spending time evaporating surface water; use genuinely high heat for the searing stage, since the reaction runs efficiently around 350°F and higher, not at a gentle simmer-level heat; and watch the meat closely once real browning starts, since the same reaction that produces a good crust can just as quickly tip into char if left too long, and char is a different chemical outcome, not simply “more” of the good one.

    Keep reading

    Sources