Safety

Food, fire and fuel safety guidance for outdoor cooking.

  • Propane Grill Safety: Leak Checks, Storage and Gas Smells

    Propane Grill Safety: Leak Checks, Storage and Gas Smells

    A propane grill asks for two habits: checking its connections and handling the cylinder with care. This guide compares the US Consumer Product Safety Commission’s Gas Grill fact sheet, NFPA’s grilling safety page, owner’s guides from Weber and Char-Broil, and UK advice from Gas Safe Register and Devon and Somerset Fire and Rescue Service.

    The soapy-water leak check

    NFPA describes brushing or spraying a bubbly soap mixture along the hose, regulator and burner connections with the cylinder valve open; bubbles mean a leak, and the cylinder should be turned off immediately. The CPSC gives a recipe of one part water to one part liquid detergent, applied with a brush, and says to check whenever you reconnect the cylinder or smell gas. Weber’s international guide gives 20 percent liquid soap to 80 percent water, or a solution from a plumbing supply shop, and Char-Broil specifies a 50/50 mild soap and water mix and warns against household cleaning agents. The recipes differ, but the sources agree on the soap-and-bubbles method, and Weber and Char-Broil add never to use a flame. Weber adds two details: do not light the burners during the test, and rinse the connections afterwards because soap solutions can be slightly corrosive.

    When to check: Weber says after any storage or non-use, every time a fitting is disconnected and reconnected, and each time the cylinder is refilled and reinstalled. The CPSC adds that many accidents follow a long period of non-use or a refill.

    When bubbles appear

    The sources split here. The CPSC says to turn off the gas and tighten the connection, and if that fails, to close the cylinder valve and take the grill to an LP gas dealer or qualified appliance repair person. Weber’s Summit guide likewise says to turn off the gas, tighten the fitting and recheck; if the leak persists, do not use the grill and contact customer service. For leaks at the hose, regulator or cylinder end, it says never to tighten the regulator with the tank valve open. Char-Broil is stricter: if “growing” bubbles appear, do not use or move the cylinder, and contact an LP gas supplier or the fire department. Any of these ends the same way: a leak that is not fixed by the manual’s own steps means no cooking.

    Storing and moving cylinders

    • Upright, always. The CPSC and Weber both say to store and transport cylinders upright and secured.
    • Not indoors. The CPSC says never to use or store a cylinder indoors. Weber says a disconnected cylinder must not go in a building, garage or other enclosed area; Char-Broil adds carport, porch and covered patio.
    • Not near the grill. No spare cylinder under or near the grill (CPSC, Weber).
    • Heat. Weber’s US guide says not to store or transport a cylinder where temperatures can reach 125°F (52°C); its international guide says 51°C. The CPSC says never to keep a filled cylinder in a hot car or trunk.
    • UK storage. Devon and Somerset Fire and Rescue says to keep cylinders outside, away from direct sunlight and frost, and not to hold more than you need.
    • Refilling. The CPSC says not to fill a cylinder yourself and suggests an exchange scheme. Weber recommends filling by weight and never beyond 80 percent, and says a dented, rusty or damaged-valve cylinder should not be used. It also says to treat an “empty” cylinder like a full one.

    Switching off and relighting

    The UK sources say to close the cylinder first, then the burner controls, so gas left in the pipework is used up. The CPSC says to turn off the burner and container valve before disconnecting, without stating an order. If the flame goes out, the CPSC says to shut off the gas, open the lid and wait at least 5 to 10 minutes, while Weber’s guide says five minutes. Weber’s Spirit support page adds that if a burner has not lit within four seconds, turn it off and wait five minutes. NFPA and Weber both say to light with the lid open.

    If you smell gas

    Weber’s owner’s guides give the same four steps: shut off the gas to the grill, put out any open flames, open the lid, and if the smell continues, keep away and immediately call your gas supplier or fire department (its international guide says fire service). If gas is escaping from the cylinder itself, or you hear it hiss, Weber says to move away, not to try to fix it, and to call the fire department. Weber notes that propane is heavier than air and can collect in low areas. The CPSC says to keep cigarettes, matches and flames away from a leaking grill and not to light the grill until the leak is repaired.

    Where to stop

    • Leak that survives the manual’s fix: stop, close the cylinder valve, and contact the manufacturer, gas supplier or a qualified technician.
    • Smell that persists after the shut-off steps: leave the grill and call the gas supplier or fire service; for a leaking cylinder, Weber says not to try to fix it yourself.
    • Cracked, cut or worn hose: Weber says not to use the grill. It recommends replacing the hose about every five years, and that some countries require sooner.
    • Repairs to gas parts: Weber says not to repair gas-carrying or gas-burning components without contacting the manufacturer, and Gas Safe says such work is for a competent person, including on a barbecue.
    • Location: the CPSC says use a grill at least 10 feet (about 3 m, our conversion) from the house, never in a garage, breezeway, carport or porch, or under a surface that will burn.

    Keep reading

    Sources

  • Smoking Meat Safely: A USDA and UK FSA Checklist

    Smoking Meat Safely: A USDA and UK FSA Checklist

    Smoked meat spends hours at low heat, which is exactly where food safety rules matter most. This checklist walks through a cook in order and gives the numbers from the USDA Food Safety and Inspection Service (FSIS) smoking page, its “Danger Zone” page, its grilling page, and the UK Food Standards Agency’s Cooking your food guidance. Where the two countries differ, both are shown. All Celsius or Fahrenheit conversions are ours.

    Before the Smoker: Thaw and Marinate Cold

    FSIS says to thaw meat completely before smoking. Smoking uses low temperatures, so frozen meat lingers in the Danger Zone (40-140°F, or 4-60°C) where bacteria multiply. Thaw in the refrigerator, and cook or refreeze within 1 or 2 days. Marinate in the refrigerator, and boil any marinade that touched raw meat before using it on cooked food. FSIS also warns against partially cooking ahead: it is acceptable only if the food goes straight from the microwave or stove into the hot smoker. In its 2024 grilling and smoking release, USDA adds that raw meats and cooked or ready-to-eat food need separate cutting boards and utensils.

    In the Smoker: Air Temperature and Two Thermometers

    FSIS wants two thermometers: one for the food, one to keep the smoker’s air temperature between 225 and 300°F (107-149°C) throughout. It estimates 4 to 8 hours for smoking meat or poultry, and says timing depends on the cut, size and weather, so the thermometer decides when it is done. Oven-safe food thermometers can stay in the meat during the cook, while an instant-read thermometer is for checking after the meat comes out. It also says to use smokers made of materials approved for contact with meat and poultry, not makeshift containers such as galvanized steel cans.

    Internal Temperatures: USDA vs UK FSA

    USDA gives one target per meat, measured with a food thermometer:

    • Beef, pork, lamb and veal steaks, chops and roasts: 145°F (63°C), then rest at least 3 minutes.
    • Ground beef, pork, lamb and veal: 160°F (71°C).
    • Poultry: 165°F (74°C).

    The FSA takes a different approach: a time and temperature pair at the middle of the food. Its table lists 60°C (140°F) for 45 minutes, 65°C (149°F) for 10 minutes, 70°C (158°F) for 2 minutes, 75°C (167°F) for 30 seconds and 80°C (176°F) for 6 seconds, with 70°C for 2 minutes as its headline figure. The two systems are not identical, so follow the guidance for your country rather than mixing them.

    Holding: Where the Danger Zone Begins and Ends

    FSIS says bacteria grow most rapidly between 40°F and 140°F, and can double in as little as 20 minutes. To hold food, keep hot food at or above 140°F (60°C). FSIS also says never to leave food out of refrigeration over 2 hours, or over 1 hour if the temperature is above 90°F (32°C).

    The FSA defines the same idea with different edges: 8 to 63°C (46-145°F). That makes the upper limit 63°C, slightly higher than USDA’s 60°C. The two agencies set the hold line in slightly different places, so use the one for your country.

    After the Cook: Leftovers

    • Time to fridge: FSIS’s smoking page says to refrigerate meat and poultry within 2 hours of removing it from the smoker, in shallow containers, cut into smaller portions or slices. The FSA also says two hours. FSIS’s grilling page adds the 1-hour limit above 90°F, which the smoking page does not repeat.
    • How long to keep: FSIS says use within 4 days or freeze. The FSA says eat leftovers within 48 hours or freeze. That is a real difference.
    • Reheating: the FSA says reheat until steaming hot throughout and only reheat once. FSIS’s grilling page gives 165°F (74°C) or steaming hot for reheating fully cooked items such as hot dogs.

    Hot Smoking Only

    The FSIS smoking page describes smoking as slow cooking in an air temperature of 225-300°F and does not cover cold smoking. The FSA’s cooking guidance does not address smoking either. So this checklist applies to hot smoking. For questions outside it, FSIS lists its Meat and Poultry Hotline at 1-888-674-6854.

    Keep reading

    Sources

  • Making Jerky Safely at Home: What USDA Says About Heating, Drying and Marinades

    Making Jerky Safely at Home: What USDA Says About Heating, Drying and Marinades

    Jerky is one of the oldest ways of preserving meat, and one of the easiest to get wrong at home. Anyone who has left strips in a dehydrator overnight has probably assumed that a long, dry cook does the safety work. According to the United States Department of Agriculture’s Food Safety and Inspection Service (USDA FSIS), that assumption is a trap. This guide summarises USDA’s advice on making jerky at home. The figures are US federal guidance, given in Fahrenheit as USDA gives them.

    A very old food

    USDA describes jerky as a nutrient-dense meat made lightweight by drying: a pound of meat or poultry weighs about four ounces after it has become jerky. Because most of the moisture is removed, it is shelf stable and can be stored without refrigeration, which is why it suits backpackers. USDA says the word “jerky” comes from the Spanish “charque”, and that “biltong” is dried meat or game used in many African countries. It also notes that North American Indians mixed ground dried meat with dried fruit or suet to make pemmican.

    Why a dehydrator alone is not enough

    USDA says that when raw meat or poultry is dehydrated at home, in a warm oven or a food dehydrator, pathogenic bacteria are likely to survive the dry heat of a warm oven and especially the 130 to 140°F of a dehydrator. It says illnesses due to Salmonella and E. coli O157:H7 from homemade jerky have raised questions about traditional drying methods for beef and venison jerky.

    The USDA Meat and Poultry Hotline’s recommendation is therefore to heat the meat to 160°F, and poultry to 165°F, before the dehydrating step. USDA says this step ensures any bacteria present are destroyed by wet heat. It points out that most dehydrator instructions do not include this step, and that a dehydrator may not reach temperatures high enough to heat meat to 160°F or poultry to 165°F.

    USDA explains the reason. Within a dehydrator or low-temperature oven, evaporating moisture absorbs most of the heat, so the meat itself does not begin to rise in temperature until most of the moisture has gone. By then, USDA says, the bacteria have become much more heat resistant, so any pathogens present are more likely to survive and can cause illness. USDA also describes experiments with lab-inoculated venison, in which pathogenic E. coli survived drying times of up to 10 hours and temperatures of up to 145°F.

    USDA’s step-by-step recommendations

    USDA’s recommendations for homemade jerky include:

    • wash hands thoroughly with soap and water before and after handling meat, and use clean equipment and utensils;
    • keep meat and poultry refrigerated at 40°F or slightly below, and use or freeze ground beef and poultry within two days and whole red meats within three to five days;
    • defrost frozen meat in the refrigerator, not on the counter;
    • marinate meat in the refrigerator, and do not save marinade to re-use;
    • steam or roast meat to 160°F and poultry to 165°F, measured with a food thermometer, before dehydrating;
    • dry the meat in a food dehydrator that has an adjustable temperature dial and will maintain at least 130 to 140°F throughout the drying process.

    USDA explains that after the initial heat treatment, the constant 130 to 140°F is important because the process must be fast enough to dry the food before it spoils, and must remove enough water to prevent microorganisms from growing.

    Marinades and curing mixes

    USDA says marinating does not make raw meat safe. It cites the University of Georgia and Colorado State University study, published in the Journal of Food Protection in 2004, which concluded that marination alone did not significantly reduce the pathogen compared with unmarinated beef slices. In those studies some samples showed complete bacterial destruction and others some survival, especially jerky made with ground beef. Another University of Georgia study cited by USDA, on ground beef jerky, found that jerky made with a curing mix containing salt and sodium nitrite had greater destruction of E. coli O157:H7 than jerky without it, and that jerky made with the curing mix and heated before dehydrating had the highest destruction rate. The authors concluded that concerns about E. coli O157:H7 in home-made ground beef jerky are minimised if the meat is precooked to 160°F before drying.

    Wild game and sun drying

    USDA advises special care with venison and other wild game, quoting researchers who note that venison can be heavily contaminated with faecal bacteria depending on factors such as the hunter’s skill and the location of the wound, and that deer carcasses are typically held at ambient temperatures, which can allow bacteria to multiply. USDA also says sun drying is not recommended for making meat jerky, because of the lack of a steady heat source and the potential for contamination from animals, insects, dust and bacteria.

    How long does it keep?

    USDA says commercially packaged jerky can be kept for 12 months, while home-dried jerky can be stored for one to two months.

    What USDA does not cover

    USDA’s jerky page discusses warm ovens and food dehydrators; it does not discuss drying jerky in a smoker. For general smoker safety, USDA’s separate smoking page is a better starting point, and it says a food thermometer is needed to monitor both the food and the smoker’s air temperature.

    The bottom line

    For safe homemade jerky, follow USDA’s order of operations: refrigerate and marinate properly, heat meat to 160°F (poultry to 165°F) first, then dry at a steady 130 to 140°F or higher, and use the jerky within one to two months. Do not rely on marinade, a long dry cook or a dehydrator’s temperature setting to make raw meat safe.

    Keep reading

    Sources

  • Cooking at the Campsite: USDA Food Safety Guidance for Coolers, Fires and Stoves

    Cooking at the Campsite: USDA Food Safety Guidance for Coolers, Fires and Stoves

    Cooking outdoors is the whole point of a camping trip, but a campsite has no refrigerator, no sink and no kitchen thermometer hanging on a hook. The United States Department of Agriculture’s Food Safety and Inspection Service (USDA FSIS) publishes a factsheet on food safety while hiking, camping and boating, and much of it applies to campfire and camp-stove cooking. The figures below are US federal guidance, given in Fahrenheit as USDA gives them.

    Plan the menu before you pack

    USDA’s general rules for outdoor food safety start with planning: decide what you will eat and how you will prepare it, then work out the equipment you need. It says to pack safely, using a cooler or packing foods frozen with a cold source, and to keep raw meats separate from other foods. It also says not to bring perishable meat or poultry without a cold source to keep it safe.

    One planning point is easy to miss. USDA says many camping areas prohibit campfires, so you should check first that the food you bring can be properly prepared and will be safe to eat. If you cannot light a fire, a portable stove has to do the job.

    Keeping the cooler cold

    USDA explains that most bacteria grow rapidly between 40 and 140°F, which it calls the “danger zone”, and that bacteria can reach dangerous levels after two hours, or one hour if the temperature is 90°F or above. Its advice for car campers includes:

    • Use a cold source, and know that a block of ice keeps food colder for longer than ice cubes. USDA suggests freezing clean, empty milk cartons filled with water, or using frozen gel-packs.
    • Fill the cooler with cold or frozen foods, and pack in reverse order, so that the first foods packed are the last used.
    • Ideally, pack raw meat or poultry in a separate cooler. With one cooler, pack raw meat and poultry below ready-to-eat foods.
    • Take foods in the smallest quantity you need.
    • At the campsite, insulate the cooler with a blanket, tarp or poncho, or keep it in the shade.
    • When the trip is over, discard all perishable foods if the cooler has no ice left or the gel-pack is no longer frozen.

    The same principle applies to leftovers. USDA says leftover food from a cooler is safe only if the cooler still has ice in it; otherwise it should be discarded. Return cold foods to the cooler promptly.

    Cross-contamination at the campsite

    USDA’s second principle is to keep everything clean. Bacteria on raw meat and poultry can spread to other foods through dripping juices, hands or utensils. When transporting raw meat or poultry, USDA says to double wrap it or place the packages in plastic bags to prevent juices dripping on other foods. Wash your hands before and after handling food, and do not use the same platter and utensils for raw and cooked meat and poultry. USDA says to bring plenty of clean platters and utensils, and, if there is no running water, to bring water or a hand sanitiser containing at least 60% alcohol, or use disposable alcohol-based wipes.

    A thermometer belongs in the camping kit

    USDA describes a food thermometer as another important piece of camping equipment. If you are cooking meat or poultry on a portable stove or over a fire, you need a way to tell when it is safe to eat, and USDA says colour is not a reliable indicator, especially in a wooded area in the evening. It advises the following:

    • A digital thermometer reads at the very tip of the probe, so it can check thin foods like hamburger patties and boneless chicken breasts as well as thick ones.
    • A dial thermometer averages the temperature along the stem, so it should be inserted 2 to 2½ inches, and sideways for thin foods.
    • Cook burgers until the patty reaches 160°F. USDA says illnesses have occurred even when ground beef patties were cooked until there was no visible pink.
    • Cook raw beef, pork, lamb and veal steaks, chops and roasts to 145°F, and let them rest for at least three minutes before slicing.
    • Cook raw ground beef, pork, lamb and veal to 160°F.
    • Cook all raw poultry, including ground poultry, to 165°F.
    • Heat hot dogs until steaming hot, and reheat any leftover food to 165°F.
    • Clean the thermometer between uses.

    Cooking gear

    USDA notes that pots are heavy to carry, and that camping stores sell lightweight cooking gear that nests together. It also says you can use aluminium foil wrap and pans for cooking. That fits well with campfire cooking, and it is also worth remembering that a foil packet still needs a thermometer reading before you eat.

    A simple campsite routine

    These steps are our own suggestions, built on USDA’s principles. Put the raw meat in its own cooler and keep it shaded. Keep a labelled “raw” platter and a “clean” platter. Put the thermometer, sanitiser and wipes in the same box as the tongs. Do the cooking near the cooler, so that food does not sit out while you look for things, and decide before you light the fire what time the leftovers will go back into the cooler.

    The bottom line

    Campfire cooking is only as safe as the cooler and the cooking temperature. Keep cold food cold below 40°F, separate raw from cooked, check whether fires are allowed, and use a thermometer rather than your eyes: 145°F for whole cuts, 160°F for ground meat and 165°F for poultry.

    Keep reading

    Sources

  • Thawing Meat for the Grill or Smoker: What USDA Says About Safe Methods

    Thawing Meat for the Grill or Smoker: What USDA Says About Safe Methods

    Everyone has been there: it is barbecue day and the meat is still a block of ice in the freezer. Should you grill it from frozen, thaw it in a hurry, or postpone? The United States Department of Agriculture’s Food Safety and Inspection Service (USDA FSIS) has clear guidance on safe thawing, and it gives a different answer for grilling than for smoking. The temperatures below are US federal figures, in Fahrenheit as USDA gives them.

    What goes wrong with unsafe thawing

    USDA says raw or cooked meat and poultry are safe indefinitely while frozen. As soon as they begin to thaw and warm above 40°F, bacteria that were present before freezing can begin to multiply. USDA says perishable foods should never be thawed on the counter or in hot water, and must not be left at room temperature for more than two hours. The reason is that while the centre of a package may still be frozen, the outer layer can sit in the “danger zone”, between 40 and 140°F, where bacteria multiply rapidly.

    USDA also says never to thaw food in a garage, basement, car, dishwasher or plastic rubbish bag, or out on the kitchen counter, outdoors or on the porch.

    The three safe ways to thaw

    USDA lists three safe methods:

    • In the refrigerator. This is USDA’s preferred method, because food stays at a safe, constant 40°F or below, but it needs planning. A large frozen item such as a turkey needs at least a day for every 5 pounds, and even a pound of ground meat or boneless chicken breasts needs a full day. After thawing in the refrigerator, USDA says items such as ground meat, poultry and seafood stay safe for an additional day or two before cooking, and red meat cuts such as roasts, chops and steaks for 3 to 5 days. Refrigerator-thawed food can be refrozen without cooking, although there may be some loss of quality.
    • In cold water. This is faster but needs attention. Use a leak-proof package or bag, submerge it in cold tap water and change the water every 30 minutes. USDA suggests a pound of meat may thaw in an hour or less and a 3 to 4-pound package in 2 to 3 hours. Food thawed this way must be cooked immediately, and cooked before refreezing.
    • In the microwave. Plan to cook the food immediately afterwards, because some areas may become warm and begin to cook. USDA says food thawed in the microwave can go straight to grilling, and must be cooked before refreezing.

    Grilling from frozen

    If there is no time to thaw, USDA says it is safe to cook foods from the frozen state. The cooking will take approximately 50% longer than the recommended time for fully thawed or fresh meat and poultry. That guidance is general, so use a food thermometer (see our guide to using one correctly) and cook to the usual safe minimum temperature. USDA’s smoking page also notes that defrosted meat cooks more evenly, which is a further reason to thaw first when you have the time.

    Smoking: thaw completely first

    Smoking is a different matter. USDA’s guidance on smoking meat and poultry says to thaw meat or poultry completely before smoking. Because smoking uses low temperatures, the meat would take too long to thaw in the smoker, allowing it to linger in the danger zone between 40 and 140°F where bacteria can multiply. It adds that defrosted meat also cooks more evenly.

    Put together, USDA’s general thawing page says cooking from frozen is safe, while its smoking page makes smoking the exception, because the low temperatures involved leave the meat lingering in the danger zone. USDA’s smoking page also repeats that food should never be thawed at room temperature, and says the best way to thaw meat and poultry safely is in the refrigerator, to cook or refreeze within one or two days.

    A practical thawing plan

    These planning tips are our own, based on USDA’s timings. Move a big cut such as a pork shoulder or brisket to the refrigerator days before, since a pound of meat takes a day and a large cut takes many. Put it on a tray or in a container so that no juices reach other food. If you are short of time, use cold water for a small cut and cook it straight away. And if you smoke regularly, keep a note of thaw dates on the packaging so nothing is left to chance.

    The bottom line

    Thaw in the refrigerator when you can, in cold water or the microwave when you cannot and you will cook straight away, and never on the counter. On the grill, USDA says frozen cooking is safe if you allow about half as long again, but for smoking USDA says to thaw completely first.

    Keep reading

    Sources

  • Smoking a Turkey Safely: What USDA Guidance Actually Changes About the Method

    Smoking a Turkey Safely: What USDA Guidance Actually Changes About the Method

    Smoking a turkey introduces a food-safety wrinkle that doesn’t apply the same way to a smaller cut like a pork shoulder or a rack of ribs: typical smoker temperatures sit right at the edge of what USDA considers safe for a large bird, and getting that detail wrong is a more realistic risk than most home cooks assume.

    Why Smoker Temperature Matters More With Turkey

    Most smokers run in the 225–275°F range, well suited to breaking down collagen in tougher, fattier cuts over several hours. USDA’s food safety guidance identifies 40°F to 140°F as the “Danger Zone” where bacteria grow fastest, and turkey, a large bird with substantial mass, can spend an extended period passing through that range as it slowly heats from refrigerator temperature. USDA specifically flags that poultry needs to move through the Danger Zone efficiently enough that bacteria don’t have time to multiply to unsafe levels before the bird reaches a safe internal temperature throughout, not just at the surface.

    The Practical Guidance: Smoker Temperature and Bird Size

    Because of that slow heat-through risk, food-safety guidance for smoking whole poultry generally recommends running the smoker at 250°F or higher, rather than the lower end of typical smoking temperatures, specifically to move the turkey through the danger zone faster than a low-and-slow 225°F cook would. Bird size matters directly here too: a larger turkey takes proportionally longer for heat to reach its center, so USDA and other food-safety sources generally recommend against smoking birds much larger than about 14 pounds, since oversized birds spend more cumulative time in unsafe temperature territory before the center catches up to a safe reading.

    The Actual Safe Temperature Target

    Regardless of smoker temperature, a whole turkey needs to reach a minimum internal temperature of 165°F, measured in the thickest part of the thigh, not the breast, since dark meat is denser and slower to heat through than breast meat. Checking only the breast risks pulling the turkey while the thigh is still under temperature, since the two areas don’t heat at the same rate even when they’re part of the same bird.

    Where Dry Brining Fits In

    Once the safety side is handled, the moisture question that concerns most home cooks smoking a turkey for the first time, that it’ll dry out over a long, low cook, is a separate issue better addressed with technique than with adjusting the danger-zone guidance. A dry brine, salting the bird and refrigerating it uncovered for 24 to 48 hours before smoking, seasons throughout and helps the meat retain its own moisture during the extended cook, an approach documented extensively by food scientists and technique writers like J. Kenji López-Alt as producing better results than a wet brine, which adds water rather than concentrating flavor and moisture retention within the meat itself.

    Putting It Together for a Holiday Cook

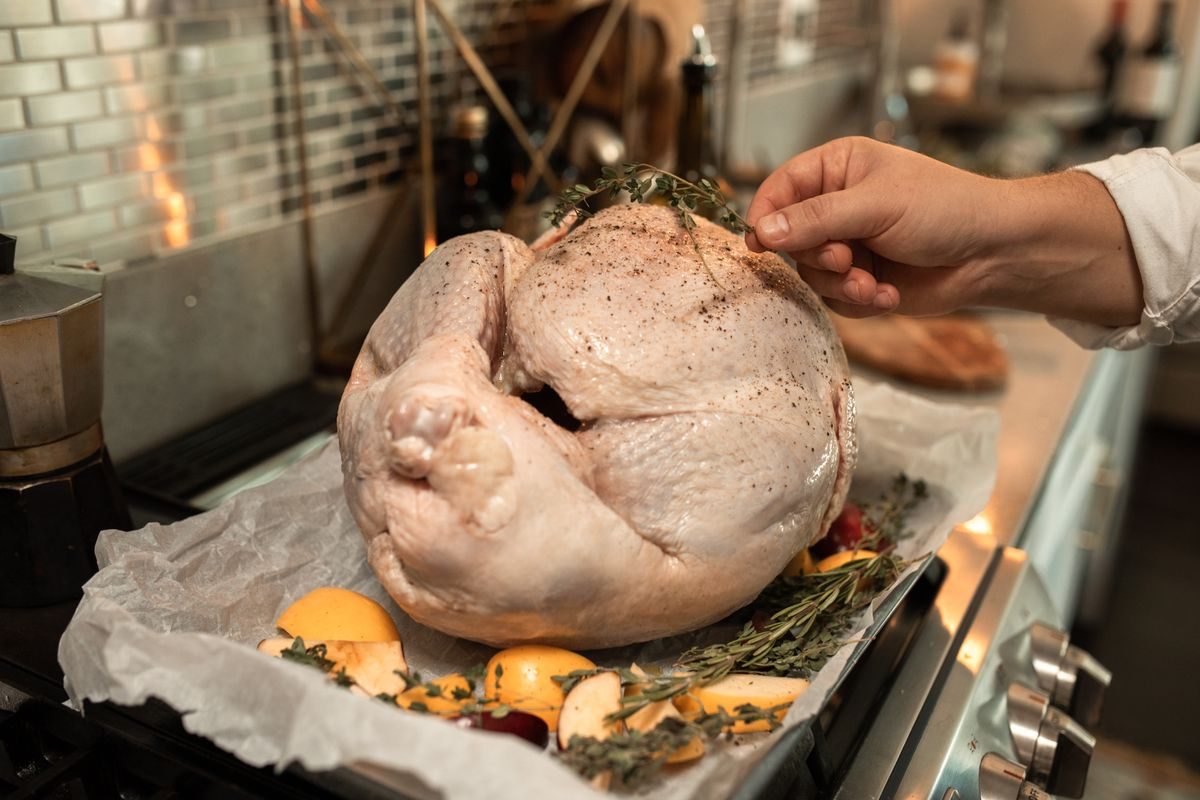
    For a turkey headed to the smoker: dry brine it the day or two before, keep it under roughly 14 pounds if you have a choice in size, run the smoker at 250°F or above rather than the lowest end of typical smoking range, and pull the bird only once the thickest part of the thigh reads 165°F on an instant-read thermometer, not based on total cook time alone, since smoker performance and outdoor temperature both affect how long that actually takes. That combination addresses the real food-safety risk specific to smoking a large bird while still delivering the moisture and flavor benefits that make smoking worth doing over a standard oven roast.

    Keep reading

    Sources

  • Cooling and Storing Leftover Smoked Meat Safely: What USDA Actually Requires

    Cooling and Storing Leftover Smoked Meat Safely: What USDA Actually Requires

    A whole smoked brisket or pork shoulder holds heat far longer than most home cooks expect, and that slow cooling is a genuine food-safety issue, not just an inconvenience while you wait to package leftovers.

    The Danger Zone, Defined

    The USDA’s Food Safety and Inspection Service (FSIS) identifies the temperature range between 40°F and 140°F as the “Danger Zone,” the range in which bacteria grow most rapidly, capable of doubling in number in as little as 20 minutes under the right conditions. Any cooked food, including a large piece of smoked meat, that sits within that range for too long gives bacteria time to multiply to levels that can cause foodborne illness, even if the food was fully cooked to a safe internal temperature at the time it came off the smoker.

    The Specific Time Limits

    FSIS guidance sets clear limits: cooked food should be refrigerated at 40°F or below within two hours of cooking, and that window shrinks to just one hour if the ambient temperature is above 90°F, a real consideration for anyone smoking meat outdoors in mid-summer. Reaching that window matters more than most people assume; leaving cooked food out too long at room temperature allows bacteria such as Staphylococcus aureus, Salmonella Enteritidis, E. coli O157:H7 and Campylobacter to grow to levels capable of causing illness, according to FSIS’s food safety documentation.

    Why a Whole Brisket Is a Specific Problem

    The two-hour rule is straightforward for a burger or a chicken breast, which cool quickly once removed from heat. A whole packer brisket or pork shoulder is a different situation: these are large, dense pieces of meat, often 10 pounds or more, that retain heat at their core for a long time even after resting at room temperature, because their mass means heat has to travel a long distance from the center to the surface to dissipate. Left whole in a single container, a large cut can easily stay within the 40–140°F danger zone range well past the two-hour limit before its center actually cools down, even though the surface may feel cool to the touch.

    The Fix: Break It Down Before You Store It

    FSIS’s general guidance for cooling any leftover applies directly here: leftovers must be put into shallow containers for quick cooling, rather than one large sealed container. For a whole brisket or shoulder, that means slicing or pulling the meat into smaller portions before refrigerating, not sealing the whole cut in one container and hoping it cools through. Smaller portions in shallow containers have dramatically more surface area relative to their volume, which lets heat escape far faster than it would from one large, dense mass, getting the meat’s actual temperature below 40°F well within the required window.

    Reheating Correctly Afterward

    When it’s time to eat leftovers, FSIS guidance specifies reheating to an internal temperature of 165°F, or until the food is hot and steaming throughout, regardless of what temperature it was originally cooked and smoked to. That reheating temperature is about killing any bacteria that may have grown during storage, not about matching the original doneness target, so it applies the same way to a brisket originally pulled at 203°F as it does to any other cooked leftover.

    Keep reading

    Sources

  • Grill Fires by the Numbers: What NFPA’s Data Actually Shows

    Grill Fires by the Numbers: What NFPA’s Data Actually Shows

    Grill safety advice is usually generic: keep it clean, don’t leave it unattended, check for leaks. The National Fire Protection Association’s (NFPA) actual fire statistics data explain why those specific recommendations exist, and which risks are genuinely the most common rather than just theoretically possible.

    The Scale of the Problem

    NFPA’s Home Grill Fires report documents that between 2020 and 2024, U.S. fire departments responded to an annual average of 12,141 home fires involving grills, hibachis, or barbecues. That total splits into 6,110 structure fires (fires that involved a building) and 6,031 outside or unclassified fires. Across that same period, these fires caused an average of 15 civilian deaths, 171 reported civilian injuries, and $241 million in direct property damage annually.

    When Grill Fires Actually Happen

    The data shows a strong seasonal pattern rather than a steady year-round rate. July is the peak month for home grilling fires, followed by June, May and August, meaning the four warmest months of the U.S. grilling season account for a disproportionate share of the annual total. That pattern tracks directly with grilling frequency: more cookouts and more grill use in warmer months naturally produce more opportunities for something to go wrong, but it also means fire risk awareness is most relevant exactly when people are least likely to be thinking about it, during casual summer cookouts rather than a planned, careful cooking session.

    Fuel Type Matters More Than You’d Expect

    NFPA’s data breaks fires down by fuel type, and the split is lopsided: 76 percent of home grilling fires involved grills fueled by gas, while 13 percent involved charcoal or other solid fuel. That doesn’t necessarily mean gas grills are inherently more dangerous to operate correctly; gas grills are also far more common in U.S. households than charcoal grills, so a higher share of total fires would be expected regardless of relative risk per grill. What it does indicate is that gas-specific failure points, propane tank connections, hose leaks, and burner ignition, are a meaningfully larger share of real-world grill fire causes than charcoal-specific risks like flare-ups or improper ash disposal.

    Where the Fires Actually Start

    Location data from NFPA’s report adds another specific detail: approximately one-quarter of home structure fires involving grills started on an exterior balcony or open porch, with 8 percent involving an outside wall igniting first and 3 percent involving a structural framing member. That pattern points directly at a common real-world habit, grilling close to a building, particularly on apartment balconies or porches where space constraints make it harder to maintain a safe clearance distance, as a specific, documented risk factor rather than a generic caution.

    What the Data Actually Supports as Precautions

    Given what the numbers show, the highest-value precautions are the ones that address the most common actual failure points: keeping the grill well clear of any exterior wall, balcony railing, or overhang rather than tucked close to a building, checking gas connections and hoses for leaks before lighting (particularly early in grilling season, after a grill has sat unused over winter), never leaving a lit grill unattended, and keeping the grill itself clean of built-up grease, which is a common accelerant in flare-ups that escalate into larger fires. None of these are exotic precautions; NFPA’s data simply confirms they’re addressing the specific, most frequent causes rather than rare edge cases.

    Keep reading

    Sources

  • Cross-Contamination and Raw Poultry: What USDA Actually Recommends at the Grill

    Cross-Contamination and Raw Poultry: What USDA Actually Recommends at the Grill

    Grilling season concentrates several food-safety risks that don’t usually collide at the same time indoors: raw poultry, shared surfaces, and food sitting outside for hours. The USDA’s Food Safety and Inspection Service (FSIS) treats cross-contamination from raw poultry as one of the more preventable risks in that mix, with specific, documented recommendations for avoiding it.

    What Cross-Contamination Actually Means

    FSIS defines cross-contamination as the transfer of harmful bacteria to food from other foods, cutting boards, or utensils when they aren’t handled properly. With raw poultry specifically, the concern is pathogens like Salmonella and Campylobacter, both commonly associated with raw chicken, being transferred onto surfaces, utensils, or other foods that won’t be cooked to a temperature high enough to kill them, such as salad ingredients or buns.

    The Core Recommendation: Separate Boards

    FSIS guidance is specific on this point: use one cutting board for raw meat, poultry, and seafood, and a separate board for produce and bread or other ready-to-eat foods. The agency notes that either wood or a nonporous surface, plastic, marble, glass or pyroceramic, is acceptable for cutting raw meat and poultry, though nonporous materials are generally easier to clean thoroughly between uses. The key point isn’t the material; it’s maintaining a strict separation so a board that’s touched raw chicken never comes into contact with food that won’t be cooked afterward.

    Cleaning Isn’t Optional Between Uses

    FSIS guidance also addresses what to do after cutting raw poultry, not just how to avoid mixing boards. The agency recommends washing the cutting board, knife and any countertop that contacted raw poultry with hot, soapy water immediately after use, and separately recommends sanitizing cutting boards periodically with a solution of one tablespoon of unscented liquid chlorine bleach per gallon of water. Washing alone removes visible residue, but the sanitizing step is aimed specifically at reducing bacterial load on a board’s surface, particularly important for wood boards, which can retain bacteria in surface grooves even after washing.

    Where This Breaks Down at a Cookout

    The most common real-world failure point isn’t ignorance of the rule; it’s convenience during an outdoor cook. A single cutting board carried out to the grill often ends up used for both raw chicken and the vegetables or bread going on the same plate, particularly when a cook doesn’t want to walk back to the kitchen mid-cook. The same applies to tongs and platters: using the same set of tongs to place raw chicken on the grill and then to remove the cooked food, or setting cooked food back on the same platter that held it raw, reintroduces the same cross-contamination risk even if the cutting board itself was handled correctly.

    A Practical Setup for Outdoor Cooking

    Bringing two designated boards, or at minimum two color-coded cutting mats, out to the grill station solves the most common failure point directly. Keep a separate plate or platter for raw poultry going onto the grill and a clean one for food coming off, and use a second set of tongs or thoroughly wash the first set (hot soapy water, not just a wipe) before it touches cooked food. None of this requires special equipment; it just requires treating the grill station the same way FSIS guidance treats a kitchen counter, as a surface where raw and ready-to-eat food need to stay physically separated at every step, not just during the initial prep.

    Keep reading

    Sources

  • Why Resting Time Is a Food Safety Step, Not Just a Texture Tip

    Why Resting Time Is a Food Safety Step, Not Just a Texture Tip

    Resting meat after it comes off the grill is usually explained as a texture and juiciness tip — let it sit so the juices redistribute rather than running out the moment you cut in. That is true, but it understates what USDA guidance actually says about resting: for food safety purposes, the rest period is part of the cooking process itself, not an optional finishing touch you can skip if you are in a hurry.

    Why the Rest Period Counts as Part of Cooking

    USDA guidance specifies that meat should rest for at least three minutes before carving or eating, for both safety and quality reasons. During that rest period, the meat’s internal temperature does not simply hold steady or begin dropping right away — it typically continues to rise slightly, or at minimum holds at the temperature reached during cooking, and that sustained heat continues destroying harmful bacteria during the rest itself. Cutting into meat the instant it hits its target temperature, rather than allowing the specified rest period, skips part of the actual safety margin the temperature guidance is built around, not just a texture benefit.

    The Actual Safe Temperatures

    USDA’s minimum safe internal temperatures, always checked with a food thermometer rather than by appearance or time, are:

    • Poultry (whole or parts): 165°F, with no separate rest requirement beyond the standard practice of letting it sit briefly before carving.
    • Beef, pork, lamb and veal steaks, chops and roasts: 145°F, followed by a minimum three-minute rest before carving or eating.
    • Ground beef, pork, lamb and veal: 160°F. Ground meat does not carry the same three-minute-rest safety margin as whole muscle cuts, because grinding distributes any surface bacteria throughout the meat, so the higher target temperature itself is what provides the safety margin, rather than a rest period doing part of that work.

    The distinction between whole-muscle cuts (steaks, chops, roasts) and ground meat matters here specifically because of where bacteria are actually located: on a whole cut, harmful bacteria are generally on the surface, which is why a lower internal temperature plus a rest period is considered adequate; in ground meat, bacteria from the surface get mixed throughout during grinding, which is why the target temperature itself is set higher rather than relying on a rest period.

    Where Cross-Contamination Actually Happens on a Grill

    Beyond temperature and resting, USDA guidance is specific about a handful of cross-contamination points that are easy to get wrong even when the cooking itself is done correctly:

    • Never wash raw meat, poultry or seafood before cooking. This is counter to a lot of home-cook instinct, but washing raw meat does not remove bacteria effectively and instead spreads it — via splashing water — onto your sink, countertops, utensils and any nearby food, meaningfully increasing cross-contamination risk rather than reducing it.
    • Use separate plates and utensils for raw and cooked meat. Tongs that placed raw burgers on the grill, then get used again to pull the fully cooked burgers off, can transfer harmful bacteria from the raw stage directly onto food that is otherwise safely cooked and ready to eat. Have a clean plate ready before food comes off the grill, and do not reuse the plate that carried raw meat out to the grill for the cooked result.
    • Keep raw items away from ready-to-eat food throughout the process, not just at the final serving stage — this includes the prep stage before anything reaches the grill, where raw meat juices on a shared cutting board or counter can contaminate salad ingredients or bread prepared nearby.

    Putting It Together

    A meal can be undone by cross-contamination even when every piece of meat individually reached a correct, verified internal temperature — the safety of the meal depends on the whole handling process, not just the number on the thermometer at the moment of pulling meat off the grill. Checking temperature with a thermometer, respecting the specified rest period as part of the cook rather than an optional step, and keeping raw and cooked food strictly separated through prep, cooking and serving together cover the actual, documented risk points in a home grilling session.

    Keep reading

    Sources

    • USDA Food Safety and Inspection Service. “Grilling Food Safely.” fsis.usda.gov
    • USDA Food Safety and Inspection Service. “Safe Minimum Internal Temperature Chart.” fsis.usda.gov