Equipment

Outdoor cooking equipment, accessories and buying guides.

  • Cleaning an Offset Smoker’s Firebox

    Cleaning an Offset Smoker’s Firebox

    An offset smoker’s firebox does a different job than a kettle’s charcoal grate or a gas grill’s burner tubes — it’s running a live wood or charcoal fire for hours at a stretch, off to the side of the meat, and that changes what actually needs cleaning and how often. This draws on Oklahoma Joe’s own FAQ page for its offset smokers and on Meathead’s “Cleaning And Maintaining Your Grill Or Smoker,” published by AmazingRibs.com, for what each source says about ash, creosote, and the firebox specifically, as distinct from the cooking grates and grease trays covered elsewhere.

    Why Firebox Ash Isn’t Just Leftover Charcoal

    Oklahoma Joe’s maintenance guidance is direct about why ash shouldn’t sit in the firebox between cooks: “Ashes collect moisture, which can lead to premature rusting and decay.” That’s a firebox-specific concern rather than a general grate-cleaning one — a firebox holds ash against bare steel for hours at high heat, and Oklahoma Joe’s instructs owners to clean out all remaining ashes once the unit has “adequately cooled” after each cook, wiping the interior with a cloth or paper towels. AmazingRibs’ Meathead makes the same underlying point about charcoal grills more broadly: “Ash holds moisture and can chemically attack steel,” and his advice is to scoop out cold ashes with something like a cut-up plastic milk jug, never removing hot ashes, since embers “can glow far longer than you think.”

    Getting the Ash Out Safely

    Oklahoma Joe’s names a specific tool for this job: its Blacksmith Rake & Brush, described as combining “a scraper blade to clean offset firebox ash beds” with a removable brush head, used to clean out coals and ash from the firebox into a non-combustible garbage bin once everything has cooled. Meathead doesn’t name a specific rake, but his warning on timing lines up with Oklahoma Joe’s cooling instruction: ashes should always go into a metal container, never a combustible one, and hot coals should be left alone rather than scooped while still active.

    When Buildup Turns Into Creosote

    This is where the two sources add different pieces of the picture. Oklahoma Joe’s FAQ page, as fetched, doesn’t use the word “creosote” directly in its maintenance section — its firebox guidance focuses on ash removal, rust prevention, and periodically coating interior surfaces with vegetable oil. Meathead’s AmazingRibs article fills that gap: he describes “scale” as “a buildup of carbon, soot, creosote, combustion by-products, and schmutz,” most often found on the hood and sides of a cooker, and his removal method is to wait until it “starts to crack and curl,” then scrape it off with a plastic putty knife and clear it with a vacuum cleaner fitted with a hose attachment. He also warns that scraped-off scale can come away as “serious black liquid and large chips of carbon flakes,” which is worth expecting before starting rather than discovering partway through.

    The Firebox Isn’t the Only Place Grease Collects

    Meathead’s article makes a point specific to offset smokers that doesn’t come up in general grate-cleaning advice: “Grease can pool in the smoke chamber of an offset smoker,” and his preventive fix is to line the smoke chamber with foil before cooking, which keeps that grease from pooling directly on bare steel in the first place. That’s a chamber-side habit rather than a firebox one, but it’s part of the same maintenance routine on the same style of cooker, and it reduces how much scraping the chamber itself needs later.

    Rust Prevention Is Where the Two Sources Overlap Most

    Both sources treat rust as the real long-term threat to an offset smoker’s steel, and both connect it back to moisture sitting somewhere it shouldn’t. Oklahoma Joe’s recommends periodically coating interior surfaces with vegetable oil to protect against rust, and separately warns never to paint the interior of the unit, reserving high-temperature paint touch-ups for the exterior only. Meathead’s broader cleaning article echoes the same logic from the charcoal-grill side — ash and moisture “chemically attack steel” if left in place — without contradicting anything in Oklahoma Joe’s firebox-specific instructions.

    Building the Firebox Cleaning Routine

    Taken together, the two sources point to a routine built around timing and tools rather than frequency alone: let the fire go out and the unit cool fully before touching the ash, clear it into a metal or non-combustible container using a rake or scraper rather than bare hands, watch for the flaking, dark buildup Meathead calls scale or creosote and scrape it before it drops onto food, and keep the bare steel lightly oiled between cooks so ash and grease left over from a cook don’t sit directly against unprotected metal.

    Keep reading

    Sources

  • Pellet Grill Hopper and Auger Maintenance

    Pellet Grill Hopper and Auger Maintenance

    Every pellet grill runs on the same basic mechanism — an auger feeding wood pellets from a hopper into a firepot — and that mechanism has exactly one enemy: water. This draws on the printed owner’s manual for a Pit Boss PB820D pellet grill and three official support articles from Traeger, covering how each manufacturer describes keeping pellets dry, clearing a jammed auger, and cleaning out the firepot.

    Why Moisture Is the Root Cause of Almost Every Jam

    Pit Boss’s owner’s manual states the mechanism plainly: if a grill is “stored outside during the rainy season or seasons of high humidity, care should be taken to insure that water does not get into the pellet hopper,” because wood pellets “when wet or exposed to high humidity, expand greatly, break apart, and could jam the feed system.” Traeger’s support article on removing and replacing pellets lists the warning signs of pellets that have already absorbed moisture: they’re “dull and have no sheen,” they “easily crumble,” and a bag or hopper may show visible moisture, clumping, or loose sawdust. Both manufacturers point to the same underlying fix — keep pellets dry before they ever reach the auger — rather than treating a jam as a mechanical problem to solve after the fact.

    Storing Pellets Between Cooks

    Pit Boss’s manual tells owners to keep pellet fuel “moisture free,” storing opened bags in an airtight container and emptying the hopper if the grill won’t be used for a longer stretch. Traeger doesn’t put a number on how long “long-term” storage is, but its cleaning guidance treats hopper moisture as an ongoing inspection item, not just a seasonal one: after a damp stretch of weather, Traeger recommends inspecting the hopper for “any signs of moisture or mold buildup” and wiping it clean with a dry cloth. Neither source suggests leaving pellets sitting in the hopper by default; both treat an emptied, dry hopper between uses as the safer default, especially with the grill stored outdoors.

    Clearing a Jammed Auger

    This is where the two manufacturers’ instructions diverge the most, mainly because their hardware differs. Traeger publishes a separate support article for clearing an auger jam on its WiFIRE-enabled grills, which this article could not load to confirm the exact steps — so treat that model line as needing its own manufacturer instructions rather than the process below. For Traeger’s AC-powered grills, the support article describes a manual teardown: emptying the hopper completely, removing screws to access the hopper assembly and auger, then working the auger back and forth by hand, using a shear pin release and, as a last resort, tapping a block of wood against the auger motor with a mallet until the jam breaks free.

    Pit Boss’s manual doesn’t describe an equivalent digital clearing function; its printed instructions focus on prevention and on periodic checks — the manual instructs owners to check the burn grate for obstructions and foreign objects “in the grill and the hopper” after any period of storage or non-use, before firing it up again. Where Traeger gives owners a documented mechanical teardown procedure for a jam that’s already happened, Pit Boss’s manual is built around catching the moisture problem before it becomes a jam in the first place.

    What Creosote Looks Like Before It Becomes a Problem

    Pit Boss’s manual gives an unusually specific warning sign: “DO NOT operate the appliance if the flame becomes dark and sooty or if the burn pot overfills with pellets.” According to the manual, soot or creosote forms “when pellets are burned without the correct amount of air to fuel or incomplete combustion,” producing a tar-like residue, and the fix it specifies is to turn the unit off, let it cool completely, then inspect it before running it again — rather than continuing to cook through a sooty flame.

    Cleaning the Firepot Itself

    Both manufacturers treat the firepot as a component that needs regular attention separate from the rest of the grill. Pit Boss’s manual instructs owners to “always clean or check your burn pot before each use” and, two or three times a year, to remove the cooking grids and flame broiler to clean in and around the burn pot area with a shop-vac, only once the grill is completely cold. Traeger’s cleaning guide is similar in substance but names the tool explicitly: “a dedicated vacuum cleaner is the best way to remove ashes from the firepot,” and Traeger adds a caution Pit Boss’s manual doesn’t spell out in the same words — this “must be done with extreme care to avoid the risk of fire,” and the grill needs to be cold, not just cooled, before starting.

    Where the Two Manufacturers Agree Without Reservation

    Strip away the differences in hardware and wording, and Pit Boss and Traeger are describing the same three-part discipline: keep pellets and the hopper dry, don’t ignore a dark or sooty flame, and vacuum out the firepot on a cold grill rather than scraping or hosing it. Where they part ways is procedural detail — Traeger documents a full manual teardown for AC-powered grills and a separate procedure for its WiFIRE-enabled line, while Pit Boss’s manual leans on prevention and routine checks rather than a published jam-clearing sequence of its own.

    Keep reading

    Sources

  • Grill Baskets, Mats and Skewers: Care and Limits

    Grill Baskets, Mats and Skewers: Care and Limits

    Grilling baskets, mesh mats and skewers all solve the same basic problem — small or delicate food falling through the grates — but they aren’t interchangeable, and each comes with its own care instructions and limits. This rounds up what the accessories actually call for, using Weber’s official care guide for its stainless Grilling Basket, a stated heat rating from mat maker Grillaholics, and skewer guidance published by cast-iron cookware maker Lodge.

    When a Basket Beats the Bare Grates

    Weber’s own instructions for its stainless steel Grilling Basket describe it as suited to “veggies, smaller pieces of meat, and delicate food such as seafood, without worrying it will fall through the cooking grates.” That’s the core case for any grilling basket or mesh mat over bare grates: food that’s cut small, irregularly shaped, or fragile enough to fall apart when flipped with tongs. Weber’s setup instructions call for preheating the grill for 10 to 15 minutes with the basket already in place before food goes in, which lets the metal come up to temperature the same way bare grates would.

    Caring for a Metal Grilling Basket

    Weber’s care instructions are specific: clean the basket after each use, and while it’s labeled dishwasher safe, Weber recommends handwashing with “a mild detergent with a non-abrasive nylon brush or sponge” to extend the product’s life, followed by drying it thoroughly before storing. For food residue that’s built up over time, Weber’s deep-cleaning method is a paste of three parts baking soda to one part water, applied generously and left to sit for a few hours or overnight, then scrubbed with a non-abrasive nylon brush and rinsed. For particularly stubborn residue, Weber suggests pouring vinegar over the baking soda paste just before cleaning and scrubbing once the fizzing reaction settles.

    Weber’s safety notes for this accessory line are also worth carrying over to any metal grilling basket: use heat-resistant grill mitts or gloves rated to EN 407 contact-heat level 2 or higher when handling it hot, and never set it down on a combustible surface, glass, or anything else that heat could damage.

    Non-Stick Mats Have a Stated Ceiling

    A mesh basket and a flat non-stick grill mat solve different problems — the mat is built for food too small or too sauce-heavy to sit directly on grates, like chopped vegetables or marinated shrimp, rather than for holding a basket’s larger cargo. According to Grillaholics, its PTFE-fiberglass coated mats “can withstand temperatures up to 500 degrees Fahrenheit without melting or burning” — about 260°C, a conversion done for this article, not a figure Grillaholics itself publishes in Celsius — and the company markets them as free of PFOA and silicone. That figure matters because it’s a hard ceiling, not a suggestion: running a grill on a high, searing setting can exceed the temperatures a coated mat is rated for, which is a different failure mode than anything Weber’s stainless steel basket has to worry about, since bare metal doesn’t carry a coating that can degrade under heat.

    Neither source in this article gives a single universal number for every mat on the market — Grillaholics’ 500°F (260°C) figure applies to its own product line, and other manufacturers set their own limits for their own coatings. The practical takeaway both sources support is the same: check what a specific mat is rated for before running it at a grill’s highest setting, since a basket’s bare stainless steel and a mat’s non-stick coating don’t share the same heat tolerance.

    Skewers: Metal Doesn’t Need Soaking, Wood Does

    Skewers split into the same two broad categories most grilling accessories do — metal and wood or bamboo — and Lodge’s published tips lay out why the prep differs. Metal skewers are, in Lodge’s words, “durable, reusable, and won’t catch on fire,” but they also heat up and stay hot, and Lodge notes they can get “hot enough to begin cooking food from the inside out,” so cook times may need to be shortened and serving requires care since the skewer itself stays hot after the food comes off the grill. Wood or bamboo skewers carry the opposite risk — they can catch fire — and Lodge’s guidance is to soak them in water for at least 15 minutes before threading food if they’ll be exposed to open flame. Lodge also mentions that alternatives like rosemary stalks or sugarcane need the same soaking treatment if they’ll touch open flame directly.

    Matching the Accessory to the Food

    None of these three sources frames one accessory as categorically better than another — each is suited to a different failure mode. Weber’s basket is built for food that would otherwise fall through the grates and holds up to direct, repeated heat as bare stainless steel. Grillaholics’ mat is for food that needs a barrier against sticking or dripping, within its stated 500°F limit. Lodge’s skewer guidance is less about the metal-versus-wood choice itself and more about matching the prep step — soaking or none — to the material actually being used. Reading the manufacturer’s own limit or instructions before assuming an accessory can handle a grill’s hottest setting is the one point all three sources support without contradiction.

    Keep reading

    Sources

  • Winterizing a Grill: Weber and NC Storage Rules

    Winterizing a Grill: Weber and NC Storage Rules

    Putting a grill away for the season looks like a two-minute job: wipe it down, throw a cover over it, done. According to Weber’s own “Preparing Your Grill For Storage” guide, that shortcut is exactly how a grill ends up housing mice or growing mold over the winter. And covering isn’t the only decision that matters — what happens to the propane tank sitting next to the grill is a separate question with its own rules, covered here using guidance from the North Carolina Department of Agriculture & Consumer Services’ Standards Division, which administers the state law referencing NFPA 58, the LP-Gas Code.

    Why a Dirty Grill Attracts Trouble

    Weber’s storage guide is blunt about the cause: “leftover food and grease” left inside a grill over winter create exactly the conditions wildlife and mold both look for. Mice in particular treat an unused grill as ready-made shelter — the lid works as a roof, and any grease or food scraps left on the grates or in the tray becomes a food source. Weber’s fix is the same for gas, electric, and charcoal models: brush the grates and burners clean, scrape the interior surfaces with a putty knife, and push the loosened debris into the grease tray or ash catcher, then actually empty that tray or catcher rather than leaving it in place over winter.

    Mold Doesn’t Need Freezing Temperatures to Take Hold

    It’s tempting to assume a grill left outside all winter is too cold for anything to grow in it. Weber’s guide complicates that assumption: mold “typically doesn’t grow at temperatures below freezing,” but the milder stretches at the start and end of the cold season — late fall and early spring — sit right in the range mold favors, and it feeds on the same grease and food residue that draws mice. Weber also flags a slower, related problem: grease and food residue trap moisture against metal, and that trapped moisture is what drives corrosion and oxidation over a season of disuse.

    If You’re Already Too Late

    Weber’s advice for a grill already hosting mice or mold by spring is not to panic. For mold, the guide says to scrape it off any surface it has grown on, then run the grill on high for at least 15 minutes before cooking on it again. For wildlife, the instruction is nearly identical: clean out whatever has been left behind, then run the grill on high for that same 15-minute stretch.

    Does the Grill Itself Need to Come Indoors?

    No, according to Weber: “Weber grills don’t need to be brought inside for the winter,” though the guide adds that bringing one in “definitely won’t hurt anything” if space allows. For a grill staying outdoors, Weber recommends a cover mainly to keep the exterior surfaces clean rather than as a mold-prevention measure on its own — the cleaning step above is what actually reduces mold risk. A cover with no way for air to move underneath can just as easily trap the same moisture Weber warns about, so cleaning the grill thoroughly and letting it dry before covering matters more than the cover itself.

    The Propane Tank Is a Separate Rulebook

    Weber’s storage guide contains one firm instruction on this point: “NEVER store a propane tank indoors,” and if the grill has a propane tank, that tank should be left outside even if the grill itself gets moved into a garage or shed. The North Carolina Standards Division’s guidance goes considerably further than that single line, since it’s describing what state law — built on NFPA 58 — actually requires of anyone storing an LP-gas cylinder.

    Per that guidance, a stored tank should be kept outdoors, away from heat sources and out of direct sun where possible, standing upright on its foot ring, and in an out-of-the-way spot where it can’t be knocked over, particularly if children are around. The list of what not to do is just as specific: don’t store a tank indoors, under the house or in a crawl space, laying on its side or upside down, near a flame or ignition source, or beside a gas grill that’s currently in use (a spare tank should be kept away from the grill entirely, not tucked underneath it). Older cylinders with only internal, counter-clockwise threaded valves should have a plug screwed into the valve outlet whenever they’re disconnected — but that plug should never go into an Acme-type valve, which has external threads, because a plug there disables a safety feature rather than adding one.

    Where the Two Sources Line Up, and Where One Goes Further

    Weber and the NC Standards Division agree completely on the rule that matters most: a propane tank never goes indoors, full stop. Where they diverge is depth, not disagreement. Weber’s blog is written for a home cook winterizing a backyard grill and gives that single rule plus a brief note on keeping tanks outside. The Standards Division’s page explains a regulatory standard built on NFPA 58, so it adds detail Weber doesn’t cover, including condition checks worth doing before storage: confirming the valve closes fully, checking that the tank isn’t severely corroded or pitted, and making sure the collar and foot ring are still securely attached. A corroded or pitted tank wall is a weakened wall, and severe corrosion at the collar or foot ring is itself a reason to consider replacing the cylinder.

    Keep reading

    Sources

  • Seasoning a Flat-Top Griddle: Blackstone’s Steps

    Seasoning a Flat-Top Griddle: Blackstone’s Steps

    This guide follows Blackstone’s own “How do I Season my New Griddle?” help-center article and Camp Chef’s “6 Ways to Maintain Your Flat Top Grill” for the actual steps, with Made In Cookware’s carbon-steel-versus-cast-iron comparison covering why a steel griddle isn’t seasoned quite like a cast-iron pan. For the cast-iron side of that comparison in more depth, see this site’s own cast-iron seasoning and cleaning guide rather than repeating it here.

    Cleaning a New Griddle Before the First Seasoning

    Blackstone’s instructions start with a plain wash, not oil: “Gently clean the griddle plate with soap and water to remove dust or debris. Rinse the griddle plate and dry it fully.” Only after the plate is clean and completely dry does the actual seasoning process begin.

    Blackstone’s Seasoning Steps

    With the griddle clean and the propane reconnected, Blackstone’s method is to “heat your griddle on high until the griddle plate starts to discolor” before any oil goes on. Once it has discolored, the instructions call for spreading “a thin layer of oil across the griddle surface (2-3 tablespoons for a 36″ griddle)” using tongs and a paper towel or cotton cloth, covering the walls of the griddle as well as the flat cooking surface. That layer is left to heat until it smokes, which Blackstone says takes “about 15 minutes,” and the layer is done bonding once the smoking stops. Blackstone is specific about what happens if a layer is undercooked or overcooked: stopping too early can leave “rancid oil on the cooktop,” while a layer that “started to turn chalky” has gone past bonding into carbonizing, and needs another coat over it. The full process — oiling, smoking off, repeating — is meant to run three to five times for a new griddle, and Blackstone notes that the edges and corners “do not get as hot” as the middle and may need extra passes before they darken to match the rest of the surface.

    Camp Chef’s Cleaning and Seasoning Routine

    Camp Chef’s flat-top maintenance guide splits the job into daily cleaning and periodic reseasoning, and treats them as two different tasks rather than one combined step. For cleaning after a cook, the instructions are to scrape off food “while the griddle is still warm” using a metal spatula or chain-mail scrubber, then “wash with hot water, mild dish soap… rinse and dry thoroughly,” with an explicit warning: “Never scour or use a dishwasher, as this could chip the nice, seasoned finish you’re going for.” Seasoning, in Camp Chef’s version, is a short top-up rather than Blackstone’s multi-pass process: apply “a thin coat of Cast Iron Conditioner or cooking oil,” spread it with a paper towel, heat the griddle “until the oil starts to smoke,” then turn off the heat and wipe away anything left over.

    Where the Two Manufacturers Line Up

    Blackstone and Camp Chef agree on the core mechanism — a thin oil layer, heated to smoking, repeated as needed — and both warn against harsh detergent or scouring pads that can strip a built-up layer. The difference is mostly in scale: Blackstone’s guidance is written for a brand-new griddle plate that needs several full passes before it’s properly seasoned, while Camp Chef’s version reads more like routine upkeep for a griddle that’s already broken in, where one light coat after cleaning is enough to keep the surface protected.

    Why a Steel Griddle Isn’t Cast Iron

    Made In’s comparison explains the material difference behind these instructions. Cast iron is “made by pouring molten hot iron alloy into a mold and leaving it to cool,” which produces a thick, heavy, heat-retentive slab, while a steel griddle plate — in the same family Made In describes as carbon steel — is “made of a single sheet of metal alloy that’s annealed… to make it both stronger and easier to shape,” resulting in something “about half the weight of cast iron counterparts.” That thinner, lighter construction is also why a flat-top griddle responds to heat changes faster than a cast-iron pan or skillet: Made In notes carbon steel is “prized for its responsiveness to temperature change,” letting a cook turn the heat down the moment something is browning the way it should, where a thick cast-iron surface stays hot and keeps cooking for longer after the burner is adjusted. Made In also points out that cast iron “tends to be a bit more brittle… than carbon steel,” meaning a dropped or thermal-shocked cast-iron piece is more likely to crack.

    What Stays the Same Either Way

    Despite the different weight and heat behavior, Made In is clear that the seasoning logic itself doesn’t change much: “Both cast iron and carbon steel griddles need to be seasoned before use, and must be hand washed and dried thoroughly before putting away,” and neither surface should be used to cook strongly acidic ingredients, which can strip a built-up seasoning layer on either material. In other words, a flat-top griddle needs its own seasoning routine mainly because of its thinner build and faster heat response, not because the underlying idea of bonding oil to the metal is fundamentally different from cast iron.

    Keep reading

    Sources

  • Cast Iron on the Grill: Lodge Use, Seasoning and Cleaning

    Cast Iron on the Grill: Lodge Use, Seasoning and Cleaning

    Lodge, the US cast iron maker, says its cookware can go on any cooktop, in the oven, on a grill or over an open flame. The advice on heat, cleaning and seasoning varies between sources, though. This guide draws on Lodge’s pages on seasoned cast iron care, cleaning, seasoning and the camp Dutch oven, together with Food Network’s guides to skillets on the grill, cleaning and seasoning, and a Weber tip on cast iron steaks. Temperatures are in °F, with °C conversions of our own.

    Using a Skillet on the Grill

    Weber’s advice is short: make sure the grill is hot and give the pan plenty of time to preheat, because it needs to be hot rather than just warm. Food Network agrees, and adds that once cast iron is hot it stays hot, so always treat the handle as hot and use grill gloves or long-handled tools.

    Food Network quotes Lodge’s resident chef, Kris Stubblefield, saying the middle and back of a grill are generally the hottest and the edges weaker, so you can control heat by moving the pan. A second chef quoted there suggests searing over the hot zone, then moving the skillet to a cooler zone. He also says a fatty steak is better done in a skillet because you avoid flare-ups from fat catching fire.

    On what to cook: Lodge says acidic ingredients such as tomato sauce or lemon juice can break down the seasoning on new cast iron. Once the seasoning has built up, it says acidic dishes are fine when the cook time is under 45 minutes.

    Camp Dutch Oven Over Coals

    Lodge’s camp Dutch oven has three legs that hold it above the heat, a flanged lid that holds coals and a bail handle. Light wood 30 to 45 minutes ahead, or briquettes 15 to 20 minutes ahead. Place coals under the oven in a circle, at least half an inch inside its edge, and on the lid in a checkerboard pattern. Do not bunch them, because that creates hot spots that can burn food or damage the oven. Every 10 to 15 minutes, lift and turn the oven a quarter turn, and turn the lid a quarter turn the other way. If you add or remove briquettes, keep the top and bottom proportions the same, and take care not to drop ash into the pot when lifting the lid. Lodge also publishes a downloadable coal chart, which we have not reproduced; our separate Dutch oven coal chart article covers that topic.

    Cleaning: Where the Sources Split

    Lodge’s routine has three steps: wash, dry, rub with oil. Its pages say a small amount of mild soap is fine, because today’s dish soap is no longer strong enough to remove seasoning. Use a stiff brush or scrubbing pad, dry completely, and add a thin layer of oil. For stuck-on food it suggests a nylon brush or a pan scraper. It says never to soak the pan or use a dishwasher, and to keep steel wool for removing rust. For a camp Dutch oven, Lodge says to rub a very light layer of oil on while the pan is still warm, and to wipe until no residue remains. Its camp cooking guide adds that the pan should cool before washing, and that any soap should be biodegradable.

    Food Network disagrees on soap. After testing both approaches, its kitchen team concluded that even a little soap strips cast iron, and recommends hot water and a scrubber, using salt and a dry towel for stuck-on food and boiling a little water if needed. It says to dry the pan thoroughly, even warming it on the stove until the water evaporates, and to wipe it with an oiled paper towel. You will have to choose between them. Both agree on drying thoroughly and finishing with a thin coat of oil.

    Seasoning and Rust

    Lodge describes seasoning as oil baked onto the iron, and says the best way to maintain it is to cook with the pan regularly. New Lodge pieces come pre-seasoned. Its reseasoning steps are to wash and dry the pan, wipe on a very thin layer of oil that will not drip, then bake it upside down at 450 to 500°F (232 to 260°C) for one hour, with foil on a lower rack to catch drips, and let it cool in the oven. Food Network gives a different temperature: 350°F (177°C), also for one hour, upside down with foil below. It prefers the oven to the stovetop, which it says makes hot and cool spots. Both warn that too much oil leaves a sticky pan.

    For rust, Lodge says to scour it off, wash, dry and oil, and to reseason if a lot of seasoning was removed. On flaking, Lodge says the black flakes are carbonized bits of oil that are not harmful to you or the cookware. It suggests scrubbing with a nylon brush or salt, drying, oiling, and reseasoning if the problem persists. Lodge says to store a camp Dutch oven with the lid ajar to keep moisture out.

    Limits

    These sources cover the pan, not the fire; use our lighting and flare-up guides for that. This article makes no health claims beyond Lodge’s statement that seasoning flakes are not harmful.

    Keep reading

    Sources

  • How to Clean a Grill Safely: Brushes, Bristles and Grease

    How to Clean a Grill Safely: Brushes, Bristles and Grease

    Cleaning a grill is a fire-prevention job and, since 2026, a recall-checking job too. This guide draws on the CDC’s MMWR report on wire-bristle injuries, the US Consumer Product Safety Commission’s (CPSC) 2026 recall notices and grilling tip sheet, NFPA’s grilling safety page, and owner’s guides from Weber and Char-Broil.

    What the CDC documented

    The CDC’s 2012 report described six patients at one Rhode Island hospital system between March 2011 and June 2012, aged 31 to 64, who each swallowed a wire bristle from a grill-cleaning brush. It followed an earlier series of six cases at the same hospitals. The injuries ranged from punctures in the neck to perforation of the gastrointestinal tract, and two patients needed emergency abdominal surgery. All six recovered. The CDC advised examining the grill surface before cooking and considering alternative cleaning methods or products, and it asked that cases be reported to the CPSC at saferproducts.gov.

    Where the guidance stands in 2026

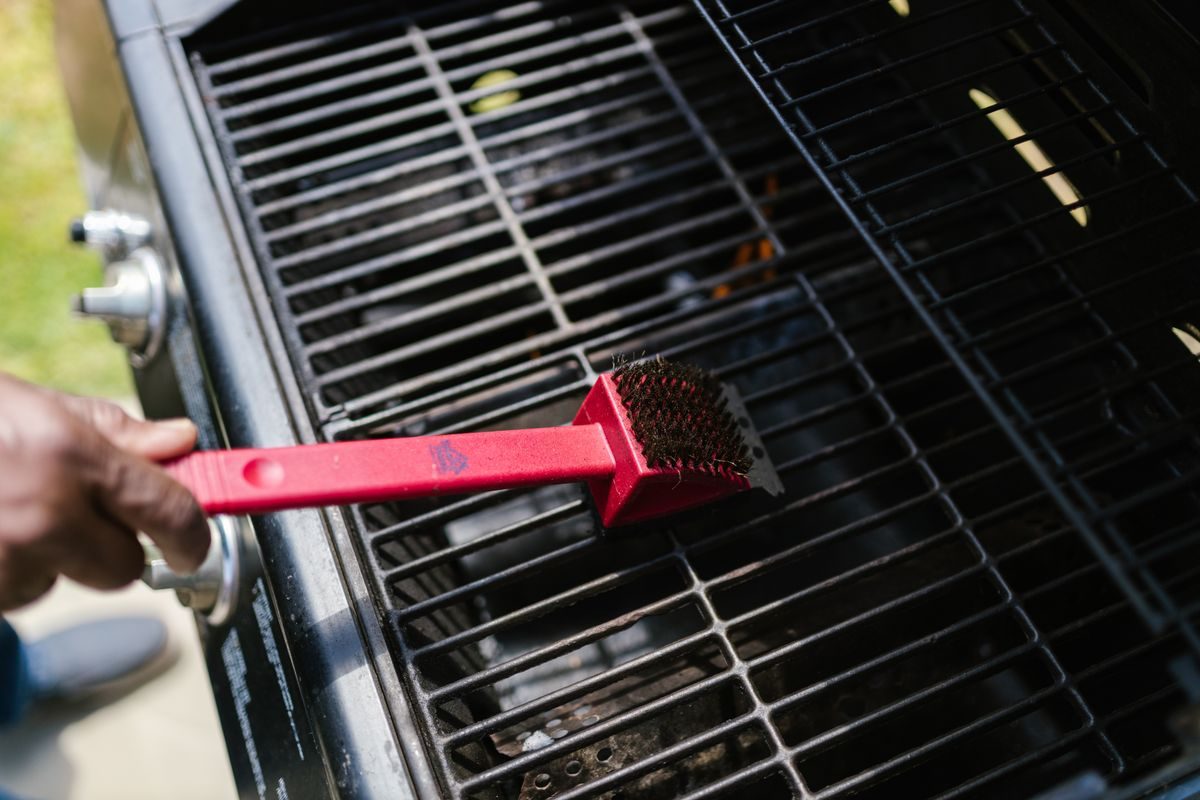
    The CPSC has since moved from the CDC’s cautious suggestion to consider alternatives to a firm stop-using message. It recalled about 3.2 million Weber wire brushes on February 26, 2026, citing at least 38 reports of detached bristles, four of them swallowed and treated. About 10.2 million Nexgrill brushes followed on March 26, and Conair’s Cuisinart recall reached 3,625,800 brushes after an August 27 expansion. The CPSC’s acting chairman urged consumers to stop using and discard metal-bristle brushes, switch to non-wire alternatives, and, before grilling, inspect the grill surface and examine food closely. Its grilling tip sheet suggests a ball of aluminum foil or a nylon brush.

    Where sources differ

    Weber owner’s guides from 2016 to 2020 (the charcoal, kettle and Summit models we read) still tell owners to check a stainless bristle brush for loose bristles and replace it every spring. They predate the recall, so treat that advice as superseded and check cpsc.gov for your brush. Weber’s replacement, a nylon brush, is listed for use only on fully cool grates. Weber’s UK page suggests brushing residue off while the grate is still hot after a burn-off. Char-Broil’s guide says cleaning cooking surfaces while the grill is hot is not recommended, and asks you to make sure no loose bristles remain if you do use a bristle brush. A cool-only nylon brush fits the Char-Broil approach, not the hot-brush one.

    Grease management, per the manuals

    NFPA says the grill had not been cleaned in roughly one-fifth of grill fires (2020–2024 averages) and advises removing grease or fat from the grill and the trays below it. Weber’s Summit 670 guide asks you to check the slide-out grease tray and catch pan before every use, remove excess grease with a plastic spatula or scraper, and wash them in soapy water. It warns that the catch pan and its hot grease need care when you remove them.

    • Foil: Weber’s US and international guides both say not to line the slide-out grease tray with foil; the US guide says foil can stop grease reaching the catch pan. The international guide does allow a disposable drip pan or foil in the catch pan.
    • Lid flakes: Weber says carbonised grease inside the lid flakes off looking like paint, and suggests wiping the lid with a paper towel while it is warm. Char-Broil says brown or black buildup inside a gas grill is not paint, and suggests detergent solution or a grill cleaner with a scrub brush.
    • Burners: Weber’s gas guides say not to enlarge burner ports or valve orifices when cleaning.

    Safe order of work for a gas grill

    Weber’s Summit guide says to turn the grill off and let it cool before cleaning. Its deep-cleaning article adds turning the grill off and disconnecting the propane tank first. Inspect the hose as you go: Weber says a nicked, cracked, abraded or cut hose means the grill should not be used until the hose is replaced with an authorised part.

    When to stop and hand off

    • Any loose bristle on the grate or brush: discard the brush and use a non-wire tool. Weber’s guide says to replace a brush if loose bristles are found.
    • A bristle in food, or swallowed: the CDC’s cases involved severe pain on swallowing or severe abdominal pain after grilled meat. The report is written for clinicians, so contact a health professional if you are worried, and report the incident at saferproducts.gov.
    • Damaged hoses, gas fittings, igniters or burner parts: Weber’s guide says not to repair gas-carrying or gas-burning components without contacting the manufacturer.

    Keep reading

    Sources

  • Food Thermometers for Grilling and Smoking: Choose and Use

    Food Thermometers for Grilling and Smoking: Choose and Use

    Grilling and smoking both make it easy to judge food by eye, and both make that a risky habit. The USDA’s Food Safety and Inspection Service (FSIS) says a food thermometer is the only reliable way to know meat, poultry, seafood or egg dishes have reached a safe internal temperature. This guide covers the main thermometer styles, where to put the probe, how to check the thermometer itself, and the official numbers to aim for, in both °F and °C.

    Why Colour and Clock Don’t Settle It

    FSIS says colour changes and firmness are often used to judge whether food is cooked, but neither tells you it is safe. In a USDA study, 21% of participants relied on visual cues such as colour and grill marks to judge their hamburger patties, and FSIS notes that ground beef can turn brown on the outside before it reaches a temperature that destroys harmful bacteria. A hamburger cooked to 160°F (71°C), measured with a food thermometer, is safe regardless of colour.

    Time is no better a guide. FSIS points out that the size, quantity and distribution of food on the grill mean individual pieces reach a safe temperature at different times, so every piece needs checking and a large or irregular cut such as a roast should be probed in several places.

    Instant-Read, Leave-In and Wireless

    Instant-read

    These are for a quick check near the end of cooking, then come out. FSIS lists digital thermistor models at roughly 10 seconds per reading and thermocouple models at 2 to 5 seconds, both usable on thin and thick food. Dial instant-read models take 15 to 20 seconds and are not suitable for thin foods unless inserted sideways.

    Leave-in probe

    A leave-in (or alarm) thermometer keeps its probe in the food on a cable that can be shut in the oven or smoker, and sounds an alert at a temperature you set. ThermoWorks, a thermometer manufacturer, describes the difference as follows: an instant-read lets you check several spots in quick succession, while a leave-in tracks one fixed spot over time, like having both an odometer and a speedometer. FSIS also lists oven-safe dial thermometers as designed to stay in food, but warns that heat conducted along the metal stem can read falsely high.

    Wireless and smart

    FSIS describes these as probes that stay in the food and send the temperature to a base unit or a phone over Bluetooth or Wi-Fi so you can watch progress without opening the lid. It lists them as usable in ovens, grills and slow cookers and notes they cost more. In America’s Test Kitchen’s testing of remote probe thermometers, the testers reported that real-world signal range differed from advertised specifications, that some Bluetooth models lost their connection at as little as 10 feet, and that dense objects can block the signal.

    One safety point applies to all styles. FSIS advises against leaving a food thermometer in food while cooking unless the manufacturer’s instructions say it is built to withstand the heat, and warns that some models have plastic faces that can melt if placed too close to heat.

    Where to Put the Probe

    • Most cuts: the thickest part of the food, away from bone, fat or gristle.
    • Whole poultry: check three places, the innermost part of the thigh, the innermost part of the wing and the thickest part of the breast, avoiding bone.
    • Thin foods (patties, sausages, thin chops): insert from the side so the whole sensing area reaches the centre.

    Read the manufacturer’s instructions for insertion depth. If there are none, FSIS says to look for a dimple on the stem marking one end of the sensor, and notes that dial thermometers generally need 2 to 3 inches (5 to 7.5 cm) in the food. At the grill, FSIS suggests lifting thin food onto a clean spatula or plate before probing it sideways.

    Safe Minimum Temperatures

    These are the FSIS minimums for common barbecue foods:

    • Beef, pork, veal and lamb steaks, chops and roasts: 145°F (63°C), then rest at least 3 minutes.
    • Ground meats: 160°F (71°C).
    • All poultry, including whole birds, breasts, thighs, wings and ground poultry: 165°F (74°C).
    • Fish and shellfish: 145°F (63°C).

    The UK Food Standards Agency expresses the target differently: the middle of the food should reach 70°C (158°F) for 2 minutes, with equivalent time and temperature pairs including 75°C (167°F) for 30 seconds, and it says you need a clean food thermometer to measure this accurately. FSIS adds that cooks may choose higher temperatures for personal preference.

    Checking Your Thermometer’s Accuracy

    FSIS says most food thermometers read within 2 to 4°F, but only if placed correctly. Its recommended check for most thermometers is an ice-water test:

    1. Fill a large glass with ice cubes, add drinking water and stir well.
    2. Immerse the stem at least 2 inches (5 cm), touching neither the sides nor the bottom.
    3. Wait at least 30 seconds and read it without lifting the stem out. It should show 32°F (0°C).
    4. If not, adjust as the manufacturer directs; some have a calibration nut or dial. Some models, such as thermometer forks, cannot be calibrated.

    ThermoWorks gives a more careful version: fill the vessel to the top with ice (crushed is preferred), add water to about half an inch below the top of the ice, then stir the probe in the middle of the slurry away from the sides and bottom. It warns that a simple cup of ice water can read a dozen or more degrees too warm. FSIS also describes a boiling-water check, which should read 212°F (100°C) at sea level.

    Keeping It Clean

    FSIS says to wash the thermometer in hot, soapy water before and after each use, by hand, since most models should not be submerged. The FSA likewise says to clean the probe fully after each use to prevent cross-contamination.

    Keep reading

    Sources